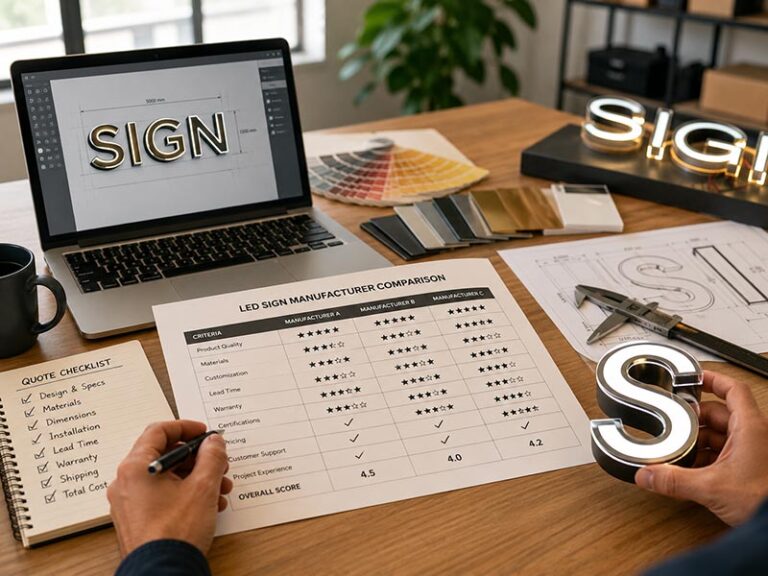
A poor-quality custom LED sign rarely looks terrible in the first design mockup. On screen, the logo may look clean, the colors may look close, and the price may look attractive. The real problems usually appear later: the acrylic surface arrives scratched, the LEDs show dark spots, the power supply overheats, the cable exits from the wrong side, or the sign cannot be mounted neatly on the wall. By that time, the store opening date, installer schedule, and replacement cost are already involved.
To avoid poor-quality custom LED signs, check the sign before production and before shipment. Confirm the material, LED layout, power supply, wiring route, mounting method, waterproof level, QC photos, lighting test video, accessory kit, packaging method, and warranty terms. A low price is only useful when the finished sign arrives clean, bright, safe, and ready to install.
This matters even more when you order from overseas. A restaurant logo sign, salon wall sign, bar neon sign, retail storefront sign, or chain-store signage project is not just a decorative product. It has to match the brand, survive transport, fit the wall, connect safely, and look right after installation. One small missing detail can turn into a very real problem on site. The good news is simple: most LED sign quality problems can be spotted early if you know where to look.
What Are the Signs of Poor Quality?
Poor-quality LED signs usually reveal themselves through small, visible problems before they become serious failures. Look for uneven brightness, dark corners, flickering, rough acrylic edges, dirty glue marks, loose wiring, weak mounting points, hot power supplies, wrong cable exits, and poor packing marks. These signs often show up in pre-shipment photos or test videos if you know what to check.
A poor-quality custom LED sign does not always look “bad” at first glance. In many cases, the front-view photo looks acceptable because the supplier chooses the best angle, turns on bright workshop lights, or takes the photo before the sign has been tested long enough. The real clues are usually in the details: the side edge, the back wiring, the letter corners, the cable exit, the mounting holes, and the way the sign behaves after staying on for a period of time.
Before a custom LED sign is shipped, the question is not only, “Does it look like my logo?” A better question is, “Can this sign survive installation, daily use, and transport without creating extra work?” A sign that looks fine in a short photo may still create problems if the LED spacing is wrong, the acrylic is too thin, the power supply is undersized, or the cable exits from the wrong side.
For storefronts, restaurants, bars, salons, gyms, and retail stores, these problems are not small. If the sign flickers after installation, the store may need a local electrician. If the acrylic face arrives scratched, the sign may look cheap even if it still lights up. If the mounting holes are weak or missing, the installer may need to drill new holes on site. If the wiring is messy, the final wall display may look unprofessional.
A good quality check should focus on visible, practical warning signs.
| Quality Warning Sign | What It Looks Like | Possible Cause | What to Ask For |
|---|---|---|---|
| Dark spots | Some areas look dimmer than others | LED spacing too wide or poor layout | Lit-up close-up photos |
| Flickering | Light shakes or turns unstable | Weak wiring or mismatched power supply | 10–30 second test video |
| Rough edges | Acrylic edge looks uneven or scratched | Poor cutting or no polishing | Side-view photos |
| Dirty glue marks | Visible adhesive around letters or tube | Rushed assembly | Close-up photos of corners |
| Loose wiring | Wires hang loosely on the back | Weak cable fixing | Back-view photo |
| Hot adapter | Power supply becomes too warm | Low-grade or undersized adapter | Power supply specification |
| Wrong cable exit | Wire comes out from a visible side | Drawing details not confirmed | Marked cable exit drawing |
| Weak mounting holes | Holes are too close to edge or missing | Poor installation planning | Back-view and mounting photo |
Uneven Brightness
Uneven brightness is one of the clearest signs of poor LED sign quality. In a good sign, the light should look smooth across the full logo, letter, or neon shape. In a weak sign, you may see:
- dark areas in corners;
- bright patches in the middle;
- weak ends on neon strokes;
- visible LED dots inside silicone tubing;
- one letter looking brighter than another;
- color differences between separate sign sections.
For LED neon signs, uneven brightness often appears around tight curves, small letters, and narrow strokes. If the LED strip is not placed correctly inside the silicone tube, the sign may look bright in the middle but weak at the ends. For channel letters, dark spots often happen when LED modules are placed too far apart or the letter depth is not matched with the LED layout.
A simple check:
| Area to Check First | Why It Matters |
|---|---|
| Small letters | Poor LED layout shows quickly in narrow strokes |
| Logo corners | Tight curves often reveal weak light diffusion |
| Long straight lines | LED spacing problems become visible |
| Letter ends | Weak endings often mean poor strip placement |
Ask for a lit-up video in normal indoor lighting, not only a front photo taken under strong workshop lights. A 10–30 second video is better than one polished image because flicker, weak sections, and color shifts are easier to see when the sign is actually running.
Flickering
Flickering is not a small visual issue. It usually means something in the electrical system needs attention. The cause may be:
- loose wiring;
- poor soldering;
- weak connectors;
- incorrect voltage;
- overloaded power supply;
- low-quality controller;
- poor wire contact after movement.
For a commercial space, flickering creates a poor first impression. A restaurant sign that flickers near the entrance, a salon logo wall that blinks during photos, or a bar neon sign that fails during evening use can make the space feel unfinished. It may also lead to extra repair costs after installation.
Before shipment, ask the factory to test the finished sign with the actual power supply included in your order. Do not only accept a photo showing the sign turned on for one second.
A better test video should show:
- the full sign turned on continuously;
- close-up view of small letters or curves;
- the real power supply connected;
- RGB or dimming function if included;
- no flashing, buzzing, or delayed startup.
If the sign includes RGB lighting, ask to see several colors, not only one color. Some weak controllers work in one mode but fail when changing colors or brightness levels.
Rough Edges
Rough edges are easy to miss in front-view photos, but they strongly affect the final look. Acrylic logo signs, channel letters, light boxes, and backing boards all need clean edge finishing. Poor cutting can leave:
- rough marks;
- sharp corners;
- burn marks;
- uneven curves;
- small chips near screw holes;
- unpolished acrylic sides;
- letter strokes that do not match the logo file.
This matters because custom LED signs are usually viewed at close or medium distance. A reception wall logo, salon sign, café sign, or indoor brand display often sits at eye level. People may stand close to it, take photos near it, or touch the surrounding wall. Rough edges make the sign feel cheaper than the design promised.
Ask for side-view photos and close-up photos of curves, corners, and small letter strokes. These areas reveal whether the sign was cut and finished carefully.
| Photo Angle | What It Reveals |
|---|---|
| Front close-up | Logo shape, surface scratches, glue marks |
| Side view | Acrylic thickness, edge finish, cutting quality |
| Back view | Wiring, mounting holes, backing strength |
| Corner close-up | Chipping, rough cutting, weak finishing |
For acrylic signs, also check whether the protective film is still on before packing. If the film has already been removed too early, the surface may collect scratches during final handling.
Dirty Glue Marks
Dirty glue marks are common in rushed production. They may appear around silicone neon tubes, acrylic letters, metal seams, or backing boards. In photos, they often look like:
- cloudy stains;
- uneven adhesive lines;
- yellowish marks;
- glue overflow near corners;
- dirty patches around small strokes;
- rough bonding areas on the back.
The problem is not only appearance. Excess glue can show poor assembly control. Too little glue may create weak bonding. Uneven glue may collect dust or become more visible after lighting. On bright white acrylic or light-colored silicone tubes, even small glue marks can stand out.
Ask for close-up photos of the most detailed parts of the sign:
- logo curves;
- letter connections;
- tube turns;
- small strokes;
- edges around cut acrylic;
- back connections near wires.
Do not accept only a far-away front photo. From a distance, glue marks may disappear. After installation, especially under lighting or camera flash, they can become much more obvious.
Loose Wiring
Loose wiring on the back of a sign is a warning sign. It may not affect the first photo, but it can create installation and long-term use problems. Wires should be fixed cleanly, routed logically, and protected from pulling, bending, and pressure.
Common wiring risks include:
- wire exits from the wrong side;
- wires hanging loosely on the back;
- connectors exposed without protection;
- cable too short for the installation site;
- cable exit not sealed for outdoor signs;
- several parts using confusing separate wires.
A common issue is that the wire exits from the wrong side. For example, the installer may expect the cable to exit from the center back so it can be hidden behind the wall, but the finished sign has the cable coming out from the bottom or side. This can leave visible wires after installation or require extra drilling.
Before shipment, ask for:
| Check Item | What to Confirm |
|---|---|
| Back-view photo | Wires are fixed and organized |
| Cable exit photo | Wire exits from the agreed position |
| Connector photo | Connections are protected |
| Wire length note | Cable is long enough for installation |
| Outdoor sealing photo | Cable exit is sealed if used outside |
Good wiring does not need to look complicated. It should look controlled. If the back of the sign looks messy before packing, the installation site will probably become messy too.
Weak Mounting
Weak mounting details often become a problem only when the installer opens the package. The sign may look good, but the mounting holes are missing, too small, too close to the edge, or not aligned with the installation plan. For larger signs, the backing board may also be too thin or flexible.
This is especially important for:
- storefront signs;
- channel letters;
- logo walls;
- signs installed on uneven surfaces;
- large acrylic backing signs;
- halo-lit signs mounted away from the wall.
A small indoor neon sign may only need simple hanging hardware, but a larger commercial sign may need spacers, pre-drilled holes, mounting templates, or stronger backing.
Ask for photos showing the mounting holes, spacers, brackets, or hanging accessories. If the sign is large, ask how the weight is supported. If the sign needs to sit away from the wall, confirm the spacer length. If the cable needs to be hidden, confirm the mounting and cable exit together.
| Mounting Problem | Possible Result |
|---|---|
| Missing holes | Installer must drill on site |
| Holes too close to edge | Acrylic may crack |
| Weak backing | Sign may bend or feel unstable |
| Wrong spacer length | Final wall distance looks wrong |
| Cable exit not aligned | Visible wire after installation |
A sign should not force the installer to “figure it out” on site. Poor mounting planning is one of the easiest problems to avoid before production.
Hot Power Supply
A power supply that becomes too hot is a serious quality warning. Some warmth is normal during use, but overheating can point to a mismatched or low-grade adapter. If the power supply is too weak for the sign, the LEDs may flicker, dim, or fail earlier than expected.
For custom LED signs, the power supply should match:
- sign size;
- LED load;
- voltage;
- sign structure;
- destination market plug type;
- indoor or outdoor use;
- RGB or dimming control if included.
A small indoor sign and a large outdoor sign should not be treated the same. RGB signs and dimmable signs may also need compatible controllers and power capacity.
Ask the factory to confirm:
| Power Detail | Why It Matters |
|---|---|
| Voltage | Prevents mismatch and flickering |
| Wattage | Shows whether the adapter has enough capacity |
| Plug type | Avoids local replacement before installation |
| Quantity | Large signs may need more than one power supply |
| Test confirmation | Proves the adapter was tested with the finished sign |
This is one place where a low quote can hide risk. Saving a small amount on the adapter can create flickering, heat, failure, and local replacement costs later.
Poor Packing Marks
Poor packing signs can often be seen before the box is closed. If the sign surface touches the power supply, screws, metal accessories, or rough carton material, scratches may happen during shipping. If the sign moves inside the box, acrylic edges or silicone tubes may be damaged.
Ask for packing photos showing:
- surface protection;
- foam support;
- accessory separation;
- carton strength;
- power supply placement;
- cable protection;
- corner protection.
For acrylic signs, check whether the front surface is protected by film or soft material. For LED neon signs, check whether the silicone tube is protected from pressure and sharp parts. For channel letters or metal signs, check whether painted surfaces are separated from hard accessories.
A well-made sign can still become a poor-quality order if it arrives scratched, cracked, or bent. Packing is not an afterthought. For overseas shipping, it is part of the product quality.
Which Materials Should You Check First?
Check the main materials before approving production: acrylic, silicone tube, metal parts, backing board, LED components, and surface finish. Good materials help the sign keep its shape, brightness, color, and installation strength. Poor materials may crack, yellow, bend, rust, fade, or make the finished sign look less premium than the approved design.
Material quality affects both appearance and lifespan. Many custom LED sign problems start with material substitution. The quote may say acrylic, silicone, stainless steel, or aluminum, but the real question is: what thickness, what finish, what structure, and what use environment? A thin acrylic backboard may be acceptable for a small indoor sign, but not for a large sign that needs strong support. A silicone tube may look fine from far away, but poor diffusion can create visible LED dots when lit.
A good factory should help match material to the actual project. A neon wall sign for a photo zone, a front-lit channel letter sign for a storefront, and an acrylic LED logo sign for a reception area do not need the same structure. Each has different requirements for weight, brightness, surface finish, mounting, and transport protection.
Material checking also protects the final brand look. A rough logo edge, cloudy acrylic, weak paint finish, or bent backboard makes the sign feel low-grade even if the LEDs work. For chain stores or repeat orders, material consistency is even more important. If each batch uses slightly different acrylic, LED color, or surface finish, the brand look becomes inconsistent across locations.
| Material Area | What to Check | Poor-Quality Risk |
|---|---|---|
| Acrylic | Thickness, clarity, edge finish, surface protection | Cracks, scratches, cloudy look |
| Silicone Tube | Smooth diffusion, bend quality, color consistency | LED dots, weak curves, uneven glow |
| Metal Parts | Paint, welding, rust protection, shape accuracy | Rust, warped letters, rough finish |
| Backing Board | Strength, weight, thickness, mounting support | Bending, cracking, hard installation |
Acrylic Quality
Acrylic is common in LED logo signs, backing boards, light boxes, and face panels. Good acrylic should look clear, smooth, and stable, with clean edges and protective film before packing.
Check these details:
- Is the acrylic surface clean and protected?
- Are the edges smooth, not chipped?
- Does the thickness match the sign size?
- Are screw holes too close to the edge?
- Does the acrylic look cloudy or scratched?
- Is the logo shape clean around curves and small strokes?
Poor acrylic may scratch easily, look cloudy, crack near mounting holes, or show rough cutting marks. Thickness also matters. A thin panel may reduce cost, but it can bend during installation or shipping.
Before production, confirm the acrylic color, thickness, finish, and whether the surface will be protected during packing. For brand logos, even a small scratch can make the finished sign look careless.
Silicone Tube
For LED neon signs, silicone tube quality directly affects the look of the light. Good silicone should spread light smoothly, bend cleanly around curves, and keep the color consistent across the design.
Look closely at:
| Check Point | What It Means |
|---|---|
| Tube surface | Should look clean, not dirty or rough |
| Curves | Should bend smoothly without distortion |
| Light diffusion | Should not show obvious LED dots |
| Ends and joints | Should not look weak or messy |
| Color consistency | Same color should stay even across the sign |
Poor silicone may show visible LED dots, uneven brightness, rough bending, or dirty surface marks. This is especially important for bar signs, café signs, event signs, and photo-wall signs, where people often view the sign up close.
Ask for close-up lit photos of curves, corners, and small details. A clean front photo from far away is not enough to judge silicone quality.
Metal Parts
Metal is often used in channel letters, halo-lit letters, back-lit signs, and outdoor commercial signs. The quality depends on the metal type, thickness, welding, painting, and rust protection.
Check for:
- smooth letter returns;
- clean paint finish;
- no rust marks;
- no sharp exposed edges;
- even welding or bonding;
- stable letter shape;
- no dents before packing.
Stainless steel and aluminum can both work well when processed correctly, but poor finishing can leave sharp edges, uneven paint, visible welding marks, or weak joints. For outdoor use, rust risk is a serious issue.
A low-cost metal sign may look acceptable at shipment but start showing corrosion after exposure to rain and sunlight. Confirm whether the metal is suitable for indoor or outdoor use.
Backing Board
The backing board supports the whole sign, so it should not be treated as a minor detail. Acrylic, PVC, aluminum composite panel, and metal backing can all be used depending on the project.
Before approving production, check:
| Backing Detail | Why It Matters |
|---|---|
| Thickness | Affects strength and bending risk |
| Material | Affects weight, cost, and outdoor use |
| Mounting holes | Must match installation method |
| Cable exit | Should match the wall plan |
| Edge finish | Affects final appearance |
| Support strength | Important for large signs |
The right choice depends on sign size, weight, mounting method, and installation surface. A weak backboard can bend, crack, or fail to hold screws properly.
For larger signs, the back structure should be reviewed with the installation plan. If the sign needs wall spacers, hanging hardware, or pre-drilled holes, these details should be confirmed before production starts.
How Do LED and Power Details Affect Quality?

LED and power problems usually appear before full failure. Watch for flickering, weak corners, visible LED dots, color drift, uneven brightness, buzzing adapters, hot power supplies, unstable RGB controls, loose connectors, and messy cable exits. These are not small details. They often show whether the sign was only made to light up for a photo, or built to work reliably after installation.
A custom LED sign can look fine in one front photo and still have poor electrical quality. That is why you should not only ask, “Does it turn on?” A better question is, “Does it turn on evenly, stay stable, use the right power supply, and connect cleanly on site?”
Many poor-quality signs pass the simplest test: they light up for a few seconds. But real problems appear when the sign stays on longer, changes colors, dims, or runs through a controller. A weak power supply may not fail immediately. It may become hot after 10–20 minutes. Loose wiring may not show in a still image, but it may cause flickering when the sign is moved or mounted. Poor LED spacing may look acceptable in a bright workshop, but dark spots become obvious on a dim restaurant wall or storefront at night.
This is why pre-shipment videos matter. A short video can reveal flicker, unstable RGB control, dim sections, color mismatch, or delayed startup. Back-view photos also matter because they show cable routing, wire fixing, connectors, and where the power cable exits. For many projects, the front of the sign is the easiest part to photograph. The back is where quality problems often hide.
| LED or Power Warning Sign | What You May See | Possible Cause | What to Ask Before Shipping |
|---|---|---|---|
| Flickering | Light shakes or blinks | Loose wire, weak adapter, wrong voltage | Continuous test video |
| Dark sections | Part of the sign looks dim | Poor LED spacing or damaged LED strip | Close-up lit photo |
| Visible LED dots | Light is not smooth | Low LED density or poor diffusion | Lit close-up of curves |
| Color mismatch | White or color looks different across letters | Mixed LEDs or poor color control | Full-sign lit photo |
| Hot power supply | Adapter becomes too warm | Undersized or low-grade power supply | Voltage and wattage details |
| RGB failure | Some modes do not work | Wrong controller or poor connection | RGB function video |
| Wrong cable exit | Wire appears on visible side | Drawing detail missed | Marked cable exit confirmation |
| Messy wiring | Loose wires on the back | Rushed assembly | Back-view photo |
LED Layout
LED layout decides whether the finished sign looks smooth or patchy. A poor layout often creates dark spots, bright dots, shadowed corners, or weak strokes. This is common in small letters, tight logo curves, thin neon lines, and deep channel letters.
Check the difficult areas first:
- small letters;
- narrow strokes;
- long straight neon lines;
- inner logo curves;
- channel letter corners;
- letter ends;
- tight turns in silicone neon.
For LED neon signs, check whether the light is even along curves and ends. If the silicone tube shows bright points, the LED strip may be too sparse or poorly positioned. For channel letters, the distance between LED modules should match the letter depth and face material. If modules are placed too far apart, dark areas may appear between them.
Ask for close-up lit photos of the smallest letters, corners, and narrow strokes. These areas reveal the layout better than the large center sections. If the difficult parts light evenly, the sign is usually better controlled.
Brightness Balance
Brightness balance is different from “the sign is bright.” A sign can be bright but still look poor if one letter is stronger than another, if the logo center is too intense, or if the corners look weak.
In real spaces, uneven brightness becomes visible quickly:
| Use Scene | Why Brightness Balance Matters |
|---|---|
| Salon logo wall | Photos show dark sections clearly |
| Restaurant reception sign | Uneven light makes the brand wall look cheap |
| Retail display | Bright spots distract from the product area |
| Storefront sign | Weak sections make the sign look old |
| Bar neon sign | Uneven color affects atmosphere |
Ask for one full front-view lit photo and one video in normal lighting. If possible, ask the factory not to shoot only under strong workshop lights. Strong light can hide dim areas.
A better check is a short video showing the sign from front and slight side angles. Dark spots, glare, and uneven brightness are easier to notice when the camera moves.
Power Supply
The power supply should match the sign size, LED load, voltage, and destination plug type. A poor power supply may work during a short test but become unstable after longer use. Warning signs include flickering, delayed startup, buzzing, dimming, and overheating.
For a commercial sign, the adapter is not a small accessory. A restaurant, bar, gym, salon, or store may run the sign for several hours every day. If the adapter is undersized, it can become hot and shorten the life of the LEDs. If the plug type is wrong, the installer or store owner may need a local replacement before installation.
Ask for the power supply specification before shipment:
- voltage;
- output current;
- wattage;
- plug type;
- quantity;
- indoor or outdoor use;
- matching confirmation with the actual sign.
Also ask whether the sign was tested with the same power supply that will be packed in the box. A test with a workshop power source does not prove the final adapter is correct.
Voltage Match
Voltage mismatch is a common hidden risk. Many LED signs use 12V or 24V systems, but the correct choice depends on the sign structure, LED type, and size. If the voltage or power load is not matched correctly, the sign may flicker, dim, heat up, or fail early.
This is especially important for:
- larger signs;
- long LED neon signs;
- RGB signs;
- signs with several separated sections;
- signs installed far from the power source;
- signs that run for many hours per day.
If the power is not distributed properly, one part may look weaker than another. Long cable runs can also affect performance if not planned correctly.
Before shipping, confirm that the sign, power supply, controller, and plug are tested as one complete set. Do not check them as separate parts. A controller may be compatible on paper, but the real test is whether it works smoothly with the finished sign.
Cable Exit
Cable exit position is one of the most practical details to check before shipment. A sign can be well made but still difficult to install if the wire comes out from the wrong place. For a logo wall, visible wiring can ruin the clean look. For a storefront sign, the wrong cable exit can force extra drilling or exposed cable routing.
Before production, confirm:
| Cable Detail | What to Decide |
|---|---|
| Exit position | Back, side, bottom, or custom location |
| Cable length | Enough for the installation site |
| Hidden wiring | Whether the cable needs to pass through the wall |
| Multiple sections | Separate wires or combined wiring |
| Outdoor use | Whether the cable exit needs sealing |
Ask for a marked drawing before production and a back-view photo before shipment. The drawing should show where the cable exits, how long the cable is, and whether it needs to be hidden behind the wall.
If the sign has multiple parts, also confirm whether each part has a separate wire or whether the wiring is combined. This affects installation time and final appearance.
Wiring Fixing
Loose wiring is a warning sign. On the back of the sign, wires should be fixed cleanly and protected from pulling, rubbing, or pressure. If the wires hang loosely, they may move during shipping, break during installation, or create a messy back view.
Look for:
- fixed cable route;
- protected connection points;
- no wires crossing sharp edges;
- no loose connectors;
- no wire tension near the exit point;
- no messy back structure;
- clean separation between power and mounting parts.
For indoor signs, clean wiring helps with installation and appearance. For outdoor signs, wiring fixing also affects waterproofing and safety. Cable exits, connectors, and joints should not be left exposed or under tension.
Ask for back-view photos that clearly show the wiring route. If the back looks chaotic before packing, it usually becomes more difficult on site.
RGB Control
RGB and dimmable signs need more checking than single-color signs. A single front photo cannot prove that the controller, remote, app control, dimmer, and color modes are working correctly.
Ask for a short video showing the actual finished sign changing colors. The video should include:
- red, green, blue, and white if available;
- brightness change;
- remote response;
- app control if included;
- at least one dynamic mode;
- all sections changing at the same time.
Check whether all parts change color together. If one section is delayed, stuck, or slightly different in color, the wiring or controller setup may need correction.
Also confirm that the remote, controller, power supply, and instructions are packed together. A missing remote or wrong controller can turn a good-looking RGB sign into an installation problem.
Heat Check
Heat is one of the easiest early warning signs to overlook. LEDs and adapters may produce some warmth, but they should not become unusually hot during normal use. Excess heat can point to undersized power, poor LED quality, weak wiring, or poor ventilation.
Ask whether the sign has been tested for a longer period, especially for:
- large signs;
- outdoor signs;
- RGB signs;
- signs with dense LEDs;
- signs used in bars or restaurants;
- signs that will run several hours per day.
You can also ask the factory to check the adapter and wiring after testing. The point is not to create a complicated lab report. The point is to avoid a sign that only survives a quick power-on photo.
For commercial use, a sign should stay stable long enough to prove that the LEDs, power supply, and wiring are working together. A small heat problem before shipment can become flickering, dimming, or failure after installation.
Do Waterproof and Outdoor Details Matter?
Waterproof and outdoor details matter because many LED sign failures start in small areas: cable exits, screw holes, back seams, connectors, power supply boxes, and mounting points. Before shipment, check whether the sign is truly built for rain, dust, sunlight, humidity, and temperature changes. A front-lit photo cannot prove outdoor quality. You need back-view photos, sealing close-ups, cable protection, and outdoor-use confirmation.
Outdoor quality problems are usually not dramatic at first. The sign may pass a short lighting test in the factory, look clean in the front photo, and still fail after a few weeks outside. Water does not need a large opening to enter. A tiny gap near the cable exit, an unsealed screw hole, or a weak joint behind the letter can let moisture reach the LEDs or wiring.
The biggest mistake is treating “outdoor use” as one simple label. A sign installed under a covered storefront is not exposed the same way as a sign mounted on an open exterior wall. A logo sign used in a dry indoor reception area does not need the same sealing as a sign facing rain, sunlight, wind, dust, and daily temperature changes. Before production, the factory should know where the sign will be installed, whether it is covered, whether the wall is flat, and where the cable will enter the building.
A poor outdoor sign often gives clues before shipment. The back may look open or unfinished. The cable exit may be exposed. The power supply may not be protected. The screw holes may sit too close to the edge. The sealing may look messy or incomplete. These details are easy to miss if you only approve the front view.
| Outdoor Warning Sign | What It May Cause | What to Ask Before Shipping |
|---|---|---|
| Exposed cable exit | Water enters through wire hole | Close-up photo of sealed cable exit |
| Open back seams | Moisture reaches LEDs or wiring | Back-view photo after sealing |
| Unsealed screw holes | Water leaks into mounting points | Photo of screw hole treatment |
| Indoor power supply used outside | Short circuit or early failure | Power supply use-location confirmation |
| No connector protection | Flickering after rain | Connector close-up photo |
| Thin or weak backing | Bending, cracking, loose mounting | Back structure and thickness confirmation |
| Poor paint or metal finish | Rust, stains, surface damage | Close-up of metal and coating |
| No outdoor test photo | Outdoor claim is unverified | Lighting test plus back-detail photos |
The practical rule is simple: if you cannot see how water is kept out, do not assume the sign is outdoor-ready.
Indoor vs Outdoor
Indoor and outdoor LED signs can look almost identical from the front, but the structure behind them should be different. An indoor acrylic logo sign for a reception wall may only need clean wiring, neat backing, and basic protection. An outdoor storefront sign needs stronger sealing, safer cable routing, better material selection, and a mounting structure that can handle weather.
Before production, say clearly where the sign will be installed:
- indoor wall;
- covered storefront;
- open exterior wall;
- glass window;
- metal panel;
- brick wall;
- roadside position.
These details affect cable exit, mounting holes, backing strength, LED protection, and power supply placement.
A poor-quality outdoor sign often happens when an indoor structure is used outside to save cost. The sign may light up during the factory test, but after rain or humidity, it may flicker, dim, or stop working. If the quote does not clearly separate indoor and outdoor requirements, ask again before approving production.
Water Entry Points
Water usually enters from the weakest points, not the most visible areas. On LED signs, common risk areas include cable exits, screw holes, seams, connectors, LED module positions, acrylic joints, and the back structure. These are the areas you should check in photos.
Common water-entry points:
| Risk Area | What to Check |
|---|---|
| Cable exit | Is it sealed and protected from pulling? |
| Screw holes | Are holes treated after drilling? |
| Back seams | Are gaps closed and sealed? |
| Connectors | Are electrical joints exposed? |
| Letter backs | Are channel letter backs open or protected? |
| Acrylic joints | Are joints clean and closed? |
Ask for close-up images of the cable exit and back side, not only a front-lit photo. If the cable comes out from the back, check whether the exit point is sealed and whether the wire is protected from pulling.
For channel letters, water can enter through return seams, backs, or wiring holes. For LED neon signs, connection points and cable exits are more sensitive than the silicone face itself. If the supplier avoids showing these areas, you are not really checking outdoor quality.
Sealing Quality
Good sealing should look controlled, not messy. Too little sealing leaves gaps. Too much messy glue may show rushed work and still fail around the edges. The important thing is not whether you can see silicone somewhere. The important thing is whether the actual water-entry points are protected.
Before shipment, ask for photos after sealing is completed. Look at:
- back seams;
- screw holes;
- cable exits;
- connection points;
- LED module areas;
- power connection areas.
If the sign is for outdoor use, these areas should not look open, loose, or unfinished.
Also check whether sealing affects the appearance. For signs installed at eye level, rough glue marks around acrylic, metal, or silicone parts can make the sign look cheap. Outdoor protection should not mean ugly finishing. A good factory should balance sealing strength with clean workmanship.
IP Rating
IP rating can help, but it should not replace photo checking. A supplier may say “IP65 outdoor,” but you still need to know which parts are protected.
Ask these questions:
- Is the sign body protected?
- Are the LED modules protected?
- Is the power supply protected?
- Are the cable exits protected?
- Are connectors protected?
- Are screw holes sealed?
- Does the installation site match the claimed protection level?
For many outdoor storefront signs, IP65-level protection is often discussed because it refers to dust protection and water-jet resistance. But the real performance still depends on structure, sealing, installation, and power connection. A sign with waterproof LEDs can still fail if the wire exit is exposed.
Do not treat IP rating as a magic word. Treat it as one checkpoint. Ask for the rating, then ask for photos that prove the structure supports the claim. If the installation site is fully exposed to rain, the waterproof details matter much more than the label in the quote.
Power Protection
Outdoor electrical problems often come from the power side. The sign body may be protected, but the power supply, connector, or cable joint may be placed in a weak location. If the adapter or transformer is not suitable for the installation environment, rain and humidity can create failure risk.
Before shipment, confirm:
| Power Detail | What to Confirm |
|---|---|
| Power supply location | Indoor, covered, or outdoor position |
| Wire length | Long enough for protected installation |
| Connector type | Protected from moisture |
| Plug type | Matches destination market |
| Junction points | Not exposed to rain |
| Power box | Suitable for use location |
In many projects, the power supply should be installed in a dry or protected area, even if the sign body is outdoor-ready. If the installer needs to place the power supply outside, that must be planned clearly.
Ask where the power supply should sit after installation. Also confirm the wire length, connector type, plug type, and whether any junctions need protection. A sign that lights perfectly in the factory can still fail outside if the power setup is not planned.
Sunlight and Heat
Rain is not the only outdoor risk. Sunlight, heat, and temperature changes can affect acrylic, silicone, paint, adhesive, wiring, and metal finishes. A sign facing direct afternoon sun may age differently from a sign under a shaded entrance.
Look for material choices that fit the environment:
- outdoor-suitable acrylic;
- stable silicone tubing;
- coated metal surfaces;
- protected wiring;
- suitable LED heat management;
- backing that does not bend easily;
- paint finish that resists fading.
Ask whether the sign will face direct sunlight, high temperature, or humid weather. If yes, the factory should consider material, backing, LED heat, and installation spacing.
Poor outdoor signs often fail slowly: fading, yellowing, surface cracks, loose adhesive, or dimming after regular use. These problems are easier to prevent before production than to repair after installation.
Mounting Strength
Outdoor signs need stronger mounting planning because they face wind, wall vibration, rain, and temperature changes. A sign with weak mounting holes or a thin backing board may look fine on the workbench but feel unstable during installation.
Before shipment, check:
- mounting holes;
- brackets;
- spacers;
- back frame;
- backing thickness;
- cable exit location;
- screw hole sealing;
- weight support.
A common problem is that waterproofing and mounting are checked separately. In real installation, they work together. A screw hole, bracket point, or cable hole can become a water-entry point if not planned correctly.
Ask for a back-view photo showing both mounting and sealing details. If the sign is large, ask how the weight is supported. If the sign sits away from the wall, confirm spacer strength and cable routing together.
Photo Proof
For outdoor signs, photo proof should include more than a lit front view. Ask for a set of practical photos that shows the finished sign from the front, side, and back. Then ask for close-ups of cable exits, screw holes, seams, connectors, power supply, mounting points, and packing.
A useful outdoor photo set can look like this:
| Photo Needed | What It Confirms |
|---|---|
| Front lit photo | Brightness and color |
| Side photo | Thickness and structure |
| Full back photo | Wiring, backing, and sealing layout |
| Cable exit close-up | Water-entry protection |
| Screw hole photo | Mounting and sealing condition |
| Connector photo | Electrical protection |
| Power supply photo | Correct type and specification |
| Packing photo | Outdoor sign is protected during shipping |
These photos do not need to be beautiful. They need to be clear. If the sign is going outdoors, the hidden details decide whether it will keep working after the first few rainy days.
How Can You Check Quality Before Shipment?
Check quality before shipment by requesting artwork proof, lit-up photos, test videos, back-view photos, wiring photos, accessory photos, and packaging photos. For larger or repeat orders, request sample approval or production confirmation photos. These checks help catch wrong colors, wrong size, weak lighting, missing accessories, and poor packing before the sign leaves the factory.
Pre-shipment checking is one of the easiest ways to reduce risk, especially for overseas orders. Once a custom LED sign leaves the factory, any correction becomes slower and more expensive. If the sign has the wrong cable exit, wrong plug, wrong color, or missing accessories, the issue may not be discovered until the installer opens the box. At that stage, the project team may have very few good options.
A proper QC check should follow the actual order details. It should not be just one pretty photo. The factory should compare the finished sign against the approved drawing: size, logo shape, color, lighting, mounting method, power supply, wire exit, accessories, and packaging.
For custom signs, photos and videos are not only for confidence. They are practical documents. They help confirm that the sign matches the order before shipping. They also help installers understand the back structure, wiring route, and accessory kit.
Artwork Proof
Artwork proof is the first quality checkpoint. Before production, confirm the logo file, sign size, letter height, color code, backing shape, mounting method, cable exit, and plug requirement.
Important details to confirm:
| Artwork Detail | Why It Matters |
|---|---|
| Logo shape | Prevents wrong curves or letter proportions |
| Size | Affects wall fit and visibility |
| Color code | Reduces color mismatch |
| Mounting method | Prevents installation problems |
| Cable exit | Keeps wiring hidden or controlled |
| Plug type | Matches destination market |
| Backing shape | Affects final wall appearance |
Many quality problems are actually drawing-confirmation problems. For example, a sign may be well made but still wrong if the cable exits from the visible side or if the logo color is not matched correctly.
Ask the factory to mark important details clearly on the proof. Do not approve production only from a front-view mockup if installation details matter.
Lighting Test
A lighting test should show the finished sign turned on, ideally through photos and short videos. For LED neon signs, check whether the glow is smooth across curves and small strokes. For channel letters, check whether each letter lights evenly without dark areas. For RGB signs, ask for a video showing color changes and controller function.
A good lighting test should show:
- full front view;
- close-up of small letters;
- curves and corners;
- power supply connected;
- RGB mode if included;
- dimming if included;
- no flicker or weak sections.
A lighting test is especially important for large logo signs, restaurant storefront signs, bar neon signs, and retail wall signs. If the sign will be viewed from close range, also ask for close-up shots.
QC Photos
QC photos should show more than the front. Useful photo angles include front view, side view, back view, cable exit, power supply, wiring, mounting holes, accessories, and packing. These photos help spot problems that a single front image hides.
Recommended QC photo list:
| QC Photo | What to Check |
|---|---|
| Front photo | Logo shape, color, surface condition |
| Lit photo | Brightness, dark spots, color consistency |
| Side photo | Thickness, edge finish, structure |
| Back photo | Wiring, cable exit, mounting holes |
| Power supply photo | Voltage, plug type, quantity |
| Accessory photo | Screws, spacers, remote, controller |
| Packing photo | Foam, surface protection, carton |
For custom orders, ask the factory to photograph the actual finished sign, not a similar previous project. The more specific the order, the more important these photos become.
Sample Check
A sample is useful when the project has a new logo, special color, unusual shape, large quantity, outdoor requirement, or chain-store rollout. It allows you to confirm material, brightness, size, color, and packing before bulk production.
A sample is especially useful for:
- new brand logos;
- chain-store rollouts;
- special LED colors;
- custom silicone tube shapes;
- large outdoor signs;
- unusual mounting structures;
- custom packaging requirements.
Not every small order needs a physical sample, but regular models should still have clear pre-shipment QC. For Iduoduo, regular samples often take about 5–7 days, while special molds or special processes may take around 7–15 days. For repeat orders, a good factory should keep approved records to reduce repeated checking.
What Packaging Problems Should You Avoid?

Packaging problems are quality problems you can often spot before shipment. Watch for exposed acrylic surfaces, loose power supplies, mixed accessories, weak cartons, thin foam, no corner protection, poor cable protection, and no packing photos. A sign can be well made but still become a poor order if it arrives scratched, cracked, bent, or missing the parts needed for installation.
A custom LED sign does not fail only because of bad LEDs or poor workmanship. Sometimes the sign leaves the factory in good condition, but the packaging turns it into a problem before it reaches the wall. Acrylic gets scratched because the adapter was placed against the front face. Silicone neon tubing gets pressed because the foam was too thin. Metal letters get dented because the carton has no corner support. Screws, spacers, and remotes disappear because accessories were not packed in a separate bag.
This is why packing photos matter. Before shipment, you should be able to see how the sign is protected, where the power supply is placed, whether the accessories are separated, and whether the carton or wooden case matches the sign size. One front-view product photo is not enough. The sign may look perfect on the workbench, but the real question is: can it survive handling, trucking, warehouse sorting, international shipping, and final delivery?
For overseas custom LED signs, packaging should not be treated as a small final step. It protects the finished sign from scratches, pressure, vibration, moisture, and missing parts. A restaurant sign, salon logo wall, bar neon sign, retail display, or storefront sign often has an installation date planned in advance. If the sign arrives damaged or missing accessories, the problem is no longer just “packaging.” It becomes a delayed opening, extra installer time, local repair cost, or a weaker final display.
| Packing Warning Sign | What It May Cause | What to Ask For |
|---|---|---|
| Power supply touches acrylic | Scratches or pressure marks | Separate accessory bag or box |
| No protective film | Surface scratches during handling | Front surface protection photo |
| Thin foam only | Cracks, dents, movement inside box | Thicker foam or shaped support |
| Loose screws in carton | Scratched sign face | Sealed accessory kit |
| No corner protection | Broken acrylic corners | Corner foam or reinforced edges |
| Oversized carton | Sign shakes during transport | Tight inner support |
| Weak carton | Crushed box, bent sign | Export-grade carton or wooden case |
| No packing photo | Hard to verify condition before shipping | Full packing photo set |
The easiest rule is this: if the sign can move inside the box, it can be damaged. If hard accessories can touch the sign surface, scratches can happen. If the installer cannot find the parts quickly after opening the box, installation becomes slower and messier.
Surface Protection
Surface protection is the first thing to check in packing photos. Acrylic, painted metal, mirror stainless steel, printed panels, and silicone neon tubes can all be damaged before installation if they are not protected correctly.
Check whether the package protects:
- acrylic front face;
- painted metal surface;
- mirror stainless steel;
- silicone neon tubing;
- printed logo panels;
- cable exits;
- small letter edges;
- corners and sharp points.
For acrylic LED signs, the front face should usually have protective film or soft wrapping. The surface should not touch screws, spacers, adapters, remotes, controllers, or rough carton material. Even small scratches are easy to notice on clear acrylic, white acrylic, glossy black acrylic, and mirror finishes.
For LED neon signs, the silicone tube should not be pressed tightly against sharp corners or heavy accessories. If the tube is squeezed for a long time during transport, it may arrive with pressure marks, uneven shape, or dirty surface marks.
Ask for a packing photo before the carton is closed. You want to see the sign protected as a finished product, not just placed into a box.
Foam Support
Foam support should hold the sign in position, not just fill empty space. Thin foam sheets may look acceptable in photos, but they may not stop movement during shipping. If the sign can slide inside the carton, the edges, tubes, letters, and cable exits are all at risk.
Good foam support should:
| Sign Type | Foam Should Protect |
|---|---|
| Flat acrylic sign | Front, back, edges, and corners |
| LED neon sign | Overall shape without pressing tube too hard |
| Channel letters | Painted faces and letter returns |
| Light box | Corners, face panel, and frame |
| Large logo sign | Full back support and edge protection |
For flat acrylic signs, foam should protect the front, back, edges, and corners. For LED neon signs, foam should support the overall shape without pressing the silicone tube too hard. For channel letters or metal signs, foam should separate painted or polished surfaces from hard parts.
A useful packing photo should show the inner support clearly. If you only see the closed carton, you cannot judge whether the sign is actually protected. Ask for at least one photo showing the sign inside the box before final sealing.
Corner Damage
Corners are one of the most common damage points. Acrylic corners can crack. Painted metal corners can chip. Backing boards can bend. Large signs can take impact at the edges during handling, especially if the carton is dropped or stacked.
Corner protection matters most for:
- rectangular acrylic signs;
- large logo backboards;
- light boxes;
- channel letter sets;
- mirror finish signs;
- painted metal signs.
Check whether the corners have extra foam, cardboard reinforcement, or shaped protection. This matters more for large logo signs, rectangular backing boards, light boxes, and acrylic panels. Thin edge protection is often not enough for international shipping.
If the sign has sharp corners, long edges, or a large backboard, ask the factory to show how those corners are protected. A cracked corner may seem small, but it can make the sign look unfinished after installation. For signs mounted at eye level, corner damage is hard to hide.
Accessory Kit
Missing or loose accessories can turn a good sign into an installation problem. The accessory kit may include screws, spacers, mounting templates, wall anchors, hanging chains, power supplies, plugs, remotes, RGB controllers, dimmers, or installation notes. These parts should be packed separately and photographed before shipment.
Ask for one clear photo showing:
- screws;
- spacers;
- mounting template if included;
- wall anchors;
- power supply;
- plug;
- remote control;
- RGB controller;
- dimmer;
- installation notes.
Loose screws or spacers should never be floating inside the carton. They can scratch the sign face during transport. Power supplies and controllers should not press against acrylic or silicone tubes. Remotes and small parts should be placed in a sealed bag or small box.
If the order includes several signs, each sign should have its accessories clearly separated or labeled. This helps avoid confusion when the installer opens the package.
Power Supply Packing
Power supplies are often heavier and harder than the sign surface. If they are packed against acrylic, painted metal, or silicone tubing, they can leave scratches, dents, or pressure marks. This is one of the easiest packaging mistakes to prevent.
Before shipment, check:
| Power Packing Detail | Good Practice |
|---|---|
| Adapter position | Separated from sign surface |
| Controller | Packed in bag or small box |
| Remote | Protected and easy to find |
| Heavy transformer | Fixed in place, not loose |
| Power cable | Coiled gently, not sharply bent |
The adapter, transformer, controller, and remote should be separated from the sign body. Ideally, they should be placed in a small inner box or protected bag, then fixed in a safe position inside the carton. They should not be able to move freely during shipping.
Before shipment, check the packing photo and ask: where is the power supply? If the answer is not clear, ask for a closer photo. A finished sign can be damaged by its own accessories if the packing is rushed.
Cable Protection
Cable protection is easy to overlook. The cable exit is a weak point because it connects the electrical system to the sign body. If the cable is bent sharply, pulled, pressed, or trapped under the sign during packing, it may loosen or fail later.
The cable should be:
- coiled gently;
- fixed in place;
- kept away from sharp edges;
- not folded tightly at the exit point;
- protected from being pressed by the sign body;
- protected at sealed outdoor exits.
For outdoor signs, the sealed cable exit should not be pressed against a hard edge. For LED neon signs, the cable connection near the silicone tube should be protected from pulling.
Ask for a back-view photo before packing and a packing photo showing how the cable is placed. If the wire looks strained before shipment, it may become a flickering or connection problem after installation.
Carton Strength
Carton strength should match the sign size, weight, and shipping route. A small indoor sign may be fine with a reinforced carton and foam support. A large acrylic sign, heavy metal letter sign, or fragile custom logo sign may need a stronger carton or wooden case.
A weak carton can collapse when stacked. An oversized carton can let the sign move. A carton that is too tight can press against the sign surface or cable exit. The right box should hold the sign securely while leaving room for protective materials.
| Shipping Situation | Recommended Packaging Focus |
|---|---|
| Small indoor sign | Reinforced carton and foam |
| Fragile acrylic logo | Surface film and shaped foam |
| Large sign | Strong carton or wooden case |
| Metal letters | Edge and paint protection |
| Overseas shipping | Inner support plus outer carton strength |
For overseas shipping, ask whether the carton is export-grade and whether the inner support prevents movement. If the sign is large, heavy, or high-value, ask if wooden packing is recommended.
Do not judge packing only by the outside box. The inner protection is what usually decides whether the sign arrives safely.
Packing Photos
Packing photos are your final chance to spot problems before the sign leaves the factory. A good packing photo set should show the finished sign, surface protection, foam support, accessories, power supply placement, cable position, inner carton condition, and final outer package.
Do not accept only one closed-box photo. A sealed carton tells you almost nothing. You need to see what happened before the box was closed. If the sign arrives damaged later, these photos also help confirm whether the issue came from packing or transport.
For custom LED signs, especially overseas orders, ask for a simple packing photo set:
| Photo Needed | What It Confirms |
|---|---|
| Finished sign before packing | Correct product and clean surface |
| Front surface protection | Scratch prevention |
| Back and cable protection | Safe wire placement |
| Accessory kit photo | No missing parts |
| Inner foam photo | Sign will not move inside box |
| Power supply placement | Hard parts are separated |
| Final carton photo | Outer package is ready for shipping |
These photos do not need to be fancy. They need to be clear. If the factory cannot show how the sign is packed, you are taking the risk after shipment instead of solving it before shipment.
Is a Low Price Always a Quality Risk?
A low price is not always a quality risk, but an unusually low quote often means something has been removed: better LEDs, thicker acrylic, stronger backing, safer power supply, waterproofing, testing, packaging, or after-sales support. Compare quotes by specification, not only by total price, or the cheapest option may become the most expensive after delivery.
Price is part of every custom LED sign order, but it should be read carefully. A cheaper quote may be reasonable if the sign is simpler, smaller, indoor-use only, or produced with an efficient structure. But if two quotes describe the same sign and one is much lower, you should ask what is different.
Often, the difference is hidden in material thickness, LED quality, power supply, finishing, waterproofing, QC time, or packaging. A poor-quality sign does not only cost the purchase price. It can create hidden costs: replacement parts, local repair, extra installer time, delayed opening, poor storefront appearance, or customer complaints.
The best value is not the highest price or the lowest price. It is the quote that clearly matches the use scene. A small indoor photo-wall neon sign does not need the same structure as a large outdoor channel letter sign. A one-time event sign does not need the same long-term durability as a permanent storefront logo. Good quoting should explain these differences, not hide them.
Price Gaps
Large price gaps usually come from specification differences. One quote may include thicker acrylic, better LEDs, proper power supply, clean wiring, waterproof treatment, installation accessories, and export packaging. Another may only include the basic sign body.
When comparing price gaps, check:
| Quote Detail | Why It Changes Price |
|---|---|
| Acrylic thickness | Affects strength and appearance |
| LED density | Affects brightness and dark spots |
| Power supply | Affects stability and heat risk |
| Waterproofing | Affects outdoor reliability |
| Packing | Affects shipping damage risk |
| Accessories | Affects installation readiness |
| QC photos/videos | Affects pre-shipment control |
If you only compare the final number, the cheaper quote may look attractive. Compare the details line by line: material, size, LED type, power supply, backing, mounting, packing, testing, and warranty.
Hidden Costs
Hidden costs appear after the sign arrives. If the power supply fails, you may need a local electrician. If the acrylic cracks, you may need a replacement panel. If the wire exits from the wrong position, the installer may need extra drilling. If the sign arrives scratched, the store may delay installation or accept a poor visual result.
Common hidden costs include:
- local repair;
- replacement power supply;
- second shipping cost;
- extra installer time;
- delayed opening;
- damaged brand display;
- re-production of broken parts;
- customer complaints for resellers.
These costs are rarely included in the original quote, but they are real. A slightly higher factory price can be cheaper overall if it prevents repair, delay, and rework.
Quote Details
A useful quote should not only say “custom LED sign.” It should list size, material, lighting type, LED color, power supply, backing, mounting method, cable exit, indoor/outdoor use, accessories, packaging, lead time, and warranty.
A clearer quote should include:
| Quote Item | What to Confirm |
|---|---|
| Size | Overall size and letter height |
| Material | Acrylic, silicone, metal, backing |
| Lighting | LED color, RGB, dimming, front-lit, back-lit |
| Power | Voltage, wattage, plug type |
| Mounting | Holes, spacers, hanging, raceway, backboard |
| Cable exit | Position and wire length |
| Use scene | Indoor, covered outdoor, exposed outdoor |
| Packing | Foam, carton, wooden case if needed |
| Warranty | What is covered and what is not |
For complex projects, drawings or production notes should support the quote. This protects both sides. You know what you are paying for, and the factory knows what must be produced.
If a quote is vague, ask questions before paying. Vague quotes often lead to vague quality.
Good Value
Good value means the sign arrives ready to install, looks close to the approved design, lights evenly, uses safe power, and includes the right accessories. It should also be packed well enough to survive shipping.
A good-value sign should deliver:
- clean surface;
- correct logo shape;
- smooth light;
- stable power;
- correct cable exit;
- proper mounting parts;
- protected packaging;
- clear pre-shipment confirmation.
For commercial signs, this is more important than saving a small amount at checkout. A sign is often installed in a visible place: above a storefront, behind a reception desk, inside a restaurant, or on a social-media photo wall. When it looks clean and works reliably, it supports the whole space.
Final Thoughts: How Should You Order with Less Risk?
The safest way to avoid poor-quality custom LED signs is to treat quality as a step-by-step confirmation process. Do not rely only on a beautiful mockup or a low price. Confirm the material, lighting, power supply, wiring, mounting, waterproofing, QC photos, packing method, and accessory list before the sign leaves the factory.
When you work with Iduoduo, you can send your logo file, size, installation scene, preferred lighting style, usage environment, and delivery requirements. Our team can help review the drawing, recommend suitable materials, confirm production details, arrange sampling when needed, test the finished sign, and prepare export-ready packaging for custom LED signs, LED neon signs, channel letters, acrylic LED logo signs, light boxes, and storefront signage projects.
If you are preparing a restaurant sign, salon logo wall, bar neon sign, retail storefront sign, event display, or chain-store rollout, send your project details to Iduoduo for a custom quote. A clear sign order starts before production, and the best time to avoid quality problems is before the first piece is made.