Most custom LED sign problems do not start when the sign is being made. They start earlier, when the logo file is unclear, the wall size is guessed, the plug type is missing, the wire exit is not marked, or the quote does not explain what is included. A custom sign may look simple in a product photo, but before production begins, many details must be confirmed: design file, size, material, lighting style, color, power supply, mounting method, packing method, and shipment proof.
Before ordering custom LED signs, you should ask the factory to confirm the sign purpose, design file, final size, material, voltage, plug type, power supply, wire exit, mounting method, quote items, quality checks, packing method, and after-delivery support. These questions help avoid wrong colors, unclear installation, weak brightness, hidden costs, shipping damage, and last-minute project delays.
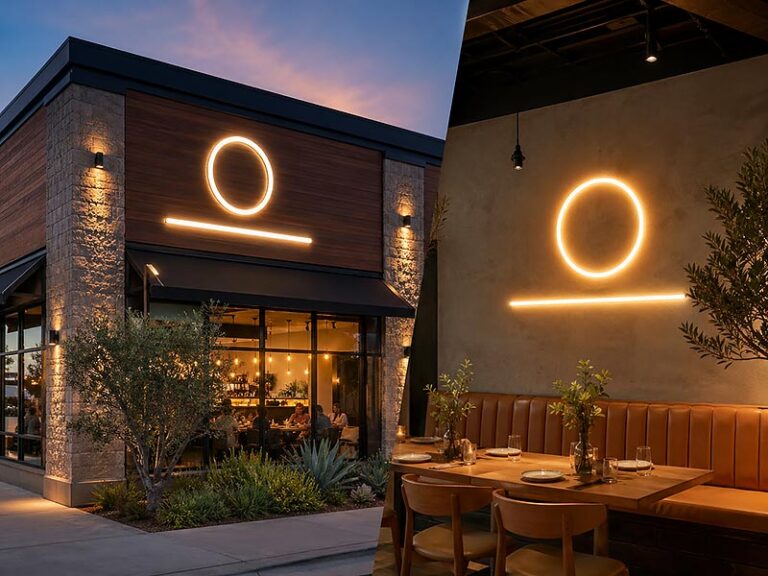
Think of a custom LED sign like a tailored piece for a real space. A restaurant storefront, salon logo wall, bar photo corner, retail display, and chain-store project all need different choices. The safest order is not the one with the fastest “yes.” It is the one where every important detail is confirmed before money is paid and production starts.
What Is the Sign For?
Before ordering a custom LED sign, confirm where it will be used, who will see it, how far people will view it, and whether it needs to work indoors, outdoors, or in a photo-friendly space. The sign purpose affects size, brightness, material, mounting, power setup, and packing method.
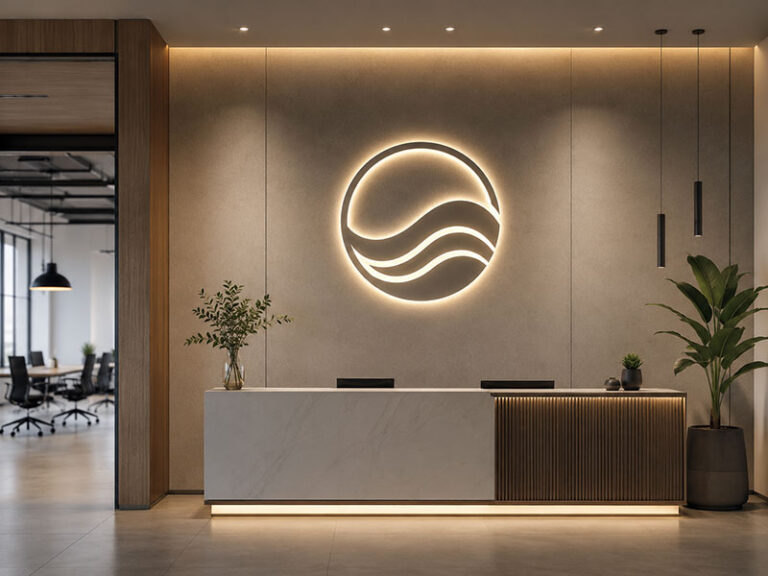
A custom LED sign should not be designed only from a logo file. The factory also needs to understand the real scene. A storefront sign needs visibility and durability. A salon logo wall needs clean details and hidden wiring. A bar neon sign may need dimmable light. An event booth sign may need light weight and quick setup.
Use the first message to the factory to explain the project in one clear line:
| Project Scene | Better First Message |
|---|---|
| Restaurant storefront | “This sign will be installed outside above the entrance.” |
| Salon logo wall | “This logo sign will be installed behind the reception desk.” |
| Bar photo wall | “This neon-style sign will be used for customer photos.” |
| Retail store | “This sign will be used inside a boutique display area.” |
| Event booth | “This sign needs to be easy to install and remove.” |
| Chain store | “This design may be repeated for several locations.” |
Main Use
The main use tells the factory what kind of sign logic to follow.
For example:
- Storefront signs need stronger visibility, durable structure, and outdoor protection.
- Reception signs need clean edges, hidden wires, and good color matching.
- Photo wall signs need controlled brightness and camera-friendly color.
- Event signs need lighter weight, simple installation, and safe packing.
- Chain-store signs need repeatable size, color, packing, and production records.
Before paying, confirm:
| Question | Why It Matters |
|---|---|
| Where will the sign be installed? | Controls material and mounting choice |
| Is it mainly for visibility or decoration? | Controls size and brightness |
| Will people view it from close or far away? | Controls letter size and readability |
| Is it a one-time sign or repeat project? | Controls records and consistency |
| Who will install it? | Controls accessory and drawing needs |
A good factory should not treat every custom sign the same way. The same logo may need different construction depending on the final use.
Indoor or Outdoor
Indoor and outdoor signs should be confirmed separately before production.
For indoor signs, the main concerns are usually:
- appearance
- wire hiding
- wall fit
- brightness comfort
- surface finish
- easy installation
For outdoor signs, the factory needs to consider:
- waterproof structure
- cable sealing
- outdoor-rated power setup
- UV exposure
- metal or acrylic durability
- wall fixing strength
- wind and rain exposure
Ask these before paying:
| Question | What You Want to Avoid |
|---|---|
| Is the sign body suitable for outdoor use? | Indoor structure used outside |
| Where will the power supply be placed? | Unsafe transformer placement |
| Are cable exits sealed? | Water entering through wiring |
| What material is used for outdoor parts? | Fading, rust, or cracking |
| Does installation need a local electrician? | Last-minute site delays |
Do not only ask, “Can it be outdoor?” Ask what parts are protected and how.
Photo Scene
Many LED signs are now made for camera use, not only for visibility.
This matters for:
- bars
- cafés
- salons
- gyms
- boutiques
- event booths
- restaurants
- reception walls
- social media photo spots
For photo scenes, ask:
| Detail | Why It Matters |
|---|---|
| Brightness | Too much light can overexpose photos |
| Dimmer | Helps adjust light for different scenes |
| Wire route | Visible wires look messy in photos |
| Background color | Affects contrast and logo visibility |
| Size | Too small looks weak in photos |
| Mounting style | Affects the final wall appearance |
A photo-friendly sign does not always need to be the brightest sign. It needs the right balance of size, color, brightness, and clean installation.
What Design File Do You Need?

Before paying for production, confirm whether the factory can produce your sign from the file you provide, whether the logo needs to be redrawn, which colors should be matched, and what approval drawing you will receive. A clean file reduces shape mistakes, wrong proportions, color mismatch, and last-minute production changes.
Many custom LED sign problems start with a file that “looks okay” on a screen but is not ready for production. A small PNG from a website, a screenshot from Instagram, or a logo copied from a business card may be enough for a rough quotation, but it may not be enough for cutting acrylic, bending LED neon tube, making channel letters, or matching a brand color.
Before paying, do not only ask:
“Can you make this logo?”
Ask instead:
“Can this file be used directly for production, or does it need to be redrawn before you make the sign?”
That question can prevent several problems later. If the factory redraws the logo without approval, the final sign may have slightly different letter spacing, icon shape, line thickness, or font style. These small changes may not matter for a decorative sign, but they matter for a brand logo, chain store, restaurant storefront, salon wall, or retail display.
| File Type | Good for Quote? | Good for Production? | What to Confirm Before Paying |
|---|---|---|---|
| AI / EPS / SVG / CDR | Yes | Usually yes | Fonts, outlines, size, colors |
| Vector PDF | Yes | Often yes | Whether it is real vector |
| High-resolution PNG | Yes | Sometimes | May need redrawing |
| JPG / Web image | Yes | Not ideal | Resolution and edge clarity |
| Screenshot | Rough idea only | No | Must be redrawn |
| Hand sketch | Concept only | No | Needs design conversion |
Logo File
The safest file for custom LED sign production is usually a vector file.
Useful formats include:
- AI
- EPS
- SVG
- CDR
- real vector PDF
These files can be enlarged without losing edge quality. That makes cutting, bending, printing, painting, and assembly more accurate.
If you only have a PNG or JPG, ask the factory:
| Question | Why You Should Ask |
|---|---|
| Is this file clear enough for production? | Avoids rough logo edges |
| Do you need to redraw the logo? | Avoids silent design changes |
| Will I approve the redrawn file? | Protects logo accuracy |
| Are any lines too thin? | Prevents production failure |
| Are small letters too small? | Prevents poor lighting or cutting |
| Will the final sign keep the same spacing? | Protects brand appearance |
LED signs are not printed posters. A thin line may need enough width for LED neon tube. A tiny letter may not fit LED modules. A sharp corner may need a small radius for bending. A gradient may need to become a printed acrylic effect or a simpler solid lighting effect.
Before paying, make sure the factory tells you what must be adjusted.
Color Match
Color should be confirmed before production, not guessed from a screen.
Different color systems can create different results:
| Color Source | Where It Appears | Possible Problem |
|---|---|---|
| RGB | Phone, computer screen | Looks different from real materials |
| CMYK | Printed artwork | May not match LED light |
| Pantone | Brand guide | Needs clear factory confirmation |
| LED color | Sign when lit | May look different at night |
| Acrylic color | Sign face or backing | Changes daytime look |
| Silicone tube color | LED neon surface | Affects lit and unlit look |
| Painted metal | Channel letter side or backing | Needs finish confirmation |
Before paying, ask:
- Can you match my Pantone or brand color?
- What color will the sign show when it is off?
- What color will it show when it is on?
- Is the tube, acrylic, or painted surface colored?
- Can this color be repeated for future orders?
- Will color notes be added to the production drawing?
Avoid vague color names if brand accuracy matters.
For example:
| Vague Request | Better Confirmation |
|---|---|
| “Make it red.” | “Match Pantone 186C as closely as possible.” |
| “Warm white.” | “Confirm LED warm white color temperature if available.” |
| “Same as logo.” | “Use the attached brand color guide.” |
| “Gold.” | “Confirm whether it is gold paint, gold acrylic, or warm yellow light.” |
Artwork Approval
Before paying, ask what approval document you will receive.
A simple mockup is not always enough. You need a production drawing that shows details used by the workshop.
At minimum, confirm:
- final width and height
- logo shape
- letter spacing
- material and thickness
- lighting style
- front color
- side color
- backing shape
- wire exit position
- mounting holes
- power supply type
- dimmer or remote, if needed
- installation direction
- quantity
- packing notes, if special
A good approval process should look like this:
| Step | What Happens |
|---|---|
| 1 | You send logo, size, wall photo, and requirements |
| 2 | Factory checks whether artwork can be produced |
| 3 | Factory points out risky details |
| 4 | Production drawing is created |
| 5 | You review size, color, wiring, and mounting |
| 6 | Changes are marked and corrected |
| 7 | Final drawing is approved before production |
This drawing becomes the shared reference. If the wire exits from the wrong side later, the first question is whether the wire exit was marked in the approved drawing.
Production Limits
Not every logo detail should be produced exactly as it appears on a screen.
Before paying, ask whether any part of the design needs adjustment for real production.
Common risk details include:
| Design Detail | Production Risk |
|---|---|
| Very thin strokes | LED neon tube may not bend cleanly |
| Tiny letters | LED modules may not fit |
| Narrow gaps | Cutting or lighting may be difficult |
| Sharp corners | Bending radius may need adjustment |
| Gradient colors | May need print or simplified lighting |
| Complex shadows | Usually not suitable for LED structure |
| Small icons | May lose shape after scaling |
| Script fonts | May need stroke adjustment |
Ask the factory:
- Which parts of my logo are difficult to produce?
- Will you simplify any detail?
- Will the final sign look different from the original logo?
- Can you mark adjusted parts in the drawing?
- Is another material or lighting style better for this design?
The goal is not to force the factory to promise everything. The goal is to know what will actually be made before payment and production.
Which Size and Material Fit?

The right size and material depend on the wall, viewing distance, logo detail, lighting style, installation method, and shipping plan. Before paying, measure the real space, check how far people will view the sign, and ask whether the material can support the design cleanly and safely.
Many people choose sign size by looking at product photos. That is risky. A sign that looks perfect in a close-up factory photo may be too small on a wide storefront or too large behind a reception desk.
Before paying, confirm:
| Item | What to Provide |
|---|---|
| Wall width | Total available width |
| Wall height | Total available height |
| Desired sign width | If already known |
| Installation photo | Front view of real wall |
| Viewing distance | Close, medium, or far |
| Obstacles | Shelves, mirrors, doors, tiles, pipes |
| Background color | Affects sign contrast |
| Installation height | Affects readability |
Material choice also affects cost, durability, lighting, installation, and packing. LED neon signs, acrylic LED logo signs, channel letters, light boxes, and metal-backed signs do not solve the same problem.
Wall Size
Measure the real wall before confirming the final sign size.
Useful information to send:
- wall width
- wall height
- photo of the wall
- socket position
- ceiling height
- counter or furniture position
- nearby shelves or mirrors
- expected sign center position
A practical sign should leave breathing room around the logo. It should not touch the ceiling, squeeze between shelves, or look lost on a large wall.
| Wall Situation | Size Risk | Better Confirmation |
|---|---|---|
| Wide storefront | Sign may look too small | Confirm viewing distance |
| Small reception wall | Sign may feel crowded | Leave side margins |
| Wall with shelves | Sign may not fit | Mark obstacle positions |
| Tile wall | Holes may be difficult | Confirm mounting before production |
| Event booth | Sign may be too heavy | Confirm booth size and support |
Viewing Distance
Viewing distance affects letter height and logo readability.
A sign used for close photos can include smaller details. A sign viewed from across the street needs bigger letters, stronger contrast, and simpler shapes.
Ask:
| Question | Why It Matters |
|---|---|
| Will people see it from 1–2 meters away? | More detail can work |
| Will people see it from the sidewalk? | Larger letters are needed |
| Will it be viewed from cars? | Simple, bold shapes work better |
| Is it mainly for photos? | Brightness and composition matter |
| Is it behind a counter? | Centering and height matter |
Small text may look clear in artwork but disappear in real use. Before paying, ask whether any words or logo parts are too small to read or light evenly.
Material Choice
Do not choose material only by price.
Choose it based on use, wall, lighting effect, and installation.
| Sign Type | Best For | Confirm Before Paying |
|---|---|---|
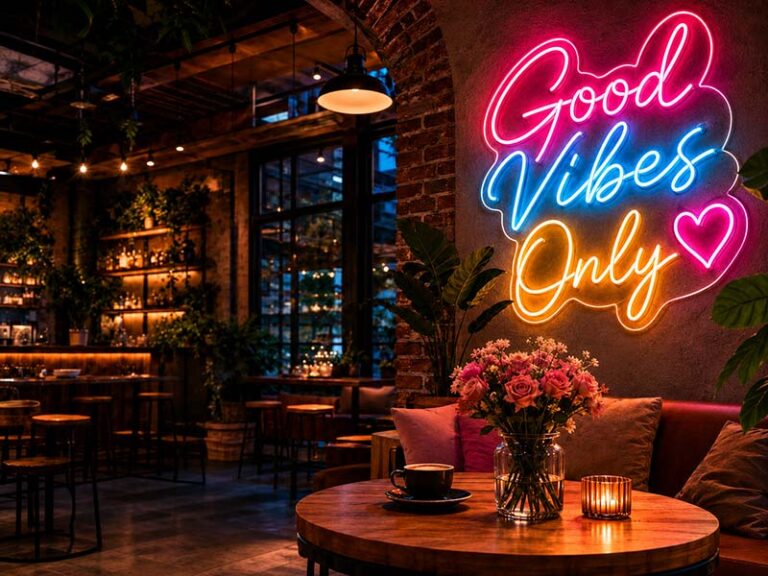
| LED neon sign | Bars, salons, cafés, photo walls | Tube size, backing, dimmer |
| Acrylic LED logo sign | Reception walls, retail interiors | Surface finish, edge quality |
| Front-lit channel letters | Storefronts, commercial signs | Letter depth, LED layout |
| Back-lit letters | Premium logo walls, building signs | Wall distance, halo effect |
| Dual-lit letters | High-impact storefronts | Wiring, power, price |
| Light box | Menus, retail displays, wall signs | Frame, panel, brightness |
| Metal backing | Larger or outdoor signs | Weight and mounting |
Before paying, ask:
- Which material fits this logo best?
- Will thin details be difficult in this material?
- Is this material suitable for indoor or outdoor use?
- How heavy will the sign be?
- Will the sign need a backer panel or raceway?
- Will the material affect shipping cost?
Small Details
Small design details often create production risk.
Check these before paying:
| Detail | Why It Matters |
|---|---|
| Thin strokes | May not support LED neon bending |
| Small letters | May not light evenly |
| Tight gaps | Hard to cut or assemble |
| Separate logo parts | Harder to align during installation |
| Sharp corners | May need slight rounding |
| Oversized acrylic | May need stronger backing |
| Large metal letters | May increase weight |
| Long signs | May need split production |
A good factory should point out these risks before production, not quietly change the design after payment.
How Will It Be Powered?
Before paying for production, confirm the voltage, plug type, power supply capacity, cable length, wire exit, dimmer option, and outdoor protection. A custom LED sign should not only light up in the factory video. It should connect safely and cleanly in your real installation space.
Power details are easy to miss because they are not the most exciting part of a custom LED sign. Most people focus on logo shape, color, and size first. But after delivery, power details decide whether the sign can be installed quickly or creates extra work for the electrician, installer, or store team.
A sign can look perfect in the production photo but still cause trouble if the plug does not match your country, the cable exits from the wrong side, the adapter is too visible on a clean logo wall, or the brightness is too strong for a small indoor space.
Before production starts, ask the factory to write power details into the approval drawing or quotation.
| Power Detail | What to Confirm Before Paying | Why It Matters |
|---|---|---|
| Voltage | 110V, 220V, or local standard | Avoids wrong transformer |
| Plug type | US, EU, UK, AU, or custom wiring | Avoids unusable plug |
| Power supply | Wattage, type, quantity | Prevents overheating or flicker |
| Cable length | Standard or extended cable | Reduces extension cord problems |
| Wire exit | Back, side, bottom, or marked position | Affects wall appearance |
| Dimmer | Needed or not needed | Controls indoor brightness |
| Outdoor use | Waterproof structure and protected power | Reduces safety risk |
Voltage and Plug
Before paying, tell the factory which country or market the sign will be used in.
Do not assume the supplier will automatically choose the right plug.
Ask:
- Can you confirm the voltage in the quotation?
- Which plug type will be included?
- Is the sign plug-in or hardwired?
- Can the power specification be saved for repeat orders?
- Will the shipped power supply match the tested sign?
Common confirmation examples:
| Destination | Common Power Question |
|---|---|
| United States | Is the adapter suitable for 110V and US plug? |
| United Kingdom | Is the UK plug included? |
| EU markets | Is the EU plug included? |
| Australia | Is the AU plug included? |
| Hardwired project | Can the sign be prepared for electrician connection? |
For chain-store projects, ask the factory to save the power specification so future signs use the same setup.
Power Supply Capacity
The power supply should match the actual sign size, LED layout, and lighting style.
Do not only ask:
“Is the power supply included?”
Ask:
“What power supply will be used, and is its capacity enough for this sign?”
Before paying, confirm:
| Item | What to Check |
|---|---|
| Wattage | Enough for the finished sign |
| Quantity | One or multiple power supplies |
| Placement | Visible, hidden, raceway, cabinet, ceiling |
| Testing | Tested with the actual sign |
| Label | Voltage and output visible |
| Outdoor use | Indoor or outdoor-rated type |
Larger LED neon signs, channel letters, acrylic LED logo signs, or dual-lit signs may need more than one power supply. If the sign has several separated parts, ask how the wiring will be arranged.
Wire Exit
Wire exit position should be confirmed before production.
Ask:
“Where will the cable come out, and can you mark it on the drawing?”
Common options:
| Wire Exit | Best Used When |
|---|---|
| Back exit | Wall has prepared power behind the sign |
| Side exit | Socket is beside the sign |
| Bottom exit | Cable drops to a lower socket |
| Custom marked exit | Wall has fixed wiring point |
| Raceway wiring | Storefront or channel letter signs |
A beautiful logo wall can look messy if the cable exits from the wrong side. If you already have a wall photo, mark the socket position before sending it to the factory.
Cable Length
Cable length can affect installation on the first day.
Ask:
- What is the standard cable length?
- Can the cable be extended?
- What cable color will be used?
- Can the cable be hidden behind the sign?
- Will cable length be marked in the quote?
Common situations:
| Scene | Cable Concern |
|---|---|
| Reception wall | Cable should be hidden |
| Bar counter | Cable may need to reach lower socket |
| Event booth | Longer cable may make setup easier |
| Storefront | Cable route may need electrician planning |
| Ceiling installation | Cable may need custom length |
If the cable will be visible, ask whether black or white cable is better for the wall.
Dimmer Option
Brightness should match the space.
A sign that looks strong in a factory video may be too bright in a small bar, salon, café, bedroom-style photo room, or retail display area.
Ask:
| Question | Why It Matters |
|---|---|
| Does this sign support dimming? | Helps control brightness |
| Is the dimmer included? | Avoids hidden accessory cost |
| Is a remote included? | Easier daily use |
| Does dimming affect color? | Important for photos |
| Is dimmer suitable for this LED system? | Avoids compatibility problems |
A dimmer is especially useful for:
- bars
- lounges
- salons
- restaurants
- retail displays
- photo walls
- event booths
Outdoor storefront signs may not need dimming, but indoor mood spaces often do.
Outdoor Protection
If the sign will be used outdoors, power protection must be discussed clearly before payment.
Do not only ask:
“Can it be used outside?”
Ask:
| Question | Why It Matters |
|---|---|
| Is the sign body suitable for outdoor use? | Prevents early failure |
| Is the power supply indoor or outdoor-rated? | Affects safety |
| Where should the transformer be installed? | Controls wiring plan |
| Are cable exits sealed? | Reduces water risk |
| Does the installer need a waterproof box? | Helps site preparation |
| Is the wiring protected from rain exposure? | Reduces failure risk |
Outdoor wiring and sealing may affect the structure, cable exit, backing, raceway, or installation method. These details should be settled before the sign is made.
How Will It Be Installed?

Before paying for production, confirm the mounting method, wall surface, wire route, hole position, accessories, installation drawing, and who will handle the final installation. A custom LED sign should be designed for the real wall, not only for the factory table.
Installation is one of the most common places where a good-looking custom LED sign becomes a difficult project. The sign may arrive on time, the color may be correct, and the lighting may work well, but the installer may still ask:
- Where should the holes go?
- Why is the wire on this side?
- How do we hide the power supply?
- Is the wall strong enough?
- Are the screws included?
- Do we need an electrician?
These problems usually happen because installation was not confirmed before production.
Before paying, send the factory a photo of the installation wall whenever possible. Mark the approximate sign position, wall width, wall height, socket location, and obstacles such as tiles, glass, pipes, shelves, ceiling lines, door frames, or existing wiring.
| Installation Detail | What to Confirm Before Paying | Why It Matters |
|---|---|---|
| Wall surface | Drywall, brick, concrete, glass, tile, wood, metal | Affects screws and anchors |
| Mounting method | Screws, standoffs, hanging chain, raceway, backer panel | Changes appearance and difficulty |
| Wire route | Hidden wire, exposed wire, side/back/bottom exit | Affects final wall look |
| Hole position | Standard or custom holes | Avoids drilling conflict |
| Accessories | Screws, anchors, spacers, chain, dimmer, guide | Prevents missing parts |
| Installer type | Store team, sign installer, electrician | Affects drawing detail |
| Sign weight | Light, medium, heavy, or split sections | Affects wall support |
Mounting Method
Before production starts, ask which mounting method fits your sign and wall.
Do not ask for the “best” method in general. Ask for the best method for your sign size, wall surface, wiring plan, and installer.
| Mounting Method | Best Used For | Confirm Before Paying |
|---|---|---|
| Pre-drilled acrylic backing | LED neon signs, logo walls | Hole quantity, backing shape |
| Standoffs | Reception walls, retail interiors | Distance from wall, screw size |
| Hanging chain | Events, temporary displays | Chain length, hanging points |
| Backer panel | Multi-part logos, easier alignment | Panel size, color, weight |
| Raceway | Storefront signs, channel letters | Raceway size, color, wire access |
| Flush mount | Clean storefront or logo installation | Template, drilling, wire exit |
Ask the factory to state the mounting method in the drawing or quote. “Wall mounted” is not specific enough.
Better confirmations include:
- clear acrylic backing with pre-drilled holes
- metal raceway with wiring inside
- individual channel letters with mounting template
- hanging chain with two hanging points
- standoffs with wall screws and spacers
Wall Surface
The wall surface should be discussed before the sign is made.
Different walls need different installation logic:
| Wall Type | Installation Concern |
|---|---|
| Drywall | May need anchors or lighter sign |
| Brick | Needs stronger drilling tools |
| Concrete | Needs suitable screws and anchors |
| Glass | Normal drilling may not work |
| Tile | Hole position must be planned carefully |
| Wood panel | Screws may need hidden placement |
| Metal frame | May need brackets or special fixing |
Before paying, tell the factory:
- wall material
- wall size
- whether drilling is allowed
- whether the surface is flat
- whether wires can go behind the wall
- whether there are pipes or cables behind the wall
- whether the sign needs to be removable
A useful question is:
“Based on this wall photo, do you recommend changing the backing or mounting method?”
This keeps the installation practical.
Wire Route
Wire routing affects appearance and installation work.
Before paying, ask:
- Where will the wire exit?
- Can the exit be marked on the drawing?
- Will the wire be hidden or visible?
- Where will the power supply be placed?
- Does the installer need to prepare a wall hole?
- Is the socket on the left, right, above, or below the sign?
Common wire route choices:
| Wire Route | Best For |
|---|---|
| Back exit | Clean logo wall with power behind sign |
| Side exit | Socket beside sign |
| Bottom exit | Socket below sign |
| Hidden wiring | Reception, salon, luxury retail |
| Exposed wiring | Temporary event or simple indoor use |
| Raceway wiring | Storefront and channel letter projects |
A wrong wire route may not stop the sign from working, but it can make the final wall look messy.
Mounting Holes
Mounting holes should be shown in the production drawing before payment.
Ask:
| Question | Why It Matters |
|---|---|
| Will the sign come with pre-drilled holes? | Helps installation |
| Where are the holes located? | Avoids drilling conflict |
| Can the holes be adjusted? | Fits special wall condition |
| How many holes are needed? | Supports the sign weight |
| Is a mounting template included? | Helps align multi-piece signs |
| Are screws and anchors included? | Avoids missing parts |
If your wall has restrictions, tell the factory early.
Examples:
- avoid tile seams
- avoid glass areas
- avoid hidden pipes
- avoid decorative panels
- avoid electrical lines
- fit between shelves
- align with mirrors or counters
For channel letters or multi-part logos, a mounting template can save a lot of time on site.
Accessories
Confirm the accessory list item by item before paying.
Do not only ask whether “installation parts” are included.
A complete accessory kit may include:
| Accessory | When It Matters |
|---|---|
| Screws | Wall-mounted signs |
| Anchors | Drywall, brick, concrete |
| Spacers / standoffs | Floating effect |
| Hanging chain | Temporary or lightweight signs |
| Brackets | Larger or special signs |
| Power supply | All illuminated signs |
| Dimmer / remote | Indoor mood lighting |
| Mounting template | Channel letters, multi-part signs |
| Installation guide | Non-professional installation |
| Spare small parts | Commercial projects |
Ask the factory to pack accessories separately and label them clearly. Metal parts should not move freely inside the box and scratch the sign surface.
Installer Needs
Before paying, decide who will install the sign.
Different installers need different support:
| Installer | What They May Need |
|---|---|
| Store staff | Simple guide, labeled accessories |
| Event team | Quick setup instructions |
| Electrician | Wiring and power details |
| Sign installer | Template, hole positions, layout |
| Contractor | Wall fixing and power plan |
| Chain-store team | Repeatable installation document |
Ask:
“What information will my installer receive before the sign arrives?”
This is better than asking whether the sign is “easy to install.” Easy for whom? A trained sign installer, a restaurant owner, and an event worker do not have the same tools or experience.
Site Timing
Installation timing should be planned before payment, especially for commercial openings and events.
A practical timeline:
| Stage | What to Confirm |
|---|---|
| Before payment | Mounting method, wall photo, wire exit, accessories |
| Before production | Approval drawing with holes and wiring |
| Before shipping | Lighting video and packing photos |
| After arrival | Accessory check and surface inspection |
| Before installation | Installer reviews drawing and wall condition |
Do not plan only around production time.
Also leave time for:
- shipping
- customs
- local delivery
- unpacking
- inspection
- installer scheduling
- possible replacement parts
A custom LED sign should not arrive the night before opening with unclear installation details.
What Does the Quote Include?
A good custom LED sign quote should clearly show the sign body, size, material, lighting style, color, power supply, accessories, packing, shipping terms, sample cost, lead time, and warranty support. A low price is not helpful if important items are missing.
Many quote problems happen because two factories are not quoting the same thing.
One quote may include:
- power supply
- dimmer
- accessories
- strong packing
- air freight
Another quote may only include:
- sign body
- basic packing
- EXW factory price
If you only compare the final number, you may choose the wrong offer.
Before paying, ask what is included and what is excluded.
| Quote Item | Should Be Clear? | Why |
|---|---|---|
| Final size | Yes | Controls material and price |
| Material | Yes | Affects durability and appearance |
| Lighting style | Yes | Changes production cost |
| Power supply | Yes | Avoids hidden accessory cost |
| Dimmer / remote | If needed | Important for indoor signs |
| Mounting accessories | Yes | Affects installation |
| Packing | Yes | Affects shipping safety |
| Shipping terms | Yes | Avoids cost confusion |
| Lead time | Yes | Helps project planning |
| Warranty | Yes | Clarifies support |
Included Items
Ask the factory to list included items clearly.
A useful quote should include:
- sign body
- final size
- material
- lighting style
- production drawing
- power supply
- plug type
- dimmer or remote, if included
- mounting accessories
- installation guide
- packing method
- shipping method
- lead time
- warranty terms
Before paying, ask:
| Question | Why It Matters |
|---|---|
| Is the power supply included? | Avoids missing adapter |
| Are mounting accessories included? | Avoids installation delay |
| Is dimmer included or optional? | Avoids hidden cost |
| Is packing included? | Protects during shipping |
| Is shipping included? | Makes quote comparison fair |
| What is not included? | Avoids surprise charges |
Price Factors
Price changes for practical reasons.
Common factors include:
| Factor | Why It Changes Price |
|---|---|
| Size | More material and LEDs |
| Material | Acrylic, metal, silicone, stainless steel differ |
| Lighting style | Front-lit, back-lit, dual-lit cost differently |
| Logo complexity | More cutting, bending, wiring |
| Waterproof structure | Adds sealing and protection |
| Backing type | Acrylic board, raceway, metal panel differ |
| Quantity | Affects production efficiency |
| Packing | Large signs need stronger protection |
| Shipping | Size and weight affect freight |
Instead of only asking:
“Can you make it cheaper?”
Ask:
“Which specification is driving the cost?”
Then you can adjust size, material, backing, quantity, or shipping method with a clear reason.
Sampling Need
Sampling is useful when color, material, or brand consistency matters.
For a one-piece sign, the finished sign may act as the sample. For repeat orders or chain-store projects, a pre-production sample can prevent expensive mistakes.
Ask:
| Question | Why It Matters |
|---|---|
| Is a sample recommended? | Reduces risk for repeat projects |
| How long does sampling take? | Helps schedule planning |
| What will the sample confirm? | Color, size, material, lighting |
| Will photos or videos be sent? | Allows remote approval |
| Is sample cost refundable? | Affects budget |
| What changes are allowed after sample? | Avoids later disputes |
For regular models, Iduoduo’s sampling time is often about 5–7 days. If the project needs molds or special processes, sampling may take about 7–15 days.
Lead Time
Before paying, separate sample time, production time, packing time, and shipping time.
Ask the factory to confirm:
| Time Item | What to Ask |
|---|---|
| Design confirmation | How long before drawing approval? |
| Sampling | Is a sample needed? |
| Production | How long after approval? |
| QC check | When will photos/videos be sent? |
| Packing | How long before pickup? |
| Shipping | Air, sea, express, or door-to-door? |
| Delivery buffer | What if the project has a fixed opening date? |
Do not plan a store opening only based on production days. Shipping and local installation can take extra time.
How Are Quality and Shipping Checked?

Before paying for production, confirm what the factory will check before shipment, what proof you will receive, how the sign will be packed, and what happens if the sign is damaged in transit. Do not only ask, “Do you have QC?” Ask for lighting videos, close-up photos, accessory photos, packing photos, and a clear damage support process.
Quality and shipping checks should be agreed before production starts, not after the sign is already finished. A custom LED sign may pass a quick lighting test but still have problems that affect real use: scratched acrylic, uneven light, loose wiring, wrong wire exit, missing screws, weak carton, or accessories packed against the sign surface.
Before paying, ask the factory to explain the exact inspection and shipping proof they will provide. This is especially important for overseas orders, because once the sign leaves the factory, every mistake becomes slower and more expensive to fix.
| Check Item | What to Ask Before Paying | Proof to Request Before Shipping |
|---|---|---|
| Lighting | Will the finished sign be fully tested? | Full lighting video |
| Brightness | Are there dark spots or uneven areas? | Front photo and close-up video |
| Wiring | Is wire exit in approved position? | Back or cable exit photo |
| Surface | Are surfaces clean? | Close-up photos |
| Size | Does it match approved drawing? | Measurement photo if needed |
| Power supply | Is correct adapter included? | Power supply label photo |
| Accessories | Are screws, spacers, dimmer included? | Accessory layout photo |
| Packing | Is sign protected for shipping? | Packing process photos |
| Carton | Is shipping mark correct? | Carton label photo |
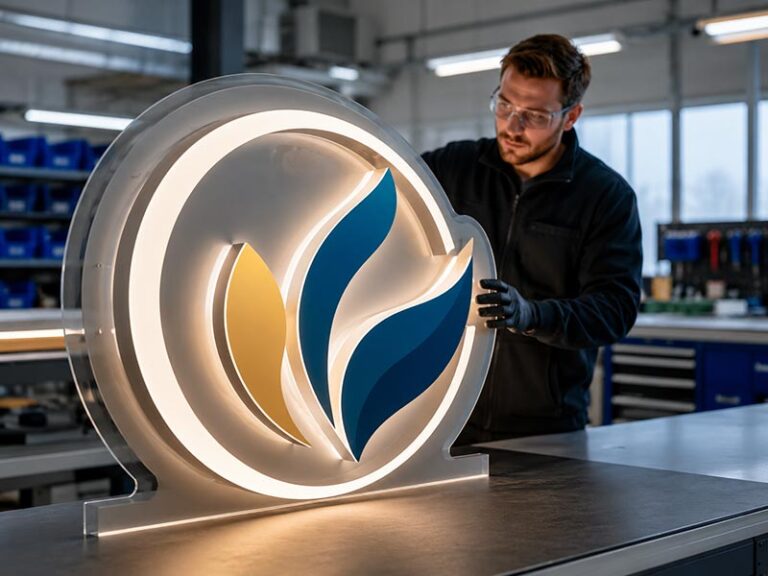
Lighting Test
Before paying, ask how the finished sign will be tested and what video you will receive before shipment.
A lighting test should show:
- full sign turned on
- whole sign from the front
- all letters or logo parts
- same power supply used for shipment
- no flicker
- no dark spots
- stable brightness
For different sign types, check different details:
| Sign Type | What to Check in Video |
|---|---|
| LED neon sign | Even tube light, no dark bends, no flicker |
| Acrylic LED logo sign | Even face light, no obvious LED points |
| Channel letters | Every letter lit correctly |
| Back-lit letters | Halo effect and wall distance |
| Dual-lit signs | Front and back light both working |
| Multi-piece sign | Each piece tested separately |
Ask for both:
- lights-on video
- lights-off photo
The sign must look right when turned on and off.
Detail Check
Before production starts, agree on visible details that will be checked before shipment.
Ask the factory to check the final sign against the approved drawing.
| Detail | What Can Go Wrong | Proof to Request |
|---|---|---|
| Logo shape | Letters slightly changed | Front photo |
| Size | Width or height wrong | Measurement photo |
| Acrylic surface | Scratches, dust, glue marks | Close-up photo |
| Silicone tube | Dirty surface, uneven bends | Close-up photo |
| Metal finish | Dents, rough paint | Side/corner photo |
| Wire exit | Wrong side | Back/side photo |
| Mounting holes | Missing or wrong spacing | Backing photo |
| Color | Wrong tube or paint color | Close-up under normal light |
| Accessories | Missing parts | Accessory layout photo |
Do not accept only “QC passed.” Ask what was checked.
Power and Accessories
Power supply and accessories should be checked before the carton is sealed.
Many installation delays happen because the sign arrives without the right adapter, dimmer, screws, spacers, remote, or hanging kit.
Ask for an accessory photo showing:
- power supply
- plug
- dimmer
- remote
- screws
- anchors
- spacers
- hanging chain
- brackets
- installation guide
- special mounting parts
For power supply, ask for a label photo if the project is important.
| Accessory Detail | Why It Matters |
|---|---|
| Plug type | Must match destination market |
| Power label | Confirms voltage and output |
| Dimmer | Controls brightness |
| Remote | Daily convenience |
| Screws and anchors | Installation readiness |
| Spacers | Correct wall distance |
| Guide | Helps installer or store team |
| Labels | Avoids mixing parts for multiple signs |
For repeat orders or chain-store projects, ask the factory to save the accessory specification.
Packing Method
Packing should match the sign size, material, and shipping method.
Before paying, ask how the sign will be packed.
Good packing may include:
- surface protective film
- foam support
- corner protection
- inner wrapping
- accessory separation
- thick carton
- reinforced outer packing
- wooden crate for large or fragile signs
Packing risks by sign type:
| Sign Type | Packing Risk | What to Confirm |
|---|---|---|
| LED neon sign | Acrylic backing cracks, tube scratches | Foam support, fixed accessories |
| Acrylic LED logo sign | Surface scratches, broken corners | Protective film, corner foam |
| Channel letters | Dents, paint scratches | Separate wrapping |
| Large sign | Bending, pressure damage | Reinforced box or wooden crate |
| Multi-piece sign | Missing parts | Labels by piece |
| Export shipment | Rough handling | Strong outer packing |
The most important point: hard accessories should not move freely inside the package. Screws, adapters, metal brackets, and power supplies can scratch acrylic or damage silicone tubes.
Shipping Proof
Before the sign leaves the factory, ask what shipping proof will be provided.
At minimum, you should receive:
- packing photos
- carton photos
- tracking number
- shipping method
- carton size
- gross weight
- package quantity
- delivery contact information, if available
Ask before paying:
| Question | Why It Matters |
|---|---|
| Is shipping included in this quote? | Avoids cost confusion |
| Which shipping method will be used? | Affects delivery time |
| How many cartons or crates? | Helps receiving plan |
| What are carton dimensions and weight? | Helps freight and storage |
| Will I receive packing photos? | Confirms protection |
| Will carton label show order info? | Reduces receiving mistakes |
| Who handles customs or import charges? | Avoids delivery delay |
For urgent projects, do not plan only around production time. Include packing, pickup, transit, customs, local delivery, unpacking, inspection, and installation.
Damage Support
Before paying, ask what happens if the sign is damaged during shipping.
Ask the factory:
- What should I do before opening the package?
- What photos should I take if the carton is damaged?
- How soon should I report the problem?
- Which parts can be replaced quickly?
- Can you help identify whether the issue is shipping damage, wiring, power supply, or production defect?
- How is warranty support handled?
Useful damage proof includes:
| Proof | Why It Helps |
|---|---|
| Outer carton photo | Shows shipping damage |
| Unpacking video | Shows condition on arrival |
| Damaged part close-up | Helps identify replacement |
| Packing material photo | Shows protection condition |
| Lighting test video | Shows electrical issue |
| Power supply photo | Helps check compatibility |
For commercial projects, time is often more expensive than the damaged part. If a sign is needed for a store opening, event booth, restaurant launch, or brand display, you need to know whether the factory can support a fast solution.
Final Approval Before Shipment
Before paying, agree on the approval step before shipment.
A good pre-shipment approval set should include:
- finished sign photo with lights off
- finished sign video with lights on
- close-up photos of key details
- backside or wiring photo
- power supply photo
- accessory photo
- packing photo
- carton or crate photo
- tracking information after shipment
The best question is not:
“Is the quality good?”
A better question is:
“Before you ship, what photos and videos will you send me so I can confirm the sign, power supply, accessories, and packing?”
That question turns quality control from a vague promise into something you can actually check.
Final Thoughts: Ask Better Questions Before You Order
A custom LED sign is not just a decoration. It is a visible part of your storefront, reception area, bar wall, salon interior, retail display, event booth, or brand rollout. The final result depends on many small decisions made before production starts. If you only ask for a price, you may miss the details that decide whether the sign fits, lights correctly, installs cleanly, and arrives safely.
The best approach is simple: ask practical questions early. Confirm the sign purpose, design file, size, material, power supply, installation method, quote details, quality checks, and shipping protection. A reliable factory should welcome these questions because they make the project clearer.
Iduoduo supports custom LED signs, LED neon signs, acrylic LED logo signs, channel letters, light boxes, and commercial signage projects for global orders. With 18+ years of manufacturing experience, 200+ employees, 18 production lines, engineering support, design support, and QC checking, Iduoduo can help turn your logo, wall size, brand color, and installation needs into a sign ready for real use.