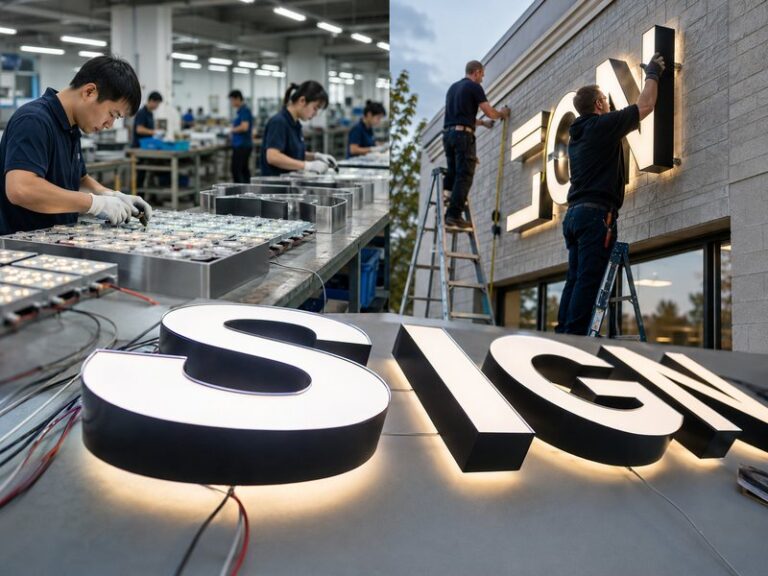

A trim cap may look like a small finishing detail around the edge of a channel letter, but experienced sign fabricators know that this narrow profile sits at one of the most important interfaces in the entire letter. It has to follow the exact shape of the acrylic or polycarbonate face, stay clean around curves and corners, bond securely without damaging the plastic, and then fit the fabricated metal return closely enough for a finished letter to look intentional rather than assembled from unrelated parts.
Trim caps are applied by fitting a flexible or formed profile around the perimeter of a cut channel letter face, shaping it around curves and corners, bonding it with an adhesive compatible with the face and trim materials, allowing the joint to fixture or cure, and then fitting the completed face assembly over the metal return. Mechanical fasteners commonly keep the removable face assembly secured to the letter body.
The interesting part begins when the artwork leaves the computer screen. A perfectly smooth script logo can suddenly contain difficult inside radii, narrow strokes, small counters, and seams that have nowhere obvious to hide. A face that is only slightly different from the return can force the trim out of shape. A beautiful sample can also become troublesome months later if the front cannot be removed for LED maintenance. Understanding trim-cap application therefore means understanding the complete relationship among face geometry, trim profile, adhesive, return fabrication, service access, and final inspection.
What Is a Trim Cap on a Channel Letter?

A trim cap is the perimeter profile attached around an acrylic or polycarbonate channel letter face. It creates the visible edge around the illuminated surface, protects the cut plastic perimeter, and helps form a removable face assembly that fits over the metal return. Traditional trim-cap channel letters therefore have a noticeable border around the illuminated face, unlike trimless constructions designed to reduce or eliminate that visible perimeter.
What Parts Does a Trim Cap Connect?
A front-lit channel letter is a coordinated assembly rather than a metal shell with an acrylic sheet placed on top. Its main elements normally include the translucent face, metal return, back, LED modules, wiring, mounting hardware, and weather-management details. The trim cap sits between two of these critical components: the face and the return. iduoduo’s documented front-lit construction likewise uses translucent acrylic or PC faces together with aluminum or stainless-steel returns and internal LEDs.
During fabrication, the trim is generally attached around the edge of the routed face first. Once this bond has been completed, the face and trim can be handled as one front assembly. That assembly then fits over the open front of the letter body. The return forms the sidewall and establishes the depth of the channel letter, while the trimmed face closes the front and provides the primary illuminated surface.
The relationship sounds simple, but three independently fabricated dimensions need to agree: the routed face outline, the formed return contour, and the internal geometry of the selected trim. If the face is produced from one drawing revision while the return is bent from another, flexible trim does not magically make the difference disappear. Forcing the parts together can bow the face, distort a corner, create a visible gap, or make later service difficult.
This is also the reason experienced factories treat face-to-return fit as an engineering checkpoint rather than leaving it to the assembly operator. The return needs to be accurate before the trim is installed, and the face needs to be cut from controlled production data. Good trim work begins long before adhesive reaches the acrylic edge.
What Does the Trim Cap Do?
The trim cap performs several functions at once. Visually, it frames the illuminated face and creates a clean transition between the translucent front and the opaque sidewall. Mechanically, it gives the flat plastic face a perimeter structure that can fit over the return and be retained from the side. It also protects the cut face edge during normal handling, assembly, servicing, packing, and transportation.
One important advantage is serviceability. LEDs, connectors, wiring, and other internal components may eventually require inspection. If the front assembly is designed to be removable, a technician can access the interior without destroying the whole letter. The face can also be replaced after accidental damage while the metal return and much of the internal structure remain usable.
The trim should not be treated as a way to hide inaccurate metal forming. When a return contains flats in a curve, irregular corners, or dimensional variation, the trim has to absorb stress that it was never intended to correct. The result may look acceptable immediately after assembly but can become more obvious after temperature changes, transportation, or repeated face removal.
A professional fabrication process therefore asks whether the face, trim, and return work together as a system. The quality of the trim joint matters, but so do the metal contour, edge position, fastening method, and planned maintenance route. Those relationships are what turn a narrow plastic profile into a meaningful structural component.
How Does Trim Cap Affect Appearance?
Trim cap is visible when the sign is unlit and usually remains visible after illumination, so its color and width become part of the brand presentation. A black trim around white acrylic produces a stronger graphic outline than white trim around the same face. Matching the trim to the return can make the side and front edge feel more continuous, while a contrasting color can deliberately emphasize the shape.
Commercial trim-cap families are available in several profile widths, with approximately 3/4 inch, 1 inch, and 2 inches, or roughly 19 mm, 25 mm, and 51 mm, appearing in established product ranges. These figures are common product options rather than mandatory industry standards. The appropriate width depends on the letter size, stroke width, contour complexity, attachment method, and desired visual border.
A border that feels balanced on a large supermarket wordmark may dominate a small script logo. Narrow letters are especially sensitive because the trim consumes part of the visible front perimeter and can make the illuminated area appear smaller. The result should therefore be judged from the expected viewing distance rather than only from a close-up photograph on the fabrication table.
Color deserves similar attention. iduoduo’s Channel Letter documentation treats trim-cap color as something that can be coordinated with the face, return, brand palette, and storefront appearance. For multi-location programs, recording the approved trim color and profile is particularly useful because small border differences become easier to notice when multiple stores are compared.
Which Materials Are Used for Trim Cap Assembly?

Trim-cap assemblies normally combine a translucent acrylic or polycarbonate face, a flexible plastic or formed metal perimeter profile, a compatible adhesive system, and an aluminum or stainless-steel return. The materials should be evaluated together because face transmission, trim flexibility, adhesive chemistry, outdoor exposure, thermal movement, letter geometry, and service requirements all affect the performance of the completed front assembly.
Which Face Materials Work?
Acrylic is widely used for front-lit channel letter faces because it offers a clean appearance, predictable fabrication, useful light transmission, and a broad range of translucent colors. Polycarbonate is another established option and may be selected where impact resistance or a particular project specification makes it preferable. Both materials can work successfully with trim-cap systems when the trim and adhesive are intended for the selected substrate.
The face specification needs to go beyond the words “white acrylic” or “polycarbonate.” Thickness, transmitted color, diffusion, edge condition, thermal movement, impact exposure, and outdoor aging can all influence the finished letter. Two white sheets that look nearly identical before illumination can transmit LED light differently enough to create noticeable differences when installed next to each other.
Edge quality becomes especially important because the trim is bonded around that perimeter. Routing debris, chips, cracks, excessive heat marks, or contamination can interfere with fit and adhesion. Small internal corners also deserve close inspection because stress is often concentrated in those areas. A clean front surface does not automatically mean that the edge is ready for bonding.
iduoduo’s acrylic processing controls cover thickness, color, light transmission, diffusion, edge condition, scratching, cracking, thermal expansion, and outdoor yellowing risk. That broader approach is useful for repeat programs because the approved face material can be recorded together with the trim profile and illuminated appearance instead of relying only on a generic material name.
Which Trim Cap Profiles Are Common?
Flexible sign-grade plastic trim remains widely used because it can follow a broad range of straight strokes, curves, and irregular letter shapes. Some established profiles include reinforcement to improve shape retention, while formed aluminum trim can be used where a more rigid edge or architectural finish is preferred. Neither option is automatically superior; the correct profile depends on the geometry and appearance of the specific letter.
The visible width of the trim deserves particular attention. Common commercial product families include profiles around 19 mm, 25 mm, and 51 mm. Wider trim provides a more substantial border and can suit larger letters, while a narrow profile often appears more proportionate on smaller letters. Extremely narrow strokes, tight counters, and highly detailed logos may still be poor candidates for conventional trim regardless of the nominal profile width.
| Assembly Element | Common Options | Main Selection Factors |
| Face | Acrylic, polycarbonate | Transmission, diffusion, impact, edge quality, outdoor use |
| Flexible trim | Sign-grade plastic profile | Curves, color, forming behavior, adhesive compatibility |
| Rigid trim | Formed aluminum | Finish, rigidity, forming precision, architectural appearance |
| Common profile widths | About 19 mm, 25 mm, 51 mm | Letter scale, visible border, attachment area |
| Return | Aluminum, stainless steel | Depth, weight, corrosion resistance, surface finish |
The profile should also be considered against the actual logo. A wide block letter and a thin fashion wordmark do not need the same visual treatment. Selecting trim only after the face has already been routed can force the factory to accept a border that is technically possible but visually too heavy.
For branded rollouts, the profile width, manufacturer or specification, and color should be retained in the production record. A later substitution may look minor when viewed as a loose strip of material but become much more noticeable after dozens of letters are installed across several locations.
Which Adhesives Are Used?
Adhesive selection should begin with the exact materials being joined rather than with a generic request for the “strongest glue.” Acrylic, polycarbonate, PVC-based trim materials, reinforced profiles, and metal retainers do not necessarily respond the same way to one adhesive chemistry. A system that bonds one substrate pair successfully may create poor adhesion, visible residue, crazing, discoloration, or brittleness on another.
Trim-cap fabrication can use solvent-type bonding systems, reactive adhesives, pressure-assisted systems, and more recent UV-curing products, depending on the selected materials and production method. The useful numbers in an adhesive data sheet are product-specific. Working time, fixture time, full cure, application temperature, viscosity, gap tolerance, and environmental resistance should not be copied from a different adhesive simply because both products are used for channel letters.
Fast curing can improve production efficiency, but speed should never replace compatibility. A bond that becomes firm in seconds is not valuable if it damages the acrylic or loses performance under outdoor thermal movement. Similarly, applying an excessive amount of adhesive does not necessarily create a stronger joint. Too much material can leave visible residue, extend cure behavior, or create uneven contact around the face.
For repeat production, recording the approved adhesive system is a sensible control. If a sample is approved using one face, one trim formulation, and one adhesive, changing only the adhesive for the production run can introduce a new variable that is invisible on the drawing. Material records help keep the sample and later orders connected to the same manufacturing logic.
How Are Trim Caps Applied to Channel Letter Faces?

Trim caps are applied through a controlled sequence that begins with an accurately cut and cleaned face. The profile is dry-fitted, formed progressively around the perimeter, held closely against the plastic edge, bonded with a compatible adhesive, and allowed to reach the required fixture or cure condition before final assembly. Accurate geometry and surface preparation are more important than trying to correct large fit problems during bonding.
How Is the Acrylic Face Prepared?
The process begins with the approved production file. The face should be routed or cut from the same controlled geometry used to develop the metal return. This matters because a trim cap follows the plastic edge very closely. If the acrylic outline and return contour originate from different revisions, even a flexible trim profile may be forced to absorb a dimensional disagreement that should have been eliminated earlier.
After cutting, the perimeter should be checked for chips, rough routing marks, melted areas, cracks, and debris. The bonding zone should also be free of dust, oil, fingerprints, release materials, and other contamination. Protective masking may remain on non-bonding areas where appropriate, but it should not interfere with the joint between the face and trim.
Small counters and inside corners deserve particular attention. A narrow internal feature may look correct when viewed from the front but give the trim too little room to form smoothly. In those cases, changing the radius, increasing the letter size, or selecting a different face-retention system can be more reliable than forcing the trim to reproduce an impractical vector shape.
The face and return do not necessarily need to be completely assembled at this stage, but their geometry should already be compatible. iduoduo’s Channel Letter engineering criteria identify accurate face-to-shell fit as a central manufacturing concern along with stable forming, illumination, weather protection, and mounting preparation. This helps keep trim installation from becoming a last-minute correction process.
How Is the Trim Formed and Bonded?
Once the face has been inspected, the trim is normally worked progressively around the perimeter. Straight runs are relatively simple, while outside curves, inside radii, pointed corners, and abrupt direction changes require more control. The operator needs to keep the profile seated against the edge without stretching it excessively or allowing it to twist away from the face plane.
Dry fitting before final bonding is valuable because it reveals difficult areas while the trim can still be repositioned. The fabricator can identify the intended seam location, determine where temporary holding pressure is needed, and confirm that the profile follows the letter without obvious buckling. Adhesive is then introduced according to the selected bonding system while the trim remains correctly positioned.
A practical sequence is:
- Cut the face from the approved production geometry.
- Inspect and clean the full perimeter.
- Dry-fit the trim around the face.
- Identify tight radii, corners, and the seam location.
- Form the profile gradually without stretching it unevenly.
- Hold the trim firmly against the face edge.
- Apply the approved adhesive system.
- Maintain the required pressure during fixture or cure.
- Inspect the finished face before installing it on the return.
The key principle is to establish correct shape before relying on adhesive. Glue should secure an accurately fitted joint rather than force two poorly matched parts to remain together. When adhesive becomes the main tool for correcting shape, visual variation and long-term stress usually increase.
Production jigs, rollers, temporary fixtures, or pressure-sensitive positioning features can improve repeatability depending on the trim system. The specific equipment is less important than keeping contact pressure, trim position, and face geometry consistent around the entire perimeter.
How Is the Bond Cured?
Curing is a manufacturing stage, not dead time between fabrication steps. The completed joint needs to remain sufficiently stable before the operator removes fixtures, stacks faces, drills fastening locations, or forces the assembly over a return. Moving the profile too early can create a seam opening, local lifting, or subtle misalignment that becomes much harder to correct after the adhesive has continued to cure.
There is no responsible universal statement that every trim-cap bond needs the same number of minutes or hours. UV-curing systems, solvent-type systems, pressure-assisted adhesives, and reactive structural products use different mechanisms. Temperature, material type, joint geometry, adhesive quantity, and production environment can also change fixture and cure behavior.
| Process Stage | Main Control | Problem Reduced |
| Face cutting | Correct file and clean contour | Face-to-return mismatch |
| Surface preparation | Clean, undamaged bonding edge | Weak or inconsistent adhesion |
| Dry fitting | Curves, corners, seam location | Forced trim and visible distortion |
| Forming | Even seating around perimeter | Waves, lifting, stretched corners |
| Bonding | Correct adhesive and contact | Peeling, residue, crazing |
| Fixture and cure | Product-specific conditions | Joint movement before strength develops |
| Final fitting | Controlled fit over return | Stress, gaps, poor serviceability |
A production schedule should therefore allow the adhesive system to work as specified instead of treating cure time as an inconvenience that can always be shortened. The fastest process is not the one with the shortest theoretical cure; it is the process that produces a stable assembly without rework.
For multi-location or repeat programs, cure control also supports consistency. If one batch is assembled immediately after bonding and another is allowed adequate fixture time, small differences in border position and seam quality can emerge even when the same face and trim materials are used.
How Are Corners, Curves, and Seams Finished?

Corners, curves, and seams are finished by forming the trim gradually so it remains fully seated against the face without stretching, twisting, or pulling the plastic out of plane. Tight radii demand more control than straight sections, while the seam should be positioned where it can be bonded cleanly and remain visually discreet. Accurate face and return geometry makes these difficult areas much easier to reproduce consistently.
How Are Tight Corners Formed?
A tight corner is demanding because the two edges of the trim do not travel the same distance around the bend. The outside edge has to cover a longer path while the inside edge compresses into a shorter one. If the profile is simply pulled hard around the corner, it may kink, lift, flatten the intended radius, or create a border that appears thinner on one side.
Flexible trim products are useful because they can follow curves that would be difficult to reproduce with a rigid retainer, but flexibility still has limits. Very small script letters, narrow counters, sharp internal points, and extremely tight radii may require design adjustment. Preserving every point from the original vector file is not useful if the physical materials cannot reproduce that geometry cleanly at the specified size.
Controlled warming may be appropriate for some trim products and fabrication methods, but temperature should not be treated casually. Uneven or excessive heat can soften the profile too much, stretch the visible surface, distort a corner, or affect the face. The correct approach depends on the particular trim material and its recommended forming procedure.
An experienced engineering review can prevent these problems before production. Increasing the overall logo size, softening an invisible internal radius, or selecting trimless construction may preserve the visual intent more successfully than forcing conventional trim around an impractical corner. The goal is not mathematical loyalty to a tiny drawing detail; it is a finished letter that looks faithful at actual viewing distance.
How Are Curves Kept Smooth?
Smooth curves begin with the metal return rather than with the trim. If the return already contains local flats, inconsistent bends, or an irregular seam, the finished face may look distorted even when the acrylic was routed perfectly. The front assembly follows the body beneath it, so poor metal forming can become visible as a wave or uneven edge after the letter is assembled.
iduoduo’s documented metal-forming controls include bending angles, curve smoothness, corners, seam position, front-to-back fit, structural flatness, and edge treatment. These controls matter directly to trim-cap quality because the face assembly ultimately has to follow that fabricated contour.
During trim forming, the operator should work progressively rather than stretching the profile around a complete curve in one motion. Gradual forming reduces the chance that one section becomes tight while another remains loose. Temporary holding points can also help keep the border width visually consistent while bonding takes place.
Final inspection should include more than a front view. Looking along the letter from a shallow side angle can reveal waves that disappear when viewed straight on. Comparing adjacent letters is also useful because repeated shapes expose variation quickly. A small irregularity in one letter may seem unimportant, but the same inconsistency repeated across a long storefront can change the visual rhythm of the entire wordmark.
Where Is the Seam Placed?
The seam is the point where the ends of a trim run meet, and its position should be decided rather than left to chance. A practical location is usually easy to access, relatively straight, visually discreet, and away from the most difficult radius. The exact choice changes with the letter because an “O,” an “E,” and a flowing script symbol present completely different perimeter geometry.
The seam also needs to remain stable after the completed face is fitted to the return. A joint can appear perfect while lying flat on the workbench yet become visible after the face is pushed over an oversized or uneven letter body. This is another example of trim quality depending on upstream dimensional control rather than on finishing skill alone.
For high-mounted exterior channel letters, the seam does not need to be invisible from a few centimeters away. It should be clean enough that it does not attract attention at the normal viewing distance. Interior retail and hospitality signs can require more careful placement because viewers may stand very close to the letters and see fine perimeter details.
Repeat programs benefit from keeping seam practices consistent where practical. If equivalent letters are produced across multiple batches, placing the seam in the same logical area can reduce visual variation and make later quality comparisons easier. The objective is controlled workmanship rather than a random joint location chosen at the final moment.
How Is the Trim-Capped Face Secured to the Return?

After the trim has been bonded to the face, the completed face assembly is fitted over the metal return and retained using the fastening method specified for that channel letter system. Traditional construction commonly uses side fasteners through the trim or retainer into the return. The adhesive connects trim to face, while the mechanical fasteners keep the removable face assembly attached to the letter body.
How Does the Face Fit the Return?
A properly fabricated face assembly should fit over the return without needing excessive force and without enough looseness to create obvious movement or gaps. The return establishes the depth and outside contour of the letter, while the trim-capped face becomes the front cover. Their dimensions have to complement each other closely enough for the finished perimeter to appear clean.
Channel letter depth varies considerably according to letter size, LED configuration, optical spacing, visual requirements, and construction method. Depths around 3 inches and 5 inches, approximately 76 mm and 127 mm, are familiar in many conventional front-lit systems, but these figures are not universal specifications. Large letters, shallow specialty constructions, narrow strokes, and custom architectural projects may require different dimensions.
Return depth affects more than appearance. It influences the distance between LEDs and the face, space for wiring, potential hot spots, total weight, side visibility, packing volume, and maintenance access. A project should therefore not inherit a 5-inch return simply because that dimension is common on another sign.
Fit also needs to support future servicing. An assembly that is extremely tight during production may become harder to remove after installation, coatings age, and environmental exposure occurs. On the other hand, excessive clearance can produce movement or an uneven visible edge. The useful target is a stable fit that can still be assembled and serviced without overstressing the face or trim.
How Is the Face Secured?
The adhesive bond around the face perimeter and the mechanical connection to the return perform different jobs. The adhesive keeps the trim attached to the acrylic or polycarbonate face. Once this front assembly has been completed, mechanical fasteners commonly pass through the side of the trim or retainer into the return to hold the front on the letter body.
This distinction becomes useful during troubleshooting. If the trim is separating from the acrylic, adding another screw into the return does not repair the failed trim-to-face bond. If the face is moving because a fastener is missing or loose, the adhesive between trim and acrylic may still be perfectly sound. Understanding the two joints helps technicians identify the actual problem instead of treating every loose face as the same failure.
Fastener quantity and spacing should follow the engineered construction rather than being copied blindly from another project. Letter height, face size, return material, trim profile, installation environment, mounting height, and applicable requirements can all influence fastening decisions. A small interior letter and a large exterior storefront letter do not operate under the same conditions.
Consistency also matters visually. Where the side of the letter can be seen, irregular screw positions can make otherwise high-quality fabrication look careless. Controlled production drawings and assembly practices help keep fastener locations logical across an entire wordmark rather than leaving every installer or operator to make independent decisions.
How Is Serviceability Protected?
Traditional trim-cap construction remains useful partly because the front can be removed. LED modules may eventually need inspection, wiring may require troubleshooting, or a face can be damaged by impact while the return remains usable. Designing for access can reduce the amount of product that needs to be replaced during future maintenance.
Serviceability begins during production. Fasteners need to remain accessible, the face should not be forced onto the return, and the letter should not depend on permanent sealing methods that prevent normal removal unless the engineered construction specifically requires them. Internal wiring should also be arranged so that removing the face does not immediately place unnecessary strain on connectors or modules.
Repeat and replacement projects benefit from accurate records. iduoduo’s documented repeat-production information can include final drawings, materials, colors, letter depth, LEDs, power supplies, mounting holes, wire exits, templates, packaging details, and QC records. Those records create a stronger starting point when a replacement face or additional store set is required.
Historical records still need verification. Materials can be discontinued, trim colors can change between suppliers, electrical requirements may differ in another market, or the original façade may have been modified. The value of saved data is not that it eliminates review; it reduces the amount of information that has to be reconstructed from photographs or memory.
How Do Manufacturers Check Trim Cap Quality?

Trim-cap quality is checked as part of the completed channel letter rather than by inspecting the loose trim alone. QC should review perimeter bonding, border consistency, corners, seam quality, face flatness, face-to-return fit, fastener positions, surface condition, color, and serviceability. Illuminated letters should then be checked while powered because edge distortion, shadows, color differences, and assembly issues can become easier to see after lighting.
What Should QC Inspect?
A useful QC process starts before final assembly. The routed face should be checked before trim application, the perimeter should be inspected after bonding, and the completed front should be evaluated after it is fitted to the return. Waiting until the letter reaches the packing station makes many problems more expensive to correct because several later production steps may already depend on the defective component.
| QC Point | Practical Inspection | Main Risk Reduced |
| Routed face | Correct contour, clean edge, no cracking | Poor fit and weak perimeter |
| Trim bond | Continuous seating with no lifted areas | Separation during handling or service |
| Corners | Consistent radius and border width | Distorted letter shape |
| Seam | Clean and stable meeting point | Visible gap or joint opening |
| Face flatness | No bowing or concentrated stress | Uneven appearance |
| Return fit | Assembly without excessive force | Cracking and difficult maintenance |
| Fasteners | Correct location and secure retention | Loose face assembly |
| Color | Match approved trim and face | Brand inconsistency |
| Illumination | Even appearance after powering | Unexpected shadows or dark zones |
| Packaging | No concentrated pressure on face or trim | Transit deformation |
Inspection should include different viewing angles. Looking only from directly in front can miss an uneven edge, wavy trim, or a face that does not sit consistently on the return. A shallow side view is particularly useful because it makes variations in the trim line and fastener position easier to see.
The full letter set should also be reviewed as a group. A small difference in border width may seem minor on one character but become very visible when ten or twenty letters are installed in a straight line. Brand projects depend on repetition, which makes consistency just as important as the quality of an individual letter.
iduoduo’s documented Channel Letter criteria include stable letter forming, accurate face and shell fit, daytime appearance, illumination quality, outdoor protection, installation interfaces, and repeat consistency. These checkpoints place trim-cap quality inside the broader performance of the finished sign.
How Is Outdoor Durability Considered?
Outdoor durability comes from the whole assembly. The acrylic or polycarbonate face, trim profile, adhesive, metal return, coating, fasteners, wire entries, back, LEDs, and installation details all respond differently to sunlight, heat, cold, moisture, and repeated temperature cycles. A weather-resistant trim material cannot compensate for an unsuitable adhesive or poorly protected electrical connection.
Thermal movement is especially relevant because plastic and metal do not expand in exactly the same way. The face and trim need enough structural compatibility to handle normal environmental change without concentrating stress in corners or seams. Overly tight fit can add unnecessary stress, while uncontrolled gaps can compromise appearance and make the front assembly feel less stable.
Outdoor evaluation should therefore consider UV exposure, material color stability, face expansion, trim formulation, adhesive suitability, metal corrosion resistance, drainage, electrical protection, fastener condition, and the actual installation environment. Coastal exposure, high heat, freezing winters, sheltered indoor malls, and shaded storefronts place very different demands on the same basic letter construction.
For illuminated products, iduoduo performs a 100% lighting inspection followed by a 72-hour pre-shipment test that checks LED and power stability, flicker, early faults, color differences, dark areas, abnormal temperature rise, and wiring connections. The 72-hour procedure is an iduoduo production control rather than a universal trim-cap standard, but it illustrates the value of assessing the finished illuminated product instead of judging quality only by the face perimeter.
When Is Trimless Construction Better?
Trim cap remains a practical solution for many front-lit storefront letters, particularly when a visible border is acceptable and removable service access is valuable. Trimless construction becomes more attractive when the design requires a cleaner illuminated edge, less visible front framing, or a more contemporary architectural appearance. The choice is therefore visual and technical rather than simply a question of newer versus older construction.
Geometry has a large influence. A broad block-letter logo may work extremely well with conventional trim cap and gain little from a more complicated front-retention system. A refined fashion wordmark, luxury hospitality identity, or narrow illuminated symbol may benefit more from reducing the visible border. Extremely complex forms can also make one construction method easier to reproduce than another.
Maintenance needs should be considered at the same time. Some trimless systems use specialized extrusions, routed interfaces, clips, adhesives, or other retention methods that change how the face is removed. A beautiful edge is only one part of the decision if access to LEDs becomes unnecessarily difficult after the sign has been installed several meters above the ground.
iduoduo’s documented Channel Letter range includes both Trim Cap and Trimless Channel Letters. That allows the structure to be selected according to the logo, viewing distance, installation environment, service plan, appearance, and project budget rather than forcing every design into a single construction method.
A well-made traditional trim-cap letter can still look extremely clean when the return is accurate, the profile is proportionate, the seam is controlled, the color is coordinated, and the illumination is even. Likewise, a trimless letter does not automatically become a premium product if the face geometry, joints, lighting, or service method have been poorly engineered.
Conclusion
Trim-cap application is a good example of how a seemingly small fabrication detail can reveal the quality of an entire channel letter manufacturing process. The trim itself is only one component. Its final performance depends on accurate face cutting, controlled metal forming, suitable materials, compatible adhesive, careful curve and seam work, correct face-to-return fit, accessible fastening, and inspection of the completed illuminated letter.
For sign companies, brands, designers, contractors, and multi-location project teams, the most useful conversation with a manufacturer therefore starts before the trim is applied. Supplying the approved logo file, intended dimensions, installation environment, face and return colors, lighting requirements, mounting conditions, and expected appearance gives the engineering team enough information to decide whether traditional trim cap, another retainer, or trimless construction is the more suitable solution. When these decisions are made early, production becomes more predictable and the finished letter is easier to install, maintain, reproduce, and replace.
Frequently Asked Questions
What Is the Purpose of Trim Cap on Channel Letters?
Trim cap creates a finished perimeter around the acrylic or polycarbonate face and helps convert that flat face into an assembly that can be fitted to the metal return. It also protects the cut plastic edge and becomes part of the visible design. In conventional serviceable construction, the trimmed face can be retained mechanically on the return so technicians can later remove the front to inspect LEDs, wiring, or other internal components without rebuilding the entire letter.
Is Trim Cap Glued to the Acrylic Face?
Yes, conventional trim-cap construction normally uses a compatible bonding system to attach the trim profile to the perimeter of the acrylic or polycarbonate face. The exact adhesive depends on the materials involved and the trim manufacturer’s requirements. The bonded trim and face then become one front assembly. Mechanical fasteners used later to attach that assembly to the return perform a different job, so the adhesive joint and face-retention fasteners should not be treated as interchangeable connections.
Can Trim Cap Be Used With Polycarbonate Faces?
Polycarbonate can be used with trim-cap systems when the selected trim and adhesive are compatible with polycarbonate. Material compatibility should always be verified because an adhesive that performs well with acrylic may behave differently with another plastic formulation. Polycarbonate may be selected for impact-related requirements, but the project still needs to consider light transmission, face thickness, thermal movement, edge condition, illuminated appearance, and the way the completed face fits the return.
What Sizes of Trim Cap Are Common?
Commercial trim-cap product families commonly include widths around 3/4 inch, 1 inch, and 2 inches, approximately 19 mm, 25 mm, and 51 mm, although available sizes vary by manufacturer and profile. Wider trim can look proportionate on large letters but may visually dominate small or narrow characters. The correct size should therefore be selected according to letter height, stroke width, face geometry, fastening requirements, and the amount of visible border acceptable for the brand design.
Can a Trim-Capped Channel Letter Face Be Replaced?
A serviceable trim-cap letter can often accept a replacement face without replacing the complete metal letter body, provided the return remains in suitable condition and the original geometry can be reproduced accurately. Successful replacement depends on matching the face outline, trim profile, trim color, return fit, and fastening arrangement. Saved production drawings and material records are especially useful because relying only on a storefront photograph makes it much harder to reproduce the original face accurately.
What Is the Difference Between Trim Cap and Trimless Channel Letters?
Trim-cap channel letters use a visible perimeter profile around the illuminated face, while trimless constructions are designed to reduce or remove that conventional border. Trim cap offers familiar fabrication and straightforward removable-face construction, whereas trimless systems can create a cleaner illuminated edge but may require different extrusion, routing, attachment, and service methods. Neither method is automatically better; the appropriate choice depends on logo geometry, viewing distance, visual style, maintenance access, production complexity, and project cost.