A pop-up store may operate for a weekend, a month, or a seasonal campaign, but its sign still has to perform like permanent retail signage. It must attract attention, communicate the brand quickly, fit a temporary space, and survive transportation without creating a difficult installation job. A sign that looks impressive in a product photo can become a problem when it arrives too heavy, needs wall drilling, blocks a walkway, or requires an electrical outlet that the venue cannot provide.
The best portable LED signs for pop-up stores are LED neon logo signs for brand visibility, slim light boxes for graphic campaigns, illuminated countertop signs for small spaces, battery-powered signs for cable-free placement, and digital poster displays for frequently changing content. The right choice depends on what must be displayed, viewing distance, available power, installation limits, transport frequency, and indoor or outdoor use.
The important word is not simply “LED.” It is “portable.” A useful pop-up sign should be easy to carry, quick to assemble, safe around visitors, simple to power, and strong enough to be packed again after the event. Imagine arriving at a shopping mall at 7:00 a.m. with only two hours before opening. The sign that can be unpacked, connected, positioned, and tested in ten minutes is often more valuable than the larger sign that looked better on the original rendering.
What Is a Portable LED Sign?

A portable LED sign is an illuminated sign made for temporary locations, repeated transport, and fast installation. It should be light enough for the available crew to handle, compact enough for the planned vehicle and venue access, and simple enough to assemble without specialist equipment. A portable sign also needs protected wiring, stable support, suitable packaging, and a power system matched to the operating location.
Portability is not determined by product weight alone. A lightweight sign can still be difficult to use when it has a fragile backboard, loose cables, an unstable stand, or packaging designed for only one shipment. A heavier sign may be easier to manage when it has carrying handles, removable feet, numbered connectors, fitted foam, and a clear setup sequence.
What Makes a Sign Portable?
A useful portable sign should move through the complete event cycle without creating extra work:
- It leaves the factory in protective packaging.
- It fits the selected courier, van, elevator, and venue entrance.
- One or two people can carry it safely.
- It can be installed within the available setup period.
- It remains stable during opening hours.
- It can be dismantled without damaging the sign or venue.
- Every part can be packed again for storage or the next event.
For small pop-up stores, a practical one-piece sign is often between 400 and 1,000 mm wide. Signs above approximately 1,200–1,500 mm may become awkward for one person to carry, even when the product itself is not especially heavy. Large logos can be divided into two or more sections, but the split lines should follow natural gaps between letters or graphic elements.
Packed dimensions matter as much as finished dimensions. A 1,400 mm-wide sign may fit the display wall but fail to fit into a passenger car, venue elevator, storage cabinet, or standard courier network. Before approving the size, measure the narrowest doorway, vehicle opening, elevator, stairwell, and storage area involved in the project.
A practical portable sign specification should record both product and package information:
| Item | Useful Planning Information |
|---|---|
| Finished size | Width, height, depth |
| Product weight | Sign, stand, and power parts |
| Packed size | Full carton or case dimensions |
| Gross weight | Product plus foam, carton, and accessories |
| Crew required | One-person or two-person handling |
| Setup time | Target minutes from unpacking to lighting |
| Tools required | None, hand tools, or power tools |
| Transport method | Car, van, courier, air freight, or road case |
How Are Portable Signs Used?
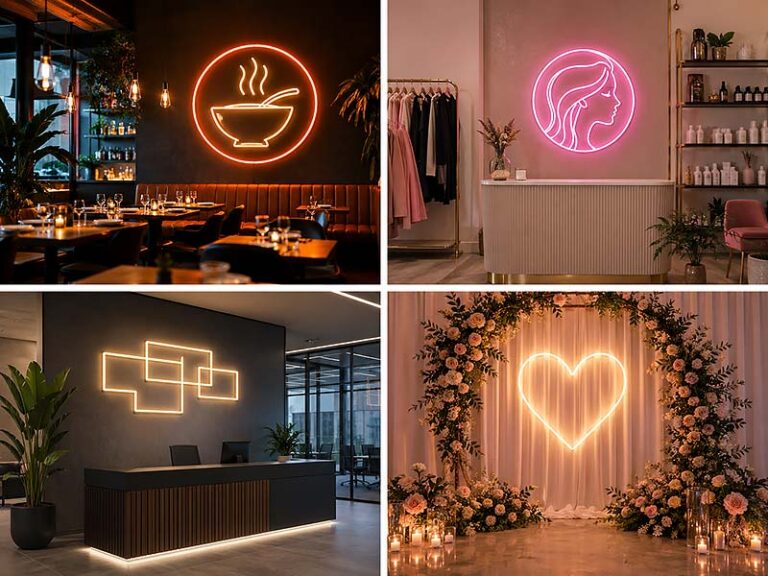
Portable LED signs normally perform one of four jobs in a pop-up store: brand identification, promotional communication, wayfinding, or atmosphere.
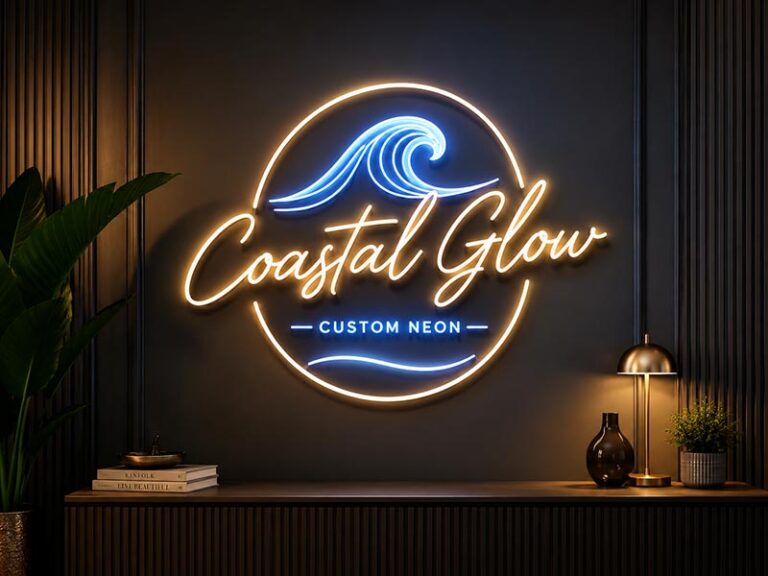
A logo sign behind the counter helps visitors recognize the brand and creates a consistent background for photographs. LED neon is often selected for such a position because the logo can be seen quickly without taking up floor space. A suitable backboard may include hanging holes, stand-off holes, or removable feet so the same sign can work on a wall, table, or temporary frame.
An entrance sign has a different job. It must attract attention from the main pedestrian route and remain stable around passing visitors. A freestanding light box or illuminated panel may work better than a wall-mounted logo. The base should be wide enough to prevent tipping but compact enough to avoid blocking the walkway.
Countertop signs are useful when floor space is limited. Common widths range from about 300 to 700 mm, depending on the counter and viewing distance. They can display a small logo, payment message, product category, promotion, or QR code. Cable routing must be planned carefully because exposed wires near payment equipment or product samples can make the display look unfinished.
Window signs need enough contrast to remain visible through reflections. A sign that looks bright in a dark room may become difficult to read behind sunlit glass. Dimming is useful when the same sign operates in both daytime and evening conditions.
Are Portable Signs Reusable?
Portable signs can be reused across several pop-up stores when the content, structure, connectors, and packaging are planned for repeated handling.
A permanent logo usually offers greater reuse value than a date, price, or campaign phrase. When promotional information changes frequently, a reusable light box frame with replaceable fabric or acrylic graphics may be more economical than manufacturing a complete new sign for every event.
Repeated transport places stress on areas that rarely cause problems in permanent installations. Common failure points include:
- Acrylic corners and narrow letter sections;
- Plug sockets and wire exits;
- Dimmer and controller connections;
- Removable stands and threaded holes;
- Surface finishes rubbing against foam or accessories;
- Power supplies packed against the sign face.
A reusable packing system should assign a fixed position to every component. Power supplies, cables, dimmers, screws, hanging wires, and stands should be packed in separate labeled compartments. The accessory bag should carry the same project or sign number as the main product.
For multi-city campaigns, labels can include:
| Label Information | Purpose |
|---|---|
| Sign number | Matches the sign to its accessories |
| Store or event name | Prevents delivery to the wrong location |
| Input voltage | Avoids incorrect power connection |
| Installation position | Shows where the sign belongs |
| Package count | Confirms all cartons have arrived |
| Repacking photo | Helps staff restore the original protection |
A sign intended for ten events needs stronger mounting points and better packaging than a sign intended for a single weekend. Informing the factory about expected reuse before production allows the structure, cable connections, stand, and case to be designed accordingly.
How Quickly Should It Set Up?
Fast installation is one of the main reasons to choose a portable sign. A realistic setup target should be agreed before production rather than discovered at the venue.
Small tabletop signs should normally require only positioning, connecting the adapter, and switching on. A reasonable target is about 3–5 minutes. Medium wall-hung or freestanding signs may require 10–20 minutes when stands, hanging wires, or separate power parts are involved. Large multi-section signs can take longer and should include numbered parts and a clear connection diagram.
| Sign Format | Typical Crew | Practical Setup Target |
|---|---|---|
| Small countertop sign | 1 person | 3–5 minutes |
| LED neon logo with feet | 1 person | 5–10 minutes |
| Hanging logo sign | 1–2 people | 10–20 minutes |
| Freestanding light box | 2 people | 10–20 minutes |
| Multi-section illuminated sign | 2 people | 20–40 minutes |
These ranges are planning references rather than fixed guarantees. Setup time changes with sign size, venue access, mounting method, and staff experience.
A useful project requirement can be written clearly: “Two retail staff must be able to unpack and install the sign within 15 minutes without drilling or power tools.” Such a requirement gives the design and engineering teams a measurable target.
What Does Portability Include Beyond the Sign?
A portable LED sign is a complete operating system, not only an illuminated front face. The system includes the sign body, support structure, power supply, plug, dimmer or controller, cables, mounting accessories, instructions, and transport packaging.
Power parts should be matched to the destination country. A sign prepared for the United States may require 110V input and a US plug, while projects in the United Kingdom, Europe, or Australia require different plug formats. Cable length should be based on the actual outlet position rather than a standard factory length.
The sign should also remain stable when people touch the counter, brush past the display, or move nearby products. Floor signs require greater attention to base width and center of gravity. Hanging signs need confirmed load points. Outdoor signs require protection not only against water but also wind, dust, sunlight, and uneven ground.
Portability therefore includes five connected factors:
- The product can be carried safely.
- The package can be transported practically.
- The sign can be installed within the available time.
- The power and accessories work at the destination.
- The complete system can be packed and used again.
A sign that meets only one or two of these conditions may be movable, but it is not fully prepared for pop-up retail use.
Which LED Signs Work Best?

LED neon signs usually work best for logos and photo areas. Slim light boxes are more suitable for product graphics, prices, and replaceable campaign artwork. Small illuminated signs fit counters and shelves, while battery-powered signs suit locations without nearby outlets. Digital poster displays are useful when videos, schedules, prices, or promotions need frequent updates. The best option depends on the message, placement, viewing distance, setup time, and transport plan.
Are LED Neon Signs Best for Logos?
LED neon signs are often the strongest choice when the main goal is brand recognition. A logo, symbol, brand name, or short campaign phrase can usually be understood within one or two seconds, making LED neon suitable for checkout backdrops, photo walls, product launch areas, and social media content.
A practical pop-up store neon sign is often between 500 and 1,200 mm wide. Smaller signs may work on counters or display shelves, while signs around 800–1,200 mm are more suitable behind a checkout desk or on a branded wall. Larger designs can be produced, but transport size, acrylic strength, installation time, and package cost increase quickly.
LED neon works best when the artwork has:
- Clear letter shapes;
- Medium or thick strokes;
- Enough space between letters;
- Limited small text;
- A simple one-color or two-color layout;
- No extremely sharp internal corners.
Small script fonts often look attractive on a screen but may be difficult to manufacture cleanly. Narrow strokes can create weak acrylic areas, crowded tubing, or uneven bends. For logos containing several fine details, simplifying the artwork may produce a more recognizable sign than trying to reproduce every line.
Backboard shape also affects portability. A rectangular acrylic board offers better protection and easier packing, but more clear acrylic remains visible around the logo. A cut-to-shape board looks cleaner on the wall, although narrow projections and sharp corners require stronger packing. A contour-cut board with a moderate border often provides a useful balance.
Common installation options include removable tabletop feet, hanging holes, steel wire, stand-offs, hooks, and temporary frames. A sign expected to work in several venues may need two installation methods. For example, the same logo sign may include detachable feet for a counter and hanging holes for a wall or booth frame.
LED neon is less suitable when the sign must show product photographs, long price lists, detailed instructions, or content that changes every week. In such cases, a light box or digital display usually communicates more information with fewer compromises.
Are Light Boxes Good for Counters?
Slim LED light boxes are useful when a pop-up store needs detailed graphics rather than a simple illuminated outline. A light box can display a logo, product photograph, promotional message, QR code, price, launch date, or several brand colors on one illuminated face.
Countertop light boxes commonly range from about 300 to 700 mm wide. Freestanding units may range from approximately 500 to 1,000 mm wide, depending on the available floor area and viewing distance. The final size should leave enough room for payment terminals, products, packaging, and staff movement.
Several graphic-face options are available:
| Graphic Face | Best Use | Main Advantage | Main Limitation |
|---|---|---|---|
| Printed acrylic | Small countertop signs | Sharp detail and rigid surface | Requires scratch protection |
| Printed film | Flat graphic panels | Good color and fine text | Replacement requires careful application |
| Fabric graphic | Larger light boxes | Lightweight and easy to replace | Needs correct tension |
| Push-through acrylic | Logos and short lettering | Premium dimensional appearance | Less suitable for detailed photographs |
| Changeable panel | Seasonal promotions | Reusable frame | Replacement panel must match the frame |
A fabric light box is particularly useful for brands running several campaigns. The aluminum frame, LEDs, power supply, and stand can remain unchanged while the fabric graphic is replaced. Rolled or folded replacement graphics take far less storage space than complete illuminated signs.
Light quality needs careful review. A well-made light box should not show dark corners, visible LED points, bright strips along the edge, or shadows behind the printed graphic. Frame depth, LED spacing, diffuser material, and graphic opacity all influence light uniformity.
For counter use, cable exit should face the nearest outlet and remain hidden behind the display. A cable crossing the checkout area can interfere with staff or create an untidy appearance. Removable feet should keep the sign stable without occupying too much counter depth.
A light box is generally better than LED neon when the message includes more than a few words, detailed brand artwork, product photography, or replaceable promotions.
Do LED Posters Suit Changing Offers?
Digital LED or LCD poster displays are suitable when content changes during the event. A store can show different products, videos, prices, countdowns, schedules, or multilingual messages without replacing a physical graphic panel.
Digital posters are most useful for:
- Product launches with several videos;
- Daily or hourly promotion changes;
- Demonstration schedules;
- Interactive brand campaigns;
- Stores offering many product categories;
- Events requiring several languages;
- Pop-ups moving between markets with different content.
A typical vertical digital poster may have a screen size around 43–55 inches. Such units provide strong visual impact but are usually heavier and more fragile than LED neon signs or slim light boxes. Transport often requires a fitted flight case, reinforced carton, or wooden crate. Wheels make movement easier inside a venue but do not reduce shipping weight.
Before selecting a digital poster, confirm:
| Item | Question to Ask |
|---|---|
| Content format | Does it support images, video, sound, or playlists? |
| Content update | USB, Wi-Fi, cloud software, or mobile app? |
| Screen orientation | Portrait, landscape, or both? |
| Brightness | Suitable for an indoor floor or bright shop window? |
| Operating system | Is special software required? |
| Power | Where will the cable run? |
| Storage | Where will the unit remain after closing? |
| Transport | Is a reusable road case needed? |
| Internet | Can content run without a stable connection? |
Digital displays often create more work than expected. Video files need correct dimensions and formats. Staff need to know how to start, stop, or update a playlist. Wi-Fi may be unavailable or restricted inside a mall. Reflections can reduce screen visibility near windows. A screen can also distract from physical products when animated content is too bright or changes too quickly.
For a short campaign using one logo and one fixed offer, a printed light box normally provides a simpler and lower-risk solution. Digital posters become worthwhile when frequent content changes are essential to the store operation, not merely an optional feature.
Are Battery-Powered Signs Worth It?
Battery-powered signs are valuable when the sign must stand away from walls, when floor cables are prohibited, or when the display changes position during opening hours. Common uses include mall entrances, central product tables, outdoor markets, mobile demonstrations, and temporary photo areas.
Battery runtime depends on sign size, LED load, brightness setting, battery capacity, and ambient temperature. Smaller illuminated logo signs may operate for several hours from a compact battery, while high-brightness light boxes and digital displays require much larger battery systems.
A practical battery specification should state:
- Battery capacity;
- Estimated runtime at full brightness;
- Estimated runtime at reduced brightness;
- Charging time;
- Battery weight;
- Battery location;
- Whether the battery can be replaced;
- Whether the sign can operate while charging;
- Number of expected charge cycles;
- Transport restrictions for the battery type.
Quoted runtime should always include the brightness condition. A sign advertised with a 10-hour runtime may achieve that figure only at 40% or 50% brightness. Operating at full brightness can reduce the available time considerably.
For a pop-up open eight hours per day, a reasonable plan is to request enough capacity for the full shift plus a safety margin. A sign expected to run for eight hours should not be designed around an exact eight-hour laboratory result. Additional capacity helps account for battery aging, colder weather, higher brightness, and delays in charging.
Battery placement also matters. A loose battery sitting behind the display can be disconnected accidentally. A battery hidden inside a narrow stand may be difficult to replace. A removable battery compartment can simplify charging, but the connector must withstand repeated use.
Plug-in power remains more practical when a nearby outlet is available and the sign stays in one position. It offers stable brightness, lower weight, and fewer charging concerns. Battery power is most useful when cable-free placement solves a real venue or safety problem.
Which Sign Fits Each Location?
The best sign depends heavily on where it will be seen. A sign designed for a checkout wall cannot automatically work at an entrance, inside a window, or on an outdoor stand.
| Location | Recommended Sign | Useful Size Range | Viewing Distance | Main Concern |
|---|---|---|---|---|
| Checkout backdrop | LED neon logo | 700–1,200 mm wide | 2–6 m | Logo clarity and photo appearance |
| Small product counter | Mini light box or illuminated logo | 300–600 mm wide | 1–3 m | Counter space and hidden wiring |
| Main entrance | Freestanding light box | 500–900 mm wide | 3–10 m | Base stability and pedestrian flow |
| Shop window | Bright light box or digital poster | Based on window area | 5–15 m | Reflections and daylight |
| Photo wall | LED neon or illuminated letters | 800–1,500 mm wide | 2–5 m | Position around people |
| Promotion area | Digital poster | 43–55 inches | 2–8 m | Content updates and transport |
| No-outlet location | Battery-powered LED sign | Project-specific | 2–8 m | Runtime and charging |
| Outdoor market | Weather-rated light box or logo sign | Project-specific | 3–10 m | Water, wind, base weight, and cable protection |
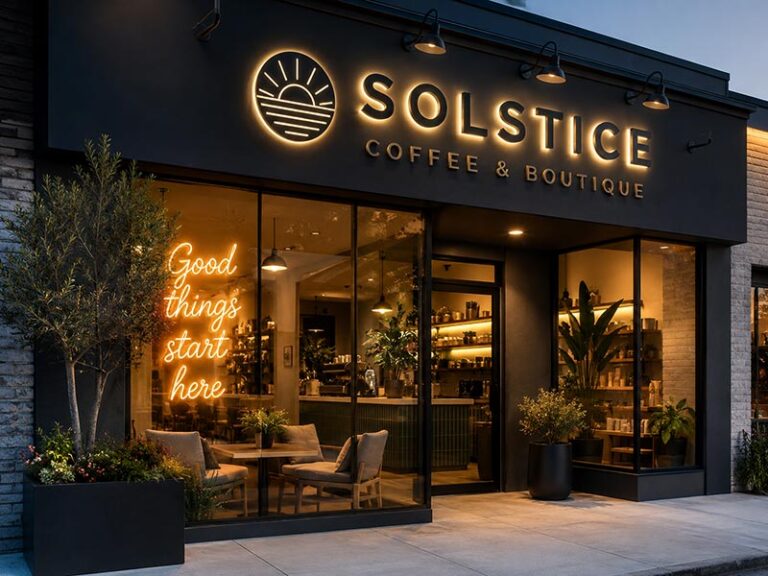
A checkout backdrop normally benefits from a clear logo rather than a long promotional sentence. Visitors standing near the counter already know they are inside the store, so brand reinforcement and photography are more important than detailed information.
An entrance display should answer a different question: why should someone walk in? A light box showing a launch product, offer, or short message may perform better than a logo alone. The message should remain readable before a visitor reaches the store.
Window displays require stronger contrast because glass reflections reduce visibility. Testing the sign in a dark workshop provides little information about daytime performance. Approval photographs should show the product under normal retail lighting, and brightness control should be considered when operating conditions change between day and night.
A photo wall sign should be positioned above shoulder height or beside the standing area so people do not cover the logo. Before confirming the size, place two people in front of a printed full-scale outline. Such a simple test can prevent an expensive sign from disappearing behind event photographs.
Which Sign Offers the Best Value?
Value should be measured across the full campaign rather than by purchase price alone. Production cost, graphic replacement, installation labor, transport, storage, damage risk, and reuse all affect the real cost.
| Sign Type | Initial Cost | Setup Difficulty | Content Changes | Transport Risk | Reuse Potential |
|---|---|---|---|---|---|
| LED neon logo | Medium | Low | Limited | Low to medium | High for permanent logos |
| Countertop light box | Low to medium | Low | Easy with replaceable graphics | Low | High |
| Freestanding light box | Medium | Medium | Easy with replaceable graphics | Medium | High |
| Battery-powered sign | Medium to high | Low | Depends on sign type | Medium | High when cable-free use is needed |
| Digital poster | High | Medium | Very easy | High | High for changing campaigns |
| Illuminated letters | Medium to high | Medium to high | Limited | Medium | High for long-term branding |
A permanent LED neon logo may be used for ten or twenty events, making the cost per event relatively low. A campaign phrase with a date may have little value after one weekend. A reusable light box frame with several replacement graphics can be more economical for seasonal promotions.
Many pop-up stores achieve better results with two smaller signs instead of one large product. A neon logo behind the counter can build brand recognition, while a portable entrance light box communicates the current offer. Each sign performs one clear job, remains easier to transport, and can be repositioned when the store layout changes.
The strongest choice is rarely the product with the most features. It is the sign that can be seen clearly, installed quickly, powered safely, transported without damage, and used again without creating extra work for the next event.
How Should You Choose One?
Choose a portable LED sign by first defining what people must see, where the sign will stand, how far away it must be readable, how often it will travel, and whether the location is indoors or outdoors. Size, brightness, power, mounting, weight, and packaging should follow those operating conditions. A suitable sign should be easy to understand, safe to install, practical to transport, and reliable throughout the full pop-up schedule.
What Will the Sign Display?
Begin with the message rather than the product type. A brand logo, product photograph, price, QR code, directional arrow, campaign phrase, and video need different sign structures. LED neon works well for a logo, symbol, social media handle, or short phrase because the illuminated outline can be recognized quickly. A light box is more suitable for product photography, several colors, detailed graphics, prices, and printed promotions. A digital poster makes more sense when content changes several times during the day.
Keep the main message short. People walking through a shopping mall or event hall may only look at a pop-up store for one or two seconds. An entrance sign normally needs one clear message, such as a brand name, product category, or launch offer. Smaller details can appear on a countertop sign closer to the product.
Check the artwork at its actual production size. Fine letters, narrow logo lines, tight spacing, and small QR codes may look clear on a laptop but fail at normal viewing distance. For QR codes, leave enough white space around the code and test scanning from the expected position before approving production. For neon designs, very thin strokes may need to be widened so the tubing can follow the artwork cleanly.
Also consider how long the message will remain useful. A permanent logo may support many events, while a dated promotion may only work once. When campaign graphics change regularly, a reusable light box frame with replaceable fabric or acrylic panels can reduce the cost of later events.
Where Will the Sign Be Placed?
The display position controls the finished size, support structure, cable exit, brightness, and viewing angle. A sign behind a checkout counter can use hanging holes, stand-offs, hooks, or removable tabletop feet. A sign at the entrance needs a stable floor base and enough clearance around passing visitors. A sign inside a window must compete with reflections and daylight. A sign on a product table should leave enough space for samples, packaging, payment equipment, and staff movement.
Measure the available width, height, and depth rather than estimating from photographs. A 900 mm-wide sign may fit the wall but interfere with shelving, lighting tracks, or a door. A floor sign may have a narrow front face but require a base 300–500 mm deep for stability. Countertop signs should be checked against the actual counter depth, especially when the power supply must sit behind the product.
Record the outlet position at the same time. Cable length should be based on the distance from the planned sign position to the socket, including the route around counters or display furniture. Avoid placing loose cables across walking areas. When no nearby outlet is available, battery power or a different sign position may be necessary.
Venue rules also affect the choice. Many malls and exhibition halls restrict wall drilling, strong adhesives, ceiling suspension, and exposed extension cables. Request the installation rules before production. A sign designed for stand-off screws cannot be installed as planned when the venue only permits freestanding displays.
How Far Away Will People View It?
Viewing distance determines how large the sign and lettering need to be. A countertop sign read from one or two meters can include smaller details than an entrance sign viewed from across a mall corridor. For a viewing distance of around 1–2 meters, a sign width of 300–600 mm may be sufficient for a short logo or message. At 3–5 meters, widths of approximately 600–1,000 mm are often easier to notice. At 5–10 meters, a simple logo or short phrase may need a width of 900–1,500 mm, depending on the font and surroundings.
Those ranges are only planning references. A bold sans-serif word can remain readable at a smaller size than a thin script logo. Strong contrast also improves visibility. White or warm white illumination against a dark background normally reads more clearly than pale illumination on a light wall.
Think about the direction of foot traffic. A sign facing directly toward approaching visitors performs differently from one seen at a 45-degree angle. Displays placed too low may be blocked by products or people. Photo-wall logos should usually sit above shoulder height so the brand remains visible in pictures.
A full-size paper print is an inexpensive way to test the planned dimensions. Place the print in the intended location, walk back to the expected attraction distance, and check whether the logo can be recognized within two seconds. Repeat the test from both sides of the main traffic route.
How Often Will the Sign Move?
Transport frequency changes the required structure and packaging. A sign used for one weekend may only need a strong export carton and fitted foam. A sign travelling to ten or twenty locations needs stronger corners, reinforced mounting points, protected connectors, reusable packaging, and clearly labeled accessories.
Estimate the full movement schedule before ordering. Include factory shipment, delivery to the first event, travel between locations, temporary storage, daily movement inside the venue, and return transport after the final event. A sign used at six locations may be loaded and unloaded more than twelve times. Acrylic corners, wire exits, plugs, controllers, and removable stands receive repeated stress during each movement.
For frequent travel, removable parts should be simple and difficult to lose. Feet, screws, hanging wires, power supplies, dimmers, and controllers should have separate labeled spaces inside the package. The product number on the sign should match the number on the accessory bag. A packing photograph placed inside the case can help staff return every part to the correct position.
Set a practical installation target. A small countertop sign should normally be ready within 3–5 minutes. A neon logo with removable feet may take 5–10 minutes. A hanging or freestanding sign may need 10–20 minutes. Large multi-section signs can require 20–40 minutes and two people. Inform the manufacturer when the sign must be installed by one person or without power tools.
Packed dimensions and gross weight are also important. A lightweight sign can still be expensive or awkward to transport when the package is oversized. Confirm the largest package size, total number of cartons, gross weight, and whether the case fits the planned car, van, elevator, and storage space.
Is the Store Indoors or Outdoors?
Indoor pop-up stores usually offer controlled conditions, but the sign still needs to handle long operating hours, public contact, bright retail lighting, and repeated setup. Outdoor locations add rain, dust, direct sunlight, wind, temperature changes, and uneven ground. A sign made for indoor use should not be moved outdoors simply because the event only lasts one or two days.
For indoor use, consider the surrounding light level. A neon sign may need a dimmer when installed near seating or a checkout counter because excessive brightness can be uncomfortable at close range. A window display may require higher output to remain visible through reflections. Ask for illuminated approval photos under normal room lighting rather than only in a dark workshop.
For outdoor use, confirm protection for the complete electrical system. The sign body, wire exits, connectors, controller, dimmer, power supply, and plug connection all need suitable protection. A weather-resistant sign body paired with an indoor power adapter does not create a safe outdoor setup. IP68 can be requested for suitable project configurations, but the structure and rating should be confirmed for the finished sign rather than assumed from one component.
Wind stability requires separate attention. A lightweight freestanding sign may tip even when the electrical parts remain dry. Outdoor bases may need a wider footprint, ballast points, ground anchors, or attachment to the event booth. Ask whether the sign can remain outside overnight, whether it must be brought indoors after closing, and what operating temperature range is expected.
When one sign will move between indoor and outdoor locations, design around the more demanding environment. Such planning may increase weight and cost, but it reduces the risk of water damage, unstable placement, and last-minute installation changes.
Which Specifications Matter Most?

The most important specifications are brightness, lighting color, power input, cable length, battery runtime, finished size, packed size, total weight, mounting method, and outdoor protection. These values must work together. A brighter sign may need a larger power supply, a larger battery adds carrying weight, and a lightweight floor stand may become unstable near heavy foot traffic. Ask for measurable specifications rather than relying on words such as “bright,” “portable,” or “weatherproof.”
How Bright Should the Sign Be?
Brightness should be selected for the actual location, viewing distance, and surrounding light. A sign used behind a counter in a softly lit shop does not need the same output as a sign placed inside a sunlit window. Excessive brightness can make nearby staff uncomfortable, wash out photographs, and shorten battery runtime. Insufficient brightness can make an otherwise well-made sign disappear under mall lighting or window reflections.
Brightness is measured differently across product types. Digital displays are commonly specified in nits, while LED neon signs and light boxes may be quoted by LED type, power, light output, or visual test results. Numbers from different product categories should not be compared directly. A 700-nit digital poster and an LED neon logo do not produce light in the same way.
The following ranges can be used for early planning:
| Location | Practical Brightness Reference | Main Risk |
|---|---|---|
| Dim indoor photo area | Low to medium output | Overexposure in photos |
| Checkout or product counter | Medium output | Glare at close range |
| Bright mall interior | Medium to high output | Sign disappears under ceiling lights |
| Indoor shop window | High output | Reflections reduce visibility |
| Outdoor shaded booth | High output | Daylight lowers contrast |
| Direct-sun outdoor location | Very high output | Heat, power use, and readability |
For digital poster displays, approximately 400–700 nits may be suitable for many indoor spaces. Bright window locations may need roughly 1,000–2,500 nits, while outdoor screens exposed to daylight may require 3,000 nits or more. Final values depend on glass reflections, orientation, shade, content colors, and viewing distance.
LED neon and illuminated logo signs should be judged with illuminated photographs or videos taken under normal room lighting. A factory photo captured in darkness can make almost any sign look powerful. Ask for a front view from the expected reading distance, a close view of corners and curves, and a photo with the room lights switched on.
Dimming control is useful for signs moving between different venues. A logo may need full output during the day but only 40–60% brightness during an evening event or photo session. The dimmer should be rated for the sign’s electrical load and supplied with the correct connectors. For RGB signs, confirm whether the controller can adjust brightness without changing the selected color.
Color temperature also changes how bright a sign appears:
| Light Color | Common Range | Visual Effect |
|---|---|---|
| Warm white | 2700–3200K | Soft, welcoming, suitable for beauty, hospitality, and lifestyle brands |
| Neutral white | 3500–4500K | Clean and balanced, suitable for general retail |
| Cool white | 5500–6500K | Crisp and strong, suitable for technology, sports, and high-contrast displays |
Two suppliers may both quote “warm white” while delivering noticeably different colors. Confirm the target Kelvin range or approve a physical LED sample where color consistency is important. For repeat orders, the approved LED type and color-temperature range should be recorded.
Light uniformity deserves equal attention. A light box should not show dark corners, visible LED dots, brighter edges, or shadow lines behind the graphic. LED neon should not have obvious dark gaps near wire exits, tight bends, or section joints. Inspection should include the complete sign at normal operating brightness, not only individual LED strips.
Which Power Option Works Best?
Plug-in power is normally the simplest option when the sign remains close to an outlet. It provides stable brightness, supports long operating hours, and keeps the product lighter because no large battery is required. Battery power is more useful when the display stands in an open area, moves during the event, or cannot use floor cables.
Before production, confirm the destination country and electrical conditions. The quotation or approval drawing should show:
- Input voltage;
- Output voltage;
- Total sign wattage;
- Power-supply wattage;
- Plug type;
- Cable length;
- Wire-exit position;
- Dimmer or controller type;
- Number of power supplies;
- Location of each electrical component.
Many portable LED signs operate on low-voltage DC power, commonly 12V or 24V, while the adapter connects to the local AC supply. The adapter must match both the sign load and the destination voltage. A project for the United States may use 110–120V AC input, while many European, British, Australian, Middle Eastern, and Asian locations use 220–240V AC input.
The power supply should have spare capacity rather than operating continuously at its maximum rating. A margin of approximately 20–30% is a useful planning reference. For example, a sign drawing 60 W should generally use a power supply rated around 75 W or higher, provided the voltage and electrical configuration are correct. Running an adapter near full capacity for long daily hours can increase heat and reduce reliability.
Cable length should be confirmed from the real installation position. Standard cables may be too short when the nearest outlet is behind a counter, above a ceiling grid, or several meters from the display. A longer low-voltage cable can also create voltage drop when the wire size is too small. Large signs may need more than one power input to maintain even brightness.
Battery-powered signs require a more detailed calculation. Battery capacity is normally expressed in watt-hours. A simple planning estimate is:
Estimated runtime = battery capacity in Wh ÷ sign power in W × 0.8
The 0.8 factor allows for conversion loss and avoids assuming every watt-hour is fully usable. A 240 Wh battery powering a 30 W sign may provide approximately 6.4 hours under the stated load:
240 ÷ 30 × 0.8 = 6.4 hours
Actual runtime changes with brightness, controller settings, temperature, battery age, and conversion efficiency.
| Daily Operating Time | Suggested Battery Planning |
|---|---|
| 3–4 hours | Battery rated for at least 5 hours |
| 6 hours | Battery rated for at least 7–8 hours |
| 8 hours | Battery rated for at least 9–10 hours |
| 10+ hours | Larger battery, spare pack, or plug-in backup |
Do not rely on a runtime claim unless the test brightness is stated. A battery may reach ten hours at half brightness but only five or six hours at full output. Ask whether the sign can operate while charging and whether the battery can be removed without dismantling the complete display.
For RGB signs, digital posters, and signs with several illuminated sections, confirm how settings behave after power is disconnected. The sign should ideally return to the previous color or program when switched on. Staff should not need to reconfigure the display before opening every morning.
Power supplies, batteries, dimmers, and controllers should be packed separately from acrylic faces and clearly labeled. For projects with several signs, each adapter should carry the same number as the corresponding sign.
What Size and Weight Are Practical?
Practical size is determined by more than the available wall or counter space. The sign must also fit through doors, inside elevators, into the planned vehicle, through courier networks, and into storage after the event.
Before confirming dimensions, measure:
- Available display width and height;
- Counter depth;
- Floor area available for the base;
- Narrowest venue doorway;
- Elevator opening and internal size;
- Vehicle trunk or van opening;
- Stairway turns;
- Storage shelf or storeroom;
- Maximum package length accepted by the courier.
For many countertop signs, widths of approximately 300–700 mm are manageable. Logo signs between 600 and 1,200 mm wide often work well behind counters or on photo walls. Signs above approximately 1,200–1,500 mm may become difficult for one person to carry, particularly when the acrylic backboard is tall, thin, or irregularly shaped.
The final decision should consider both product and package data:
| Specification | Why It Matters |
|---|---|
| Finished width and height | Determines visual impact and fit |
| Product depth | Affects counter space and stability |
| Net weight | Indicates how many people are needed |
| Packed size | Controls transport and storage |
| Gross weight | Includes foam, carton, case, and accessories |
| Largest single section | Determines whether it fits through access points |
| Number of packages | Affects handling and risk of missing parts |
| Center of gravity | Important for freestanding stability |
A sign weighing 8 kg may appear easy to handle, but the complete package could weigh 14–18 kg after adding a stand, adapter, foam, carton, and accessory box. Ask for gross weight rather than relying only on the net product weight.
Large logos can be divided into sections to reduce package size. Split lines should follow natural gaps between letters or separate graphic elements. Avoid dividing through narrow illuminated strokes, curved letters, or highly visible areas. The assembled sign should not show a dark gap or uneven alignment at the joint.
Backboard shape affects strength and packing. A rectangular acrylic board protects delicate lettering and is easier to support with foam. A contour-cut board creates a cleaner appearance but may have narrow sections that can crack during transport. When portability is more important than hiding every millimeter of acrylic, a moderate clear border often improves durability.
For floor-standing signs, weight cannot be reduced without considering stability. A light upper panel mounted on a narrow base may tip when touched. The base footprint, sign height, center of gravity, and expected pedestrian contact should be reviewed together. Some stands need removable steel plates or ballast that travels separately.
Package size also affects freight charges. Courier and airfreight costs are often calculated using volumetric weight rather than actual weight. An oversized but lightweight package may cost more than a smaller, heavier one. Ask for packed dimensions before final approval so transport cost can be checked before production is completed.
How Should the Sign Be Installed?
The installation method should match the venue rules, available crew, setup time, and expected number of uses. A portable sign should not arrive with mounting holes but no suitable hardware, cable plan, or installation instructions.
Common installation options include:
| Installation Method | Suitable Location | Main Point to Confirm |
|---|---|---|
| Removable tabletop feet | Counters and product tables | Foot depth and stability |
| Freestanding floor base | Entrances and open areas | Base size and tipping resistance |
| Hanging holes and chains | Booth frames and temporary walls | Load capacity and hanging height |
| Steel-wire suspension | Exhibition structures | Attachment points and leveling |
| Stand-off mounting | Temporary or permanent walls | Drilling permission and hole template |
| Hooks | Grid walls and booth panels | Hook size and panel strength |
| Portable frame | Open spaces and photo areas | Assembly time and package size |
| Adhesive mounting | Small lightweight signs | Surface condition and removal method |
Ask the venue whether drilling, screws, strong adhesive, ceiling suspension, or exposed cables are allowed. A sign developed for wall mounting may need to be redesigned with feet or a frame when drilling is prohibited.
Tabletop feet should be tested with the complete sign, not only calculated from a drawing. The sign should remain stable when the counter is touched or when a cable is moved. For taller signs, feet may need a wider front-to-back dimension. The feet should also be removable without damaging the acrylic.
Freestanding signs need attention to the center of gravity. A narrow vertical display may require a steel base, wide outriggers, or concealed ballast. The base should not create a toe or trip hazard in a pedestrian route. Rounded corners and a low-profile structure are preferable in busy entrances.
Hanging signs require confirmed load points. The sign weight, chains, hooks, and frame capacity should all be checked. Two suspension points are normally more stable than one for a wide sign. Cable exits should be positioned so the power wire can follow the hanging structure rather than falling visibly across the display.
For multi-section signs, every part should be labeled. A practical marking system may use A1, A2, B1, and B2, with matching labels on connectors and accessory bags. Installation drawings should show:
- Finished layout;
- Distance between sections;
- Mounting-hole positions;
- Wire-exit positions;
- Power-supply location;
- Connection order;
- Required tools;
- Final cable route.
Installation time should be tested before shipment. A small countertop sign should usually need only positioning and power connection. A hanging sign may require leveling, cable management, and two people. A large frame or multi-section sign should be assembled at the factory once so any confusing joints or missing hardware can be corrected.
A complete accessory pack may include screws, anchors, stand-offs, chains, steel wire, hooks, feet, connection cables, power supplies, dimmers, controllers, templates, and printed instructions. The exact contents should be photographed before packing.
What Protection Does Outdoor Use Need?
Outdoor use requires protection against water, dust, sunlight, heat, wind, corrosion, and unstable ground. Waterproofing the LED strip alone is not enough. The sign body, backboard, cable exits, connectors, controller, power supply, plug connection, and supporting structure must be reviewed as one system.
Begin by clarifying how the sign will actually be used:
- Fully outdoors or under a canopy;
- Daytime only or left outside overnight;
- Protected from direct rain or fully exposed;
- Temporary weekend event or repeated seasonal use;
- Coastal, humid, hot, cold, or dusty environment;
- Freestanding, wall-mounted, or attached to a booth.
An outdoor sign placed under a covered market roof faces less water than a sign installed in an open plaza, but wind-driven rain can still reach cable joints and adapters. “Covered” should not automatically be treated as “indoor.”
Ingress-protection ratings should apply to the agreed finished configuration. IP65 is commonly requested for signs exposed to rain and dust. Higher protection may be needed for harsher conditions. IP68 is available on request for suitable project configurations, but the rating, electrical structure, and actual exposure must be confirmed before production.
The following areas deserve individual checks:
| Area | Outdoor Requirement |
|---|---|
| Sign face and housing | Water-resistant materials and sealed construction |
| Wire exit | Sealed gland or protected outlet |
| Connectors | Weather-resistant connection or protected enclosure |
| Power supply | Outdoor-rated unit or dry protected location |
| Controller and dimmer | Protected from water and direct sunlight |
| Plug connection | Raised from the ground and enclosed |
| Metal parts | Corrosion-resistant material or surface treatment |
| Acrylic and graphics | Suitable for UV exposure |
| Base | Stable on uneven ground |
| Cable route | Protected from water, feet, and vehicles |
Outdoor brightness may need to be higher than indoor brightness, particularly during daytime. Higher output increases power demand and may produce more heat. Power supplies and controllers should have ventilation or heat dissipation suitable for the enclosure.
Sunlight can also affect color and materials. Printed graphics need UV-resistant ink or film for repeated outdoor use. Clear acrylic may yellow over time when unsuitable material is selected. Dark metal surfaces can become very hot under direct sun, which may affect adhesives, cables, and internal components.
Wind is often a greater risk than rain for a portable sign. A lightweight sign with a tall face can act like a sail. The stand may need a wider base, removable ballast, ground anchors, or attachment to the booth frame. Ask the event organizer about expected wind conditions and whether freestanding signs must be removed above a stated wind speed.
The electrical connection should never sit directly on wet ground. Use raised, protected connections and keep excess cable away from puddles and walking routes. Extension cords used locally must also be rated for the environment.
Before shipping, an outdoor illuminated sign should receive a complete lighting inspection and extended aging test. iduoduo performs a 100% lighting test and 72-hour aging test for illuminated sign products before shipment. Inspection should also cover seals, connectors, cable exits, power parts, mounting accessories, and packing protection.
The strongest outdoor specification is not simply the highest IP number. A reliable configuration matches the real exposure, installation method, wind load, operating hours, power location, and transport schedule.
What Should You Confirm Before Ordering?

Before ordering a portable LED sign, confirm the production artwork, finished dimensions, lighting color, power system, mounting method, included accessories, packing size, delivery schedule, inspection records, and reorder standard. Every important detail should appear in the approved drawing or quotation. Verbal assumptions often lead to incorrect cable positions, unsuitable plugs, missing hardware, oversized packages, or signs that cannot be installed at the venue.
Is the Artwork Ready for Production?
A logo file is not automatically ready for sign production. Artwork created for a website, social media profile, printed brochure, or business card may contain lines that are too thin, letters that are too small, or gaps that cannot be reproduced cleanly with LED neon, acrylic, metal, or illuminated light-box construction.
Vector files usually provide the best starting point. AI, EPS, SVG, CDR, or editable PDF files allow the design team to inspect paths, letter spacing, proportions, and exact colors. A high-resolution PNG can help confirm visual appearance, but it may not contain accurate production dimensions. Screenshots and low-resolution JPEG files often require redrawing.
Before approving the artwork, check the following information:
| Artwork Detail | What Should Be Confirmed |
|---|---|
| Overall dimensions | Exact finished width, height, and depth |
| Letter height | Height of individual letters or logo parts |
| Minimum stroke width | Whether narrow lines can be produced reliably |
| Letter spacing | Enough room for tubing, wiring, and cutting |
| Logo proportions | No stretching or unapproved reshaping |
| Brand colors | Pantone, CMYK, RGB, RAL, or approved sample |
| Lighting color | Warm white, neutral white, cool white, color LED, RGB, or RGBW |
| Backboard shape | Rectangle, contour cut, letter cut, or no visible backboard |
| Surface finish | Clear, frosted, painted, brushed, polished, or printed |
| Viewing direction | Front-facing, double-sided, or angled display |
For LED neon signs, very fine logo elements may need to be widened. A stroke that looks clean on a screen may be too narrow for the selected neon width or bend radius. Tight internal corners can also cause uneven tubing or crowded joints. Small lower-case letters deserve special attention because openings inside letters such as “a,” “e,” and “o” may close visually when the sign is reduced.
A full production drawing should show more than the front view. Ask for a rear view showing cable exits, power connections, hanging holes, mounting holes, removable feet, and controller position. Side-view dimensions are useful when the sign must fit inside a narrow counter, shelf, or display frame.
A portable sign often needs to work in several venues. When wall drilling is not always allowed, the drawing may need two mounting options, such as removable feet plus hanging holes. Both options should be shown before production begins.
Approval should also cover the sign when switched off. Acrylic edges, printed graphics, backing shape, visible wires, metal finishes, and stand design remain visible throughout the day. A sign should not depend on darkness to look finished.
For accurate approval, request the following files before production:
- Front-view production drawing;
- Rear-view wiring and mounting drawing;
- Side-view depth drawing;
- Illuminated rendering;
- Non-illuminated rendering;
- Color reference;
- Accessory layout;
- Packaging arrangement for larger projects.
Print the drawing or view it at a large scale before signing. Check every number, especially overall size, letter height, hole position, cable exit, plug type, and quantity. A signed drawing normally becomes the main production reference, so corrections are easier before materials are cut.
Are the Voltage and Plug Correct?
The destination country should be confirmed before the power supply is selected. Portable LED signs commonly use low-voltage LED systems, often 12V or 24V DC, while the supplied adapter connects to local AC power. The adapter must match the sign load, local voltage, plug format, and expected daily operating time.
Typical AC supply ranges include:
| Destination | Common Input Voltage | Common Plug Format |
|---|---|---|
| United States and Canada | 110–120V | Type A or B |
| United Kingdom | 220–240V | Type G |
| Most of Europe | 220–240V | Type C, E, or F |
| Australia and New Zealand | 220–240V | Type I |
| United Arab Emirates | 220–240V | Type G |
| Japan | 100V | Type A or B |
| Singapore | 220–240V | Type G |
Local requirements can vary by venue and region, so the project country and installation address should appear on the order record. A travel adapter is not an ideal substitute for a correctly specified commercial power supply.
The approval information should state:
| Electrical Item | Information Required |
|---|---|
| Adapter input | AC voltage and frequency |
| LED output | DC voltage and current |
| Sign power | Estimated or measured wattage |
| Power-supply rating | Wattage with suitable spare capacity |
| Plug | Destination-specific format |
| Cable length | Adapter cable and low-voltage cable lengths |
| Wire exit | Rear, side, bottom, or selected position |
| Controller | Dimmer, RGB controller, RGBW controller, or none |
| Control method | Button, remote control, app, or fixed color |
| Number of adapters | One shared supply or separate supplies |
A useful power-supply margin is approximately 20–30% above the sign’s expected electrical load. For example, a sign consuming 60 W should normally use a correctly matched supply rated around 75 W or more. Operating an adapter continuously at its maximum rating can create more heat and reduce long-term reliability.
Cable length needs to match the venue layout. A standard one-meter cable may be unsuitable when the outlet is behind a counter, above a display wall, or several meters away. Excessively long low-voltage cables also need an appropriate wire size to reduce voltage drop and uneven brightness.
For battery-powered signs, request runtime figures at a stated brightness level. “Up to ten hours” provides little value without knowing whether the test was performed at full brightness or reduced output. A pop-up store operating for eight hours should ideally have nine to ten hours of usable capacity, allowing for battery aging, temperature, charging delays, and higher brightness settings.
Battery information should include capacity in watt-hours, charging time, battery weight, replacement method, expected charge cycles, and whether the sign can operate while charging. For signs travelling by air, battery shipping restrictions should be checked before finalizing the design.
RGB and RGBW signs require additional confirmation. Ask whether the selected color remains saved after power is disconnected. Staff should not need to reset the sign every morning unless frequent color changes are part of the event plan.
Are Cables and Accessories Included?
A portable LED sign should arrive as an installation-ready set rather than an illuminated product with several essential parts left for local purchase. The exact accessory list depends on whether the sign stands on a counter, hangs from a booth frame, mounts to a wall, or uses a floor base.
Common accessories may include:
| Accessory | Why It May Be Needed |
|---|---|
| Power supply | Converts local AC power to the required LED voltage |
| Destination plug | Matches the country and venue outlet |
| Dimmer | Adjusts brightness for day, evening, or photography |
| RGB controller | Changes color, effects, or brightness |
| Remote control | Operates dimming or color functions |
| Extension cable | Reaches a hidden or distant outlet |
| Removable feet | Supports a countertop sign |
| Floor base | Supports a freestanding sign |
| Hanging chains | Suspends the sign from a frame or approved point |
| Steel wire | Provides a cleaner hanging appearance |
| Stand-offs | Mounts the sign away from the wall |
| Screws and anchors | Secures the sign to the selected surface |
| Installation template | Marks hole positions and letter spacing |
| Spare connectors | Supports field replacement when required |
| Instructions | Shows assembly, wiring, operation, and repacking |
The quotation should state which items are included and which must be prepared locally. “Installation accessories included” is too general. A photo or written list provides a more reliable record.
Mounting hardware must match the installation surface. Screws suitable for timber may not work on concrete, plasterboard, aluminum exhibition panels, or temporary fabric walls. When the final wall material is unknown, the factory can supply the sign-side hardware, while the local installer selects anchors suitable for the actual structure.
Countertop feet need more than the correct hole pattern. They should support the sign without tipping when the counter is touched or the cable is moved. Confirm the depth of each foot, spacing between feet, material thickness, and whether tools are required for assembly.
For hanging signs, confirm the total hanging length, load capacity, number of suspension points, and leveling method. Two hanging points usually provide better control for wide signs. Power cables should follow the suspension route where possible rather than hanging loosely across the graphic.
For multi-section signs, every cable and connector should be labeled. A simple system such as A-to-A, B-to-B, and C-to-C prevents incorrect connections. Matching numbers should also appear on the sign sections, accessory bags, power supplies, and packing diagram.
Request an accessory photo before shipment. The photo should show every supplied item laid out clearly. Compare the photo with the agreed list and keep a copy for receiving inspection.
Small hardware should be packed in sealed, labeled bags. Loose screws or metal parts can scratch acrylic faces during shipping. Power supplies should not rest directly against illuminated surfaces. Remotes and controllers need separate protection so buttons are not damaged in transit.
For repeated pop-up events, include at least one packing checklist. Staff can use the same list after each event to confirm that no adapter, foot, screw, or remote has been left at the venue.
How Will the Sign Be Packed?
Packaging should be designed around the sign structure, transport method, number of planned events, and handling conditions. A package suitable for one courier shipment may not survive repeated loading, storage, and multi-city transport.
Before production is completed, request the following packing information:
| Packing Detail | What to Confirm |
|---|---|
| Number of packages | Total cartons, crates, or cases |
| Packed dimensions | Length, width, and height of each package |
| Gross weight | Full weight including accessories and protection |
| Internal protection | Foam, EPE, corner blocks, dividers, or shaped inserts |
| Surface protection | Film, soft bag, tissue, or foam sheet |
| Accessory position | Separate box or fixed compartment |
| Outer package | Corrugated carton, wooden crate, or flight case |
| Carrying method | Handles, wheels, or two-person lifting |
| Reuse | One-time packaging or reusable transport case |
Finished dimensions do not show the actual transport requirement. A 1,200 × 500 mm sign may need several centimeters of protective clearance on every side. A wooden crate can increase both size and weight considerably. Freight cost should be checked using packed dimensions rather than product dimensions alone.
For standard courier or express shipment, a strong corrugated carton with fitted foam, edge protection, and an internal accessory box may be suitable for small and medium signs. Larger acrylic signs, freestanding light boxes, digital displays, and irregular structures may require a wooden crate.
Acrylic signs should not move inside the package. Movement can produce scratches, cracked corners, damaged neon tubing, or broken wire connections. Foam should support the stronger areas of the backboard without pressing directly against delicate protruding parts.
Contour-cut acrylic needs extra protection around narrow sections and sharp corners. A rectangular backboard is usually easier to pack because the foam can support a regular outer shape. For highly irregular logos, a custom-cut foam insert may be worthwhile.
Accessories should be isolated from the sign face. Adapters, metal feet, screws, chains, and controllers can cause damage when placed loose inside the same cavity. A fixed compartment or separate accessory carton provides better protection.
Multi-part signs should be separated with foam or dividers. Each section should carry a clear label matching the installation drawing. Where several store signs ship together, package labels can include the project name, store number, sign number, destination, and package count, such as “Store 03 — Package 1 of 2.”
Reusable packaging needs stronger construction. A touring sign may benefit from a flight case with wheels, recessed handles, metal corners, and replaceable foam. The initial case cost may be higher, but repeated carton replacement and transport damage can cost more over a long campaign.
Ask for packing photos before shipment. Useful photos include the unprotected sign, surface protection, foam placement, accessory compartment, closed inner package, and final outer carton or crate. Such records help with receiving checks and provide a guide when the sign is repacked after an event.
Large wooden cases should comply with applicable international shipping requirements. When fumigated or treated wood is required, confirm the marking and export documents before dispatch.
Is the Sign Tested Before Shipping?
A completed sign should be inspected for appearance, dimensions, lighting, electrical performance, mounting preparation, accessories, and packing before shipment. A single photo showing the sign switched on does not provide enough evidence.
For illuminated signs, inspection should include:
| Inspection Point | What Should Be Checked |
|---|---|
| Overall size | Matches the approved drawing |
| Letter or graphic size | Correct proportions and spacing |
| Color | Matches the approved reference |
| Surface | No scratches, dents, glue marks, or stains |
| Lighting | All sections illuminate correctly |
| Uniformity | No dark areas, bright spots, or uneven color |
| Color temperature | Matches the approved Kelvin range or sample |
| Controller | Dimming, RGB, or RGBW functions operate correctly |
| Power supply | Correct input, output, plug, and quantity |
| Wiring | Secure connections and correct cable exit |
| Mounting | Correct holes, feet, brackets, or hanging points |
| Accessories | Complete and labeled |
| Packing | Correct protection and package labels |
Ask for measurements in the inspection photos when size is important. A tape measure placed across the finished sign can confirm width and height. Close-up photos should show corners, edges, backing, wire exits, stand connections, and surface finish.
Lighting should be reviewed under normal room lighting as well as in a darker area. Dark-room photos are useful for checking illumination, but they can hide scratches, uneven finishes, and excessive brightness. Normal-light photos provide a more realistic idea of how the sign will appear inside a retail venue.
Extended operation testing helps identify early electrical failures. iduoduo performs a 100% lighting test and a 72-hour aging test for illuminated products before shipment. The test is intended to identify problems such as failed LEDs, unstable power supplies, loose connections, abnormal heating, dark sections, or controller faults before packing.
For battery-powered signs, testing should also cover charging, runtime, battery connection, and operation while charging where applicable. The actual runtime test should record the brightness level and operating mode.
Outdoor signs need additional checks around sealed wire exits, connectors, power-supply protection, and mounting stability. When a specific ingress-protection requirement has been agreed, inspection should follow the confirmed structure and exposure conditions.
A short installation trial can reveal problems that are not visible during lighting inspection. The factory can assemble the feet, frame, hanging system, or multi-section structure and record the setup process. Such a test may expose unclear labels, missing screws, inaccessible connectors, or an unstable base.
Request a final approval set containing front photos, back photos, illuminated video, controller demonstration, accessory photo, measurement photos, and packaging photos. Keep the records with the approved drawing and invoice. They provide a clear reference when the shipment arrives.
Can the Design Be Reordered?
Reorder preparation should begin with the first order. Brands operating seasonal pop-ups, touring events, franchise stores, or product launches may need replacement signs, additional units, or matching signs months later. A clear production record makes repeat orders faster and reduces differences between batches.
The saved record should include:
| Reorder Record | Information to Retain |
|---|---|
| Approved artwork | Final vector file and production drawing |
| Finished dimensions | Width, height, depth, and section sizes |
| Materials | Acrylic, aluminum, stainless steel, fabric, or other materials |
| Colors | Pantone, RAL, CMYK, RGB, paint code, or sample reference |
| LED specification | Type, color, Kelvin range, and brightness |
| Power system | Voltage, wattage, plug, cable length, and controller |
| Mounting | Hole positions, feet, brackets, frame, or suspension |
| Accessories | Exact included parts and quantities |
| Packaging | Foam layout, labels, carton, crate, or case |
| Inspection standard | Approved appearance and testing record |
| Order code | Unique reference for future production |
A repeat order based only on an old photograph can lead to changes in color, scale, wire position, or accessories. The original production drawing should remain the main reference.
For light boxes, record the frame specification separately from the replaceable graphic. Future campaigns may only need new fabric or acrylic graphics. Confirm the visible graphic size, bleed area, edge treatment, printing method, and installation method so replacement faces fit correctly.
For LED neon signs, retain the tubing color, backboard outline, hole positions, cable exit, dimmer type, power-supply rating, and sign-section layout. Warm white LEDs from different batches may vary, so the approved color-temperature range should be recorded.
For multi-country campaigns, the same sign design may need different plug and voltage packages. Create separate electrical versions under one artwork reference, such as US, UK, EU, and AU. Such organization reduces the chance of sending the wrong adapter to a location.
A first-location sample is useful before a larger rollout. The sample can confirm appearance, setup time, packing size, outlet position, staff handling, and visibility inside the real store. Any changes can be added to the master record before additional units are produced.
Reorder records should also include changes made after the first event. For example, staff may report that the cable needs to be one meter longer, the feet need a wider base, or the packing case needs wheels. Updating the production record prevents the same issue from appearing in later units.
Before placing the order, send the manufacturer a complete project package containing the logo file, target size, store or booth photo, display location, destination country, opening date, quantity, mounting restrictions, power availability, expected operating hours, and number of planned events.
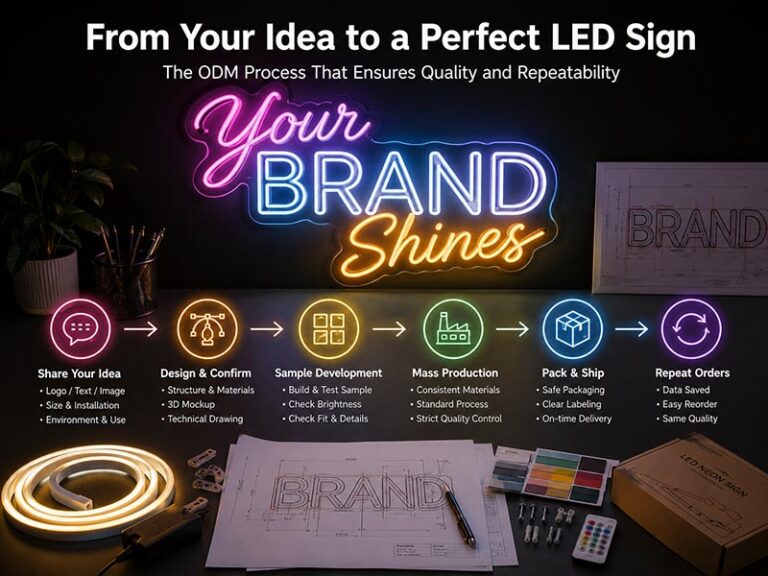
For portable custom signs, iduoduo can review artwork, dimensions, lighting, power, installation accessories, testing, packaging, and shipment preparation before production. LED neon signs usually require approximately 3–5 production days, while other illuminated and non-illuminated signs usually require approximately 7–10 days after the artwork, materials, structure, installation details, and payment are confirmed. Shipping time should be added separately when planning the event opening date.
Ready to Plan a Portable LED Sign for Your Pop-Up Store?
A useful quotation starts with the real operating conditions. Send iduoduo your logo or artwork, intended sign size, store or booth photo, display position, destination country, opening date, quantity, available power, and mounting restrictions. Details such as viewing distance, daily operating hours, transport method, and expected reuse frequency also help determine whether LED neon, a slim light box, a countertop sign, or another portable format is more suitable.
The iduoduo team can review the artwork, structure, lighting, power supply, removable stand, mounting accessories, and packaging before production. Where a design contains narrow strokes, difficult mounting points, or an oversized shipping package, practical adjustments can be discussed before materials are cut.
Project files and specifications can be sent to sales@led3dsigns.com. A clear brief makes it easier to confirm the production drawing, price, lead time, testing plan, packed size, and shipment schedule without relying on assumptions.