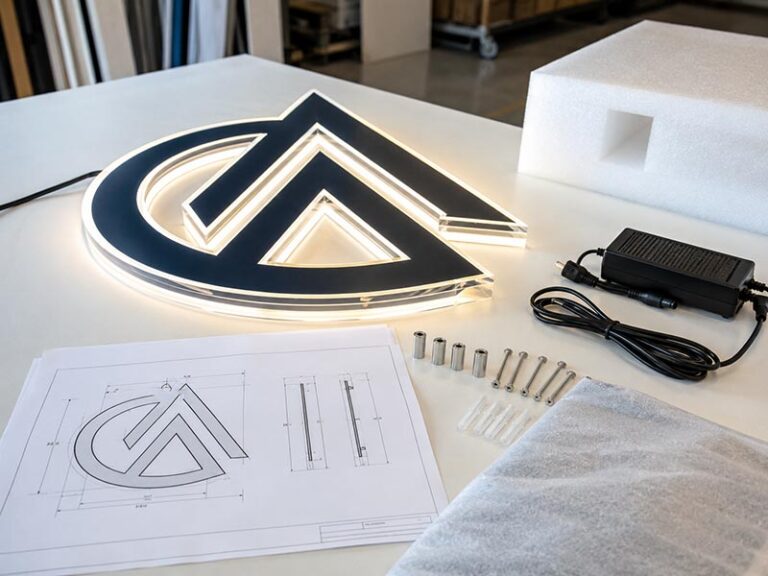

Raceway-mounted channel letters are often chosen because they can make a complicated illuminated storefront sign easier to organize at the job site. Multiple letters are already positioned on one metal enclosure, electrical components can be concentrated in a more accessible area, and the building may require fewer penetrations than an individually mounted letter system. That convenience, however, does not turn installation into a simple “drill and bolt” job. The raceway still has to align with the storefront, connect to reliable structure, match the planned electrical feed, remain serviceable, and resist outdoor moisture where applicable.
Raceway-mounted channel letters are installed by confirming the wall, sign dimensions, structural fixing points, and power location first; transferring the approved mounting layout to the facade; preparing mounting and electrical penetrations; anchoring and leveling the raceway; completing the correct electrical connection; sealing outdoor penetrations; and testing every illuminated component. Final anchoring, building-side wiring, permits, and structural approval must follow local requirements.
A well-made sign can arrive at the site in excellent condition and still become an expensive installation problem if the real wall differs from the original survey. A power feed may be 150 mm away from the drawing, a decorative panel may hide an empty cavity, or a seemingly straight storefront line may be visibly out of level. Experienced installers therefore spend significant time checking conditions before the first permanent hole is drilled. That preparation is what turns a factory-finished sign into a clean, reliable storefront installation.
What Are Raceway-Mounted Channel Letters?

Raceway-mounted channel letters are individual illuminated letters or logo elements attached to a shared metal enclosure. The raceway acts as a common mounting structure and can organize wiring, power supplies, mounting points, and service access. Compared with fixing and wiring every letter independently, this arrangement can reduce facade penetrations, centralize electrical components, simplify field positioning, and make future maintenance more manageable.
Raceway Components
A raceway is not simply a decorative metal bar placed behind a set of letters. It forms part of the sign’s structural, electrical, and maintenance system. Depending on the project, the complete assembly may contain the metal enclosure, channel letters, low-voltage wiring, power supplies, mounting holes, removable access covers, wire exits, grounding provisions, drainage openings, fasteners, and identification labels used during installation and future service.
The individual letters normally contain LED modules and internal low-voltage wiring. Those leads can be routed into the raceway and grouped according to the electrical design. Keeping these connections in one controlled enclosure can reduce loose field wiring and gives technicians a defined area to inspect when a power supply or circuit later needs attention. A well-planned enclosure should provide enough space for wiring bends, connectors, labels, service tools, and proper ventilation around electrical components.
Maintenance access matters from the beginning. If a raceway cover cannot be removed after the sign is installed, a simple power-supply replacement can become a much larger job. Drainage openings must also remain open, and wiring should not be packed against access panels or routed across fasteners that will need to be removed. A good raceway is therefore judged not only by how it looks on installation day, but by how easily it can be inspected several years later.
Raceway and Flush Mounting
The practical difference between raceway mounting and flush or individual mounting is where most of the field work occurs. With individually mounted letters, installers may have to locate, drill, wire, level, and seal multiple independent units. With a raceway system, much of the relationship between the letters has already been established during production, so the field team mainly positions and secures the shared enclosure and completes the planned electrical interface.
That does not mean raceway mounting is always the better visual choice. An individually mounted system can produce a cleaner architectural appearance because there is no visible enclosure behind the letters. It can work especially well when the building provides easy rear access, concealed electrical routing, and a suitable structural surface. Raceway mounting becomes more attractive when the installer needs centralized wiring, easier service access, fewer facade penetrations, or a practical solution for a leased storefront where future removal may also matter.
The raceway itself should be treated as part of the design. Matching its finish to the wall can reduce its visual presence during the day, while a contrasting enclosure may become an unintended design element. Mounting style should therefore be confirmed during engineering rather than selected after the sign has already been fabricated.
Project Fit
Raceway systems are commonly suited to retail storefronts, restaurants, commercial buildings, shopping-center units, leased premises, and projects where electrical service needs to remain accessible from the exterior. The installation method can also be helpful where property managers want to limit unnecessary penetrations in completed facade materials. iduoduo’s technical documentation specifically identifies reduced wall penetrations, centralized power and wiring, easier installation, and storefront use as key characteristics of raceway mounting.
Before selecting this system, confirm that the wall can support the combined weight of the raceway and letters, that the planned electrical feed can reach the intended entry point, and that the enclosure will be visually acceptable on the finished facade. These questions sound simple, but they affect manufacturing dimensions, hole positions, power-supply location, packaging, installation time, and long-term serviceability.
A raceway can also make future tenant changes easier. Instead of dealing with numerous individual mounting and wiring locations, the service team may be able to remove one organized assembly. The exact benefit depends on the original installation, but it illustrates an important principle: mounting decisions should consider the complete life of the sign, not only the fastest method of getting it onto the wall.
What Should You Check Before Installation?
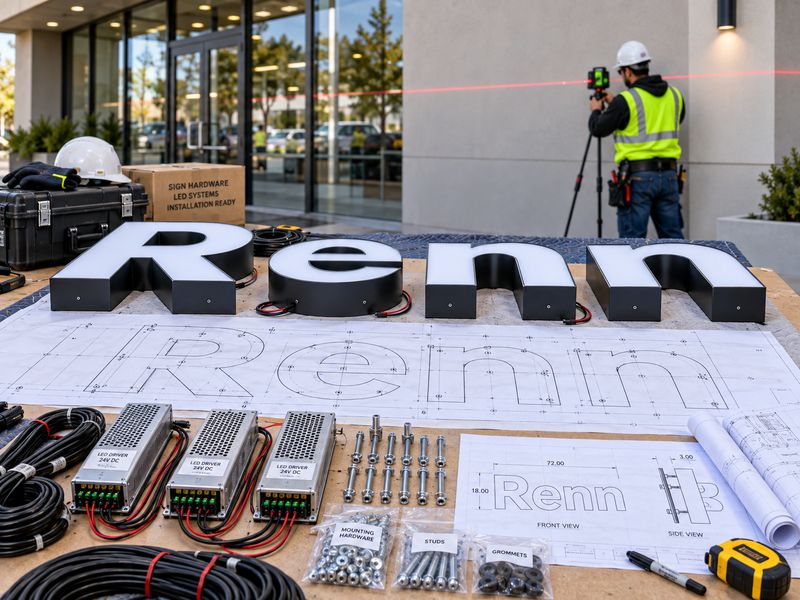
Before installation, verify the approved sign size, raceway dimensions, weight, mounting height, centerline, facade construction, structural backing, electrical feed, wire exit, access conditions, and required approvals. Compare the physical sign with the latest drawing and the real storefront before drilling. Most expensive installation errors occur when the team assumes that the wall, electrical feed, or site dimensions still match an earlier plan.
Site Measurements
A final site check should happen even when the project already has detailed shop drawings. Commercial construction changes frequently between initial survey and sign installation. A cladding system may become thicker, a door may move slightly, a landlord may add another facade element, or the electrician may leave the power feed in a different location. A small dimensional change can become highly visible once a long raceway is positioned over a storefront entrance.
Start with the overall raceway width and height and compare them with the approved installation area. Confirm the intended sign centerline, the vertical installation height, clearances from doors and windows, and the relationship between the sign and major architectural elements. A laser level is usually more reliable than following a masonry joint, canopy edge, door frame, or ceiling line because those features can be visibly out of level over a long distance.
Electrical location should be checked during the same survey. Confirm that the building feed actually reaches the planned raceway entry and that the routing does not require an unexpected exposed cable or additional penetration. Access equipment also needs consideration. A sign can be perfectly engineered but still create a delay if a lift cannot reach the facade because of awnings, landscaping, traffic restrictions, street furniture, or limited working space.
| Installation Check | What to Verify | Main Risk if Missed |
| Sign dimensions | Overall width, height, raceway depth | Incorrect fit |
| Position | Centerline and mounting height | Poor visual alignment |
| Wall | Surface material and structural backing | Anchor failure |
| Power | Actual feed location and input voltage | Rework or electrical mismatch |
| Wire exit | Raceway and wall connection point | Visible or extended wiring |
| Access | Lift, scaffold, working area | Installation delay |
| Drawing | Latest approved revision | Incorrect hole layout |
| Approval | Property and local requirements | Work stoppage |
Wall Conditions
The visible facade is not necessarily the material that should carry the sign. A thin metal panel may hide a cavity and structural rail system. EIFS contains finish and insulation layers that should not be treated like solid concrete. Stone may be mechanically fixed to another structure, while an interior decorative panel may cover lightweight framing. Understanding what lies behind the finish is often more important than identifying the finish itself.
Brick requires similar care because solid brick, hollow brick, older masonry, decorative veneer, and mortar joints can provide very different fixing conditions. Heavy signs should not simply be attached to loose mortar or weak edges. Stone installations need attention to drilling method, panel thickness, edge distance, hidden support, and cracking risk. Lightweight walls may require timber backing, metal studs, reinforcement plates, or another reliable structural connection.
Site photographs can help a manufacturer plan mounting interfaces, but photographs cannot prove hidden structural conditions. Where the substrate is uncertain, the local installation or structural team should investigate before final anchor selection. This is especially important for high-mounted outdoor signs because the visible finish may appear substantial while providing little meaningful resistance to the actual sign load.
Templates and Drilling
A full-size template or accurately dimensioned mounting layout can greatly reduce installation errors. It should identify the raceway position, centerline, mounting holes, wire exit, sign orientation, and correct project version. For repeated store programs, templates also help local teams maintain consistent positioning across locations even when different installers are involved.
Before using a paper template, confirm its scale. Printing software can automatically resize large documents, folded paper can shift hole locations, and moisture can distort long templates. An older revision can create even more serious errors if mounting holes or raceway dimensions changed after approval. For that reason, the template, current drawing, physical raceway, and product identification should be checked together before permanent marks are transferred to the wall.
Drilling should begin only after the team has checked the area behind each planned penetration. Electrical cables, plumbing, framing, waterproofing layers, facade joints, existing conduits, and structural rails may all affect the final hole location. The installation documentation specifically calls for checking these hidden conditions before drilling.
A five-minute review before drilling is far less expensive than patching a completed facade, relocating an electrical hole, modifying a bracket on a lift, or discovering that a mounting point has landed in an empty cavity after the raceway is already in position.
Which Wall and Anchoring Method Should You Use?

The correct anchoring method depends on the actual wall structure, total raceway weight, mounting height, environmental exposure, and reliable substrate behind the visible surface. There is no single anchor that works for every channel-letter installation. Concrete, brick, timber, lightweight walls, EIFS, stone, and metal facades behave differently, so final anchor selection should be confirmed by qualified local installation or structural professionals.
Wall-Specific Anchoring
Good anchoring creates a continuous load path from the raceway into dependable building structure. A sign may feel solid when first installed even if its fasteners are only gripping a decorative outer layer, but that condition can deteriorate under repeated wind, vibration, moisture, thermal movement, or long-term loading. The fixing method therefore has to match what actually exists behind the surface.
Concrete may accept appropriately selected mechanical or chemical anchors once the substrate condition and required embedment are confirmed. Masonry needs more judgment because brick condition and internal structure vary widely. Timber construction can provide good support when installers connect to suitable structural members rather than thin finish panels. Lightweight walls frequently need blocking, backing plates, studs, or other reinforcement rather than relying on the surface sheet alone.
EIFS deserves special attention because the finish coat and insulation are not intended to act as the main support for a heavy raceway. A suitable connection may need to pass through the exterior layers to reliable structure while controlling compression and maintaining the weather barrier. Metal cladding creates a similar challenge because a thin panel can look strong while contributing very little structural capacity.
| Wall Type | Key Installation Concern | What Must Be Confirmed |
| Concrete | Embedment and substrate quality | Structural depth and anchor type |
| Brick | Solid, hollow, aged, or veneer construction | Reliable masonry location |
| Timber | Finish panel versus structural framing | Structural timber position |
| Lightweight wall | Limited surface strength | Backing or reinforcement |
| EIFS | Compressible insulation | Structural attachment behind system |
| Stone | Cracking and edge distance | Panel thickness and backing |
| Metal facade | Thin outer skin | Frame, cavity, and waterproof layer |
Structural Load
A raceway installation should be understood as a structural load path rather than a simple question of bolt quantity. The letters transfer their weight to the raceway. The raceway transfers that weight and other loads through the mounting points. The anchors then transfer those forces into the building structure. If any part of that chain is weak, adding more random fasteners does not necessarily solve the problem.
Outdoor signs also experience environmental loads. Wind can create forces that are much greater than the static weight suggests, especially when the sign is large, elevated, projected from the structural surface, or installed in an exposed location. Temporary forces during lifting and positioning can also be important because the raceway may not be fully supported until several mounting points have been secured.
Large projects may require product dimensions, total weight, mounting-hole positions, materials, brackets, and manufacturing drawings to be reviewed by the local structural team. iduoduo can provide product-side information such as dimensions, weight, brackets, installation plates, mounting holes, and manufacturing drawings, while final wind-load calculations, foundations, anchors, and structural sign-off remain local responsibilities.
Using thicker metal or more bolts without understanding the substrate can increase cost and weight without improving safety. Correct engineering is about transferring known loads into suitable structure through a defined connection.
Waterproof Penetrations
Every exterior penetration should be treated as part of the building envelope. Mounting holes, electrical penetrations, raceway fixings, brackets, and fasteners passing through waterproof layers can become potential water-entry points if they are not detailed correctly. Reducing the number of penetrations does not remove the need to protect the remaining ones.
Sealant selection depends on the facade material, metal surface, cable jacket, expected temperature range, movement, and local environment. The goal is not simply to add a large amount of sealant around everything. Some openings are intentional drainage points, and some service covers need to remain removable. Over-sealing can trap water, block drainage, or make future electrical service unnecessarily difficult.
The installation documentation notes that outdoor stud holes, electrical holes, raceway holes, backboard holes, bracket holes, and curtain-wall penetrations all require waterproofing consideration.
A good field practice is to inspect and photograph penetrations before access equipment is removed. Those photographs create a useful reference if a moisture problem later appears. They can help distinguish a building-envelope issue, blocked drainage, damaged seal, later renovation work, or another source of water intrusion.
How Do You Install the Raceway and Letters?

Install the raceway by transferring the approved layout to the facade, confirming the centerline and level, marking mounting and electrical penetrations, drilling only after wall conditions are checked, lifting the assembly by the structural raceway, routing the planned wiring, positioning the enclosure, and securing it to approved fixing points. Finish by checking alignment, access covers, drainage, letter position, and structural stability before electrical commissioning.
Positioning and Layout
Begin with the approved sign centerline and mounting elevation. Do not assume that the best-looking position is the geometric center between two architectural features. The actual approved location may have been chosen to account for storefront visibility, door positions, facade joints, landlord rules, neighboring signs, or brand standards that are not obvious from the wall itself.
Use the installation template or mounting drawing to establish the raceway boundaries, mounting holes, and electrical entry. Before drilling, measure the complete sign against the real storefront one more time. For chain-store projects, confirm the store number and drawing revision because two signs may look almost identical while having different widths, mounting positions, or electrical exits.
The template should also be checked against the physical raceway. If the planned hole positions do not match the actual product, stop before drilling. This verification is especially important when projects have gone through several design revisions or when multiple raceways are delivered together.
After the holes are marked, check for conflicts with facade joints, hidden structural members, electrical services, plumbing, or waterproof layers. Once permanent drilling begins, changing the mounting plan becomes more expensive and can leave visible repairs on an otherwise finished storefront.
Lifting and Fixing
The raceway should be handled through its structural enclosure or designated lifting points rather than by grabbing individual letters. Channel letters are engineered to remain attached during use, but that does not mean each letter is designed to act as a lifting handle for the entire assembly. Incorrect handling can distort returns, damage faces, loosen fasteners, or place unnecessary stress on letter-to-raceway connections.
The lifting method depends on overall raceway length, total weight, installation height, and site access. A compact unit may be manageable by an appropriately sized crew, while larger assemblies can require a lift or other mechanical access equipment. The installation plan should take that into account before the product arrives at the job site.
Once the raceway reaches the mounting position, route the electrical feed through the planned opening before fully tightening the structural fasteners. Install enough initial fixings to hold the assembly safely, then recheck horizontal level, visual position, and any required clearances. The enclosure should not be twisted against an uneven facade by excessive tightening because this can distort the cover, change letter alignment, and create service problems.
A practical installation sequence is:
- Confirm the correct raceway, drawing, and template.
- Establish the approved centerline and elevation.
- Mark mounting and electrical penetrations.
- Drill and prepare the approved fixing locations.
- Route the planned electrical feed.
- Lift the raceway using appropriate handling points.
- Install initial structural fasteners.
- Recheck horizontal level and sign position.
- Secure the remaining approved fixing points.
- Check the letters, access cover, drainage, and facade finish.
Service Access
One of the strongest practical reasons to use a raceway is centralized service access, but that advantage exists only if the enclosure remains serviceable after installation. Before finishing the job, open and close the raceway cover and verify that a canopy, trim piece, cladding joint, soffit, or other architectural feature does not prevent future removal.
Power supplies should remain reachable for inspection and replacement. Wiring connections should not be buried permanently behind a surface that must be destroyed to gain access. Cables should have enough organization and identification that a technician can understand the system without tracing every wire from the beginning.
Drainage and fasteners also need consideration. A technician may need to inspect drainage openings, retighten accessible hardware, test a power supply, or replace a damaged connector years after installation. The source documentation specifically requires maintaining access to raceway covers, wiring, drainage, power supplies, controllers, removable panels, and fastening points.
This is an important shift in thinking. The question is not only whether the sign can be installed today. A professional project also asks whether a service technician can work on it three years later without dismantling half of the storefront.
How Do You Wire, Waterproof, and Test the Sign?

After the raceway is mechanically secure, verify the building supply, power-supply input, LED output voltage, polarity, circuit grouping, grounding requirements, cable condition, outdoor connectors, drainage, and facade sealing before energizing the sign. Building-side AC wiring and final electrical approval should follow local rules. Once powered, every letter should be checked for stable illumination, correct color, flicker, abnormal heat, and service accessibility.
Power and Wiring
Illuminated channel letters usually involve two electrical sides: the building’s AC supply and the lower-voltage system that powers the LEDs. Those two sides need to be clearly understood because problems often occur when installers assume a voltage instead of checking the actual power-supply label and site conditions.
North American projects commonly use building supplies around 110 to 120V AC, while many projects in Europe, the United Kingdom, Australia, the Middle East, and other markets commonly use approximately 220 to 240V AC. These are common market ranges rather than a substitute for site verification. The actual building supply and the specific power-supply input range should always be confirmed before connection.
LED sign systems commonly use 12V or 24V DC on the low-voltage side, but the exact voltage depends on the LED modules and power system selected for the project. Polarity, circuit grouping, cable length, and conductor size all matter. Long low-voltage runs can experience voltage drop, while reversed polarity can prevent a section of the sign from operating correctly.
| Electrical Item | Common Project Values | Installation Check |
| Building input | About 110-120V or 220-240V AC | Verify actual site supply |
| LED output | Commonly 12V or 24V DC | Match the installed LED system |
| Polarity | Positive and negative DC | Confirm before energizing |
| Power supplies | One or multiple units | Follow circuit labels |
| Grounding | Project dependent | Follow product and local requirements |
| Factory lighting check | 100% of illuminated products | Retest after installation |
| Factory stability test | 72 hours before shipment | Site commissioning still required |
Final building AC input, breakers, grounding, wall wiring, junction boxes, high-voltage connections, and local electrical acceptance belong to the qualified local electrical team where required. The manufacturer can prepare the product’s low-voltage system, power matching, wire exits, polarity, internal wiring, labels, and agreed electrical information.
Waterproofing and Drainage
Outdoor sign protection depends on the complete installed system rather than a single waterproof component. Cable entries, electrical connectors, raceway seams, service covers, mounting holes, wall penetrations, drainage openings, and the surrounding facade all influence how water behaves during rain and long-term exposure.
Check every outdoor connector before closing the raceway. Connections should be secure, insulated appropriately, protected from standing water, and arranged so cable tension is not transferred directly to the connector. Where suitable, cable routing can include a downward drip path before entering an enclosure or wall penetration to reduce the chance of water travelling along the cable.
Drainage openings should remain open and oriented correctly. They should not be sealed shut simply because an installer sees a hole in the enclosure. The installation guidance specifically warns against blocking drainage openings, positioning them against the wall, allowing them to face upward, filling them with sealant, or letting wiring obstruct the drainage path.
The building penetration itself deserves equal attention. A well-sealed raceway cannot prevent water from entering the wall if the electrical or mounting penetration has been poorly treated. Final inspection should therefore look at both the product and the facade as one connected weather-management system.
Commissioning
Commissioning is more than turning the sign on for a few seconds and confirming that light appears. The complete installed system should be observed for correct operation, visual consistency, electrical stability, and physical condition. Every intended illuminated area should work, and the sign should remain stable long enough for obvious intermittent issues to appear.
Look for flickering, dead sections, incorrect color, unexpected color-temperature differences, dim letters, control problems, exposed wiring, unusual heat, or signs of a poor connection. If the raceway contains multiple power supplies, verify that circuit labels correspond with the correct letter groups and that service access remains clear.
The sign should also be inspected from the normal customer viewing area. A raceway can be technically level but still look wrong if the storefront reference used during positioning was not the approved one. Daytime inspection helps reveal scratches, sealant marks, exposed fasteners, uneven surfaces, and facade damage that may be less visible after dark.
A final completion check should confirm:
- All intended illuminated sections operate.
- No obvious flicker or unstable lighting is present.
- Color and color temperature match the approved configuration.
- Raceway position and letter baseline are correct.
- Structural fasteners remain secure.
- Outdoor penetrations have been treated.
- Drainage remains open.
- Access covers close correctly.
- Wiring remains organized and protected.
- Completion photographs are saved.
At the factory level, iduoduo performs a 100% lighting check and a 72-hour pre-shipment stability test on illuminated products. That process can reduce early product-side failures, but transportation and installation introduce new variables, so final on-site commissioning remains essential.
What Permits, Documentation, and Support Are Required?

Raceway-mounted channel-letter projects may require sign permits, electrical approvals, building review, landlord or shopping-center authorization, structural documentation, high-access permits, or final inspection depending on the location. A manufacturer can provide product drawings, dimensions, mounting information, templates, weight, electrical specifications, and technical support, while local professionals remain responsible for final site conditions, anchoring, building wiring, permits, and acceptance.
Permits and Responsibility
There is no universal permit process that applies to every illuminated storefront sign. Requirements can change between countries, states, cities, shopping centers, landlords, historic districts, and individual commercial properties. Two stores using almost identical channel letters may therefore need very different documentation and approval steps.
A municipality may review the sign’s size and position. An electrical authority may require particular components or inspection. A landlord may limit facade penetrations or specify the color of a raceway. A shopping center may restrict working hours, lift access, or installation methods. Larger projects may require structural review, insurance documents, or additional high-level work authorization.
Potential project requirements can include Sign Permit, Electrical Permit, Building Permit, Landlord Approval, Mall Approval, Historic District Approval, construction insurance, high-access authorization, and final local inspection. The source documentation places these local approvals and final acceptance with the local project team.
These requirements should be investigated before manufacturing drawings are finalized. A late permit comment that changes sign dimensions, mounting location, raceway depth, or electrical access can affect production, packaging, and installation. Resolving approval conditions during engineering is usually much easier than changing a completed sign after it has already shipped.
Installation Documentation
A professional installer should not have to reverse-engineer the sign after opening the crate. Clear manufacturing and installation information helps the field team understand how the raceway was intended to connect to the building and reduces unnecessary troubleshooting during installation.
Useful documents can include the approved shop drawing, mounting layout, overall sign dimensions, raceway dimensions, product weight, mounting-hole locations, full-size template, wire-exit location, power-supply information, electrical labels, circuit identification, accessory lists, product numbers, and basic wiring information. For more complex assemblies, photographs taken before packing can also help installers understand component orientation.
Documentation becomes even more valuable in multi-location programs. Several stores may use the same logo while requiring different total widths, mounting heights, power configurations, and facade interfaces. Product labels, templates, power supplies, accessories, and drawings should therefore remain traceable to the correct store or project number.
iduoduo prepares installation interfaces through shop drawings, mounting layouts, templates, mounting holes, raceways, wire exits, power supplies, accessory identification, and remote technical support, while local installers and other qualified professionals remain responsible for final site measurement, structure, anchoring, high-level work, high-voltage connection, permits, and acceptance.
Good documentation does not replace professional installation skill. It allows skilled installers to focus on real site conditions rather than spending time guessing how the product was designed.
Project Coordination
The strongest installation process starts before production. The local team should provide reliable information about the facade, wall construction, available sign area, proposed mounting height, power feed, installation restrictions, destination electrical requirements, access equipment, and any landlord or permit conditions that could influence the product.
The manufacturer can then coordinate the raceway dimensions, mounting interface, hole positions, wire exit, power configuration, service access, packaging, and supporting documentation around those conditions. This early coordination is particularly useful when the sign must be shipped internationally because modifying the product in the factory is usually easier than improvising structural or electrical changes on a lift at the job site.
At installation, the local team confirms what cannot be verified remotely: actual wall construction, hidden backing, final anchor selection, access safety, building waterproofing, electrical supply, and any changes made during construction. That division of responsibility is practical rather than bureaucratic. Even the best engineering drawing cannot detect a concealed pipe added after the original survey or determine the condition of old masonry from a photograph.
After completion, retain daytime photographs, nighttime illumination photographs, power-supply labels, wiring details, waterproofing records, and notes about any field modifications. Those records can make future service much faster and also provide a useful reference when the same sign system is installed at another location.
A raceway-mounted channel-letter installation succeeds when manufacturing and field installation meet at a clear, well-planned interface. The raceway may simplify mounting and wiring, but the finished result still depends on accurate site measurements, reliable structure, correct anchors, appropriate electrical work, careful waterproofing, service access, and thorough commissioning. When those elements are considered before production rather than solved one by one at the wall, installation becomes more predictable and the finished storefront looks cleaner. For custom projects, iduoduo can coordinate the manufacturing-side details that installers need, including mounting layouts, raceways, wire exits, electrical preparation, templates, and project-specific installation interfaces, while the local team completes the final site and regulatory work.
Frequently Asked Questions
How long does it take to install raceway-mounted channel letters?
Installation time depends on the sign size, mounting height, wall construction, access equipment, electrical preparation, and whether the site is ready when the crew arrives. A compact storefront raceway with prepared power and straightforward structural fixing can often be installed much faster than a comparable set of individually mounted letters. Larger signs, difficult facades, high-level access, permit requirements, or unexpected structural conditions can extend the work considerably, so installation time should be planned around actual site conditions rather than a fixed universal number.
Are raceway-mounted channel letters easier to install than flush-mounted letters?
They can be easier because multiple letters are already organized on one common enclosure, allowing the installer to position one main assembly instead of aligning and wiring every letter independently. Raceway systems can also centralize power supplies and reduce the number of wall penetrations. However, the raceway itself may be heavier and still requires suitable structural support. The easier option therefore depends on wall access, sign size, electrical routing, landlord requirements, and the visual standard of the building.
What type of wall can support a channel-letter raceway?
Raceways can be installed on many wall types, including concrete, masonry, timber structures, metal facades, and appropriately engineered layered wall systems, but the correct anchor and support method changes with each substrate. The visible surface alone should not be assumed to carry the load. EIFS, thin metal cladding, lightweight walls, veneers, and some stone systems may require fastening through the surface to reliable backing or structural framing. Final anchoring should be confirmed by qualified local professionals.
Do raceway-mounted channel letters need a dedicated electrical connection?
Most illuminated commercial channel-letter systems need a suitable building power source that matches the specified power supplies. The raceway can centralize low-voltage connections and may contain one or more power supplies depending on the sign design. The building-side AC connection, circuit protection, grounding, and final electrical approval should follow local requirements. Before installation, confirm the actual input voltage, power location, wire route, and whether the project requires hardwiring by a qualified electrician.
Are raceway-mounted channel letters waterproof?
Outdoor raceway systems can be designed for exterior use, but the finished installation depends on more than the enclosure itself. Mounting holes, wire penetrations, electrical connectors, service covers, drainage openings, sealants, and the building facade all influence weather resistance. Drainage must remain functional, and outdoor penetrations should be properly treated during installation. It is more accurate to evaluate the entire product and installation system than to assume that a single waterproof rating automatically covers every site condition.
Do I need a permit to install raceway-mounted channel letters?
Many commercial sign projects require some form of local approval, but the exact requirement depends on the jurisdiction and property. Sign permits, electrical permits, building approval, landlord approval, shopping-center approval, historic-district review, or final inspection may apply. Requirements should be checked before production drawings are finalized because approval conditions can affect sign size, mounting location, electrical design, and installation method. Local installers, contractors, property managers, and permit professionals are usually best positioned to confirm these site-specific requirements.
What information should I send a manufacturer before ordering raceway-mounted channel letters?
Provide the logo or artwork, overall sign dimensions, letter height, installation location, indoor or outdoor use, facade photographs, wall type if known, desired lighting style, color requirements, destination market, available input voltage, power location, expected mounting method, and any landlord or permit restrictions. Better site information allows the manufacturer to coordinate the raceway, mounting holes, wire exits, electrical configuration, service access, packaging, and installation documentation before production, reducing the amount of work that must be improvised after the sign reaches the site.